Converting an iPad into a Document Camera

We’ve almost made it through our first week of learning remotely in Kindergarten! My hat is off to any of you who have been doing this since September! It’s been a big learning curve but thankfully, I have a wonderful community of colleagues online who have inspired me and given me confidence that I could make this work.

Today I thought I’d share a hack I figured out this week that has been a *lifesaver* for teaching live: turning my iPad into a document camera. I’ll do my best to lay out how I got this to work.

First off, these instructions are for you if you are using Google Meet for your live meeting, a PC computer, and an iPad. I could not find instructions online for this tech set up which is why I’m sharing mine here. I did find some instructions for doing this on Zoom, so I think my method will work for that meeting platform as well (maybe).

Start your meeting. I first log into my Google Meet on my PC. Then I log into the same Google Meet (with the same Google ID) on my iPad (so I am logged on twice in the meeting). It is very important to mute your microphone and turn off your video when you log in. You also have to make sure (this step is CRITICAL) that your volume controls on the side of the iPad are as low as they can go (off/muted) or else you might get feedback.

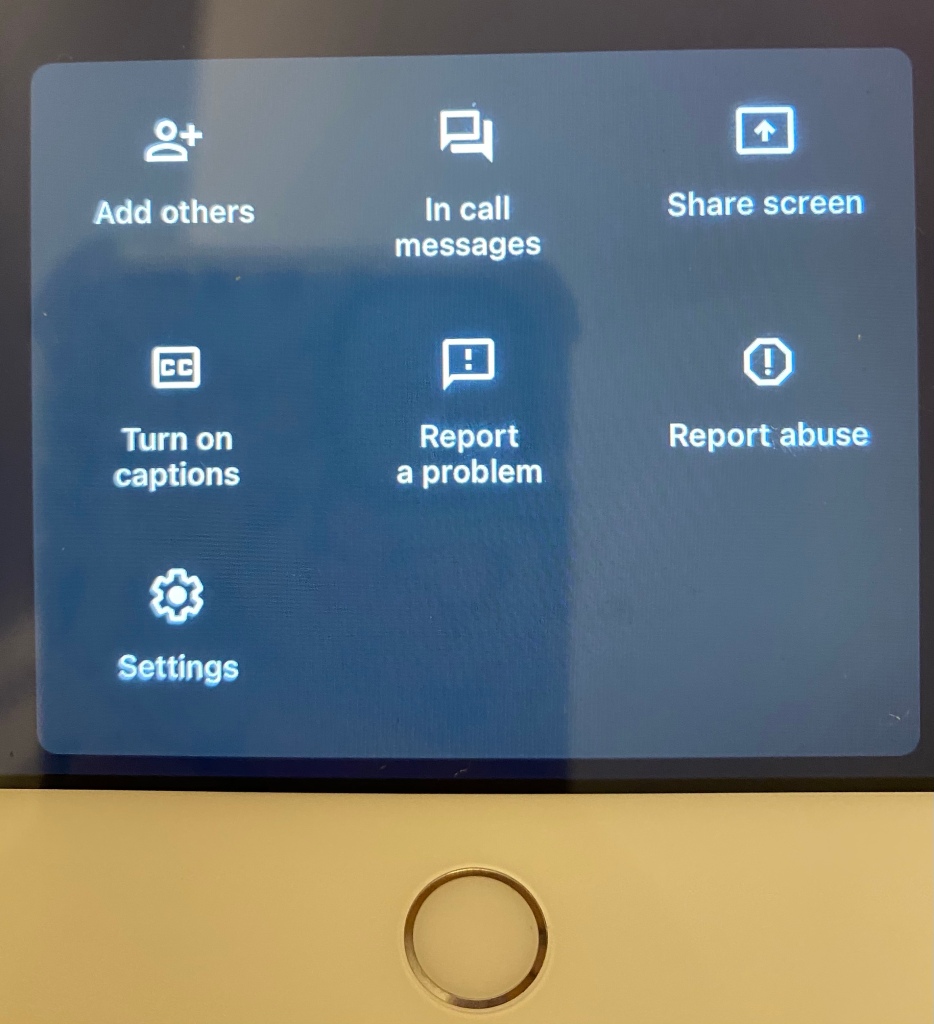
When I want to use my iPad as a document camera, I click on on the meeting controls on my iPad and choose “share screen” and “start broadcast” and then open my camera on the iPad. It will share what my camera sees with my students in the Meet.

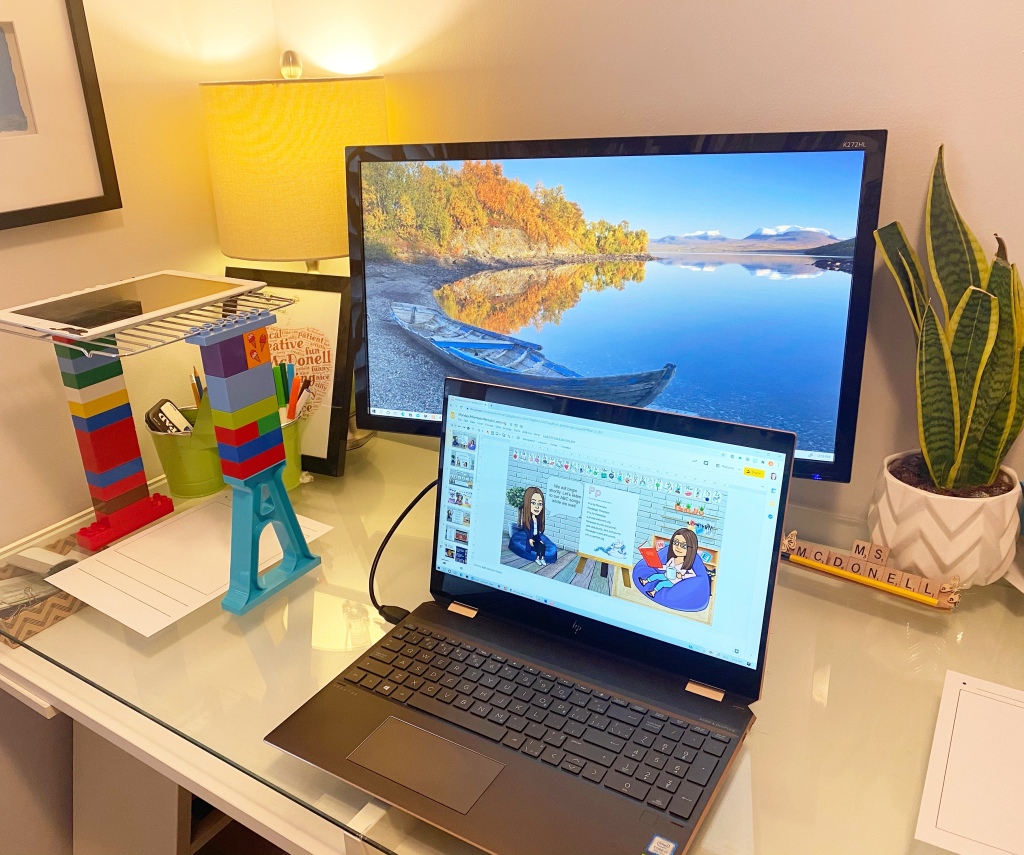
You will need a stand of some kind to put your iPad on. I built one out of Duplo and a cookie rack (yup, really. Desperate times!). The cookie rack is helpful because the camera lens fits between the bars and the bars also fit nicely on the round pegs of the Duplo, which keeps it from slipping. I taped my Duplo base to my desk for added stability. There are probably a million different ways to make a stand that will work just as well depending on what you have at home. This is the best I could come up with given the time (and I didn’t want to spend any money on it either!).

An engineering masterpiece!

This is how it looks when I’m about to model a lesson for Writer’s Workshop:

Ready for a mini lesson!
Ready to read!

*I should add that I had been encouraged to try using my Osmo and iPad as a doc cam, but that didn’t work for me. If you didn’t know this is possible, give it a go and see if it works for you. The Osmo was super easy to set up, but I had a long time delay when I presented it in my live meeting and it didn’t end up being what I needed. But maybe it will work better for you, and then you won’t need any Duplo or a cookie rack!

I hope my instructions were clear enough and that if you decide to try setting this up that it works for you! Wishing all of you the best as we carry forward with our remote learning journeys!

In the Studio: Self-Portraits

And just like that, another school year begins! I can’t believe we are already in week three of the new year. I tend not to work on too many “projects” so early in the year, preferring to give the children time to get comfortable in our space, explore, and make connections with classmates and staff. However, the one project I will dedicate time to is self portraits. I always find the children exhibit a high level of interest in drawing and painting at this time of the year and portrait work excites them. Additionally, portrait work requires slowing down, looking closely, and noticing details: all skills I want to emphasize and encourage in the first term. At the start of the year, we are also looking to develop a rapport and make connections with our students, so small group work like this often leads to relationship building.

“When we invite children to create self-portraits, we offer them mirrors and encourage long, sustained study of their faces from [an] unfamiliar perspective. Then we ask them to re-create themselves on paper, weaving together the image that they see in the mirror with the person they experience themselves to be. Their portraits are eloquent statements of self.”  (Ann Pelo, The Language of Art (2007))

If you are new to self-portraits, I highly recommend reading Ann Pelo’s book, The Language of Art, to get an idea of the process. Ann so clearly lays out this project from beginning to end, including how to set up the studio, what prompts to use, cleanup, and ways to build on the experience.

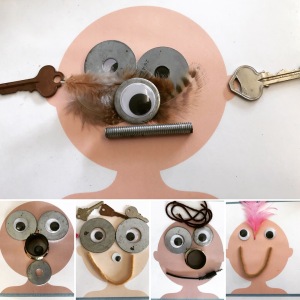
This year I decided to take a new approach to our self-portrait work. Rather than limit the children’s experiences to the Art Studio, we would take some time before drawing our portraits to look more closely at faces and facial features. We began by reading Faces by David Goodman. In this story, the author shows us how we can spot “faces” everywhere in our environment and how we can construct faces out of loose parts. After reading the story, we set up a simple provocation with loose parts and mats/cork boards:

These mats can be downloaded for free from Picklebums at https://picklebums.com/people-play-dough-mats/

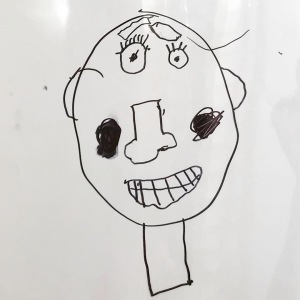
Our next step was to move beyond loose parts into a drawing/sketching phase. From what I had seen of the children’s drawings so far, I knew that most children were using simple mark making (dots, lines, etc.) in their pictures. We decided to take some time to look more closely at our facial features and break down how to draw them with increased attention to detail. Each week, we take time in our schedule for a focused art and drawing lesson (if you want to read more about Art and Fine Motor Instruction, click here: https://thecuriouskindergarten.blog/2014/01/16/art-and-fine-motor-instruction-snowflakes/). In our first lesson of the year, we decided to focus on faces. Now, I know that giving a large class of somewhat-new-to-school 3-5 year-olds whiteboards, erasers, and dry erase markers seems daunting in the first few weeks of school. In fact, I almost bailed on the lesson myself out of fear. In the end, I decided to have confidence that I could capably walk the children through the process of listening and following instructions, managing their materials, and successfully drawing themselves. And wow! Were we impressed! At the start of the lesson, each child gets a 9×12 whiteboard, a tissue or sponge (for erasing), and a whiteboard marker. I absolutely love using whiteboards for this kind of lesson because they are totally “risk-free” for the children. If they make a mistake or are unhappy with what they’ve drawn, they simply and easily erase it and try again. Even the most reluctant of artists are willing to give drawing a go on a whiteboard, in my experience.

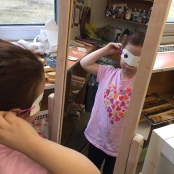
During the lesson, I modeled looking in a mirror, talking the children through what I noticed, one facial feature at a time. I had extra mirrors on hand for the children to look in too. The children felt extremely successful with their finished works and we photographed them to share with our parents at home. I really believe that walking them through this process together helped to increase their interest and confidence in drawing their portraits at the Art Studio.

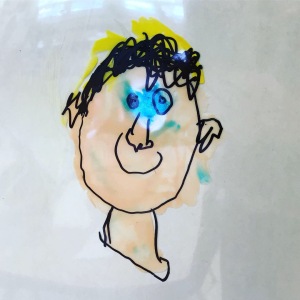
A few days later, we opened the studio for portrait work. This year, we decided to use sharpies on acetate (overhead paper) so that we could paint them afterwards and not lose any details of the children’s sketches. Once again, we had mirrors on hand for the children to look in.

This student was clearly very proud of his amazing dimples!

This student was so excited about his work, exclaiming, “My first nose! Ms McDonell, I did it! I drew a perfect nose!”

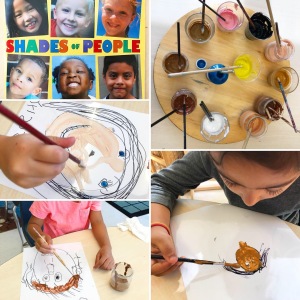
Honestly, the black and white portraits were beautiful enough, but we decided to carry on with the painting portion of the project. When everyone had completed their sketches, we read Shades of People by Shelley Rotner and Sheila M. Kelly. I absolutely love this book as it talks about all the wonderful colours of skin we see in the world. As a follow up, we set up a selection of “skin tone” coloured tempera paints (we used a collection created by Crayola) at the art studio. The trick with this technique is to flip the transparency over and paint on the back. When the paint is dry, you flip the transparency back over and all marker sketching that was covered by the paint is visible from the other side. It makes for a bit of a “surprise” when the children see all their work revealed to them in complete, detailed form. It is very important when painting on acetate to mix the tempera paint with a bit of white glue. Otherwise, when the paint dries, it will flake off the plastic sheeting.

And voila! Our first art project of the year is complete! I love how each portrait is unique and special and I can see the children’s personalities and characteristics so clearly represented in their work. This is the first time I have scaffolded the children’s portrait work in this way, and it just reminded me of how truly capable children are when given the tools and support they need. If you haven’t given portraits a try, I hope this post will inspire you to do so!


Playdough Provocations: Treasure Maps!

IMG_8683

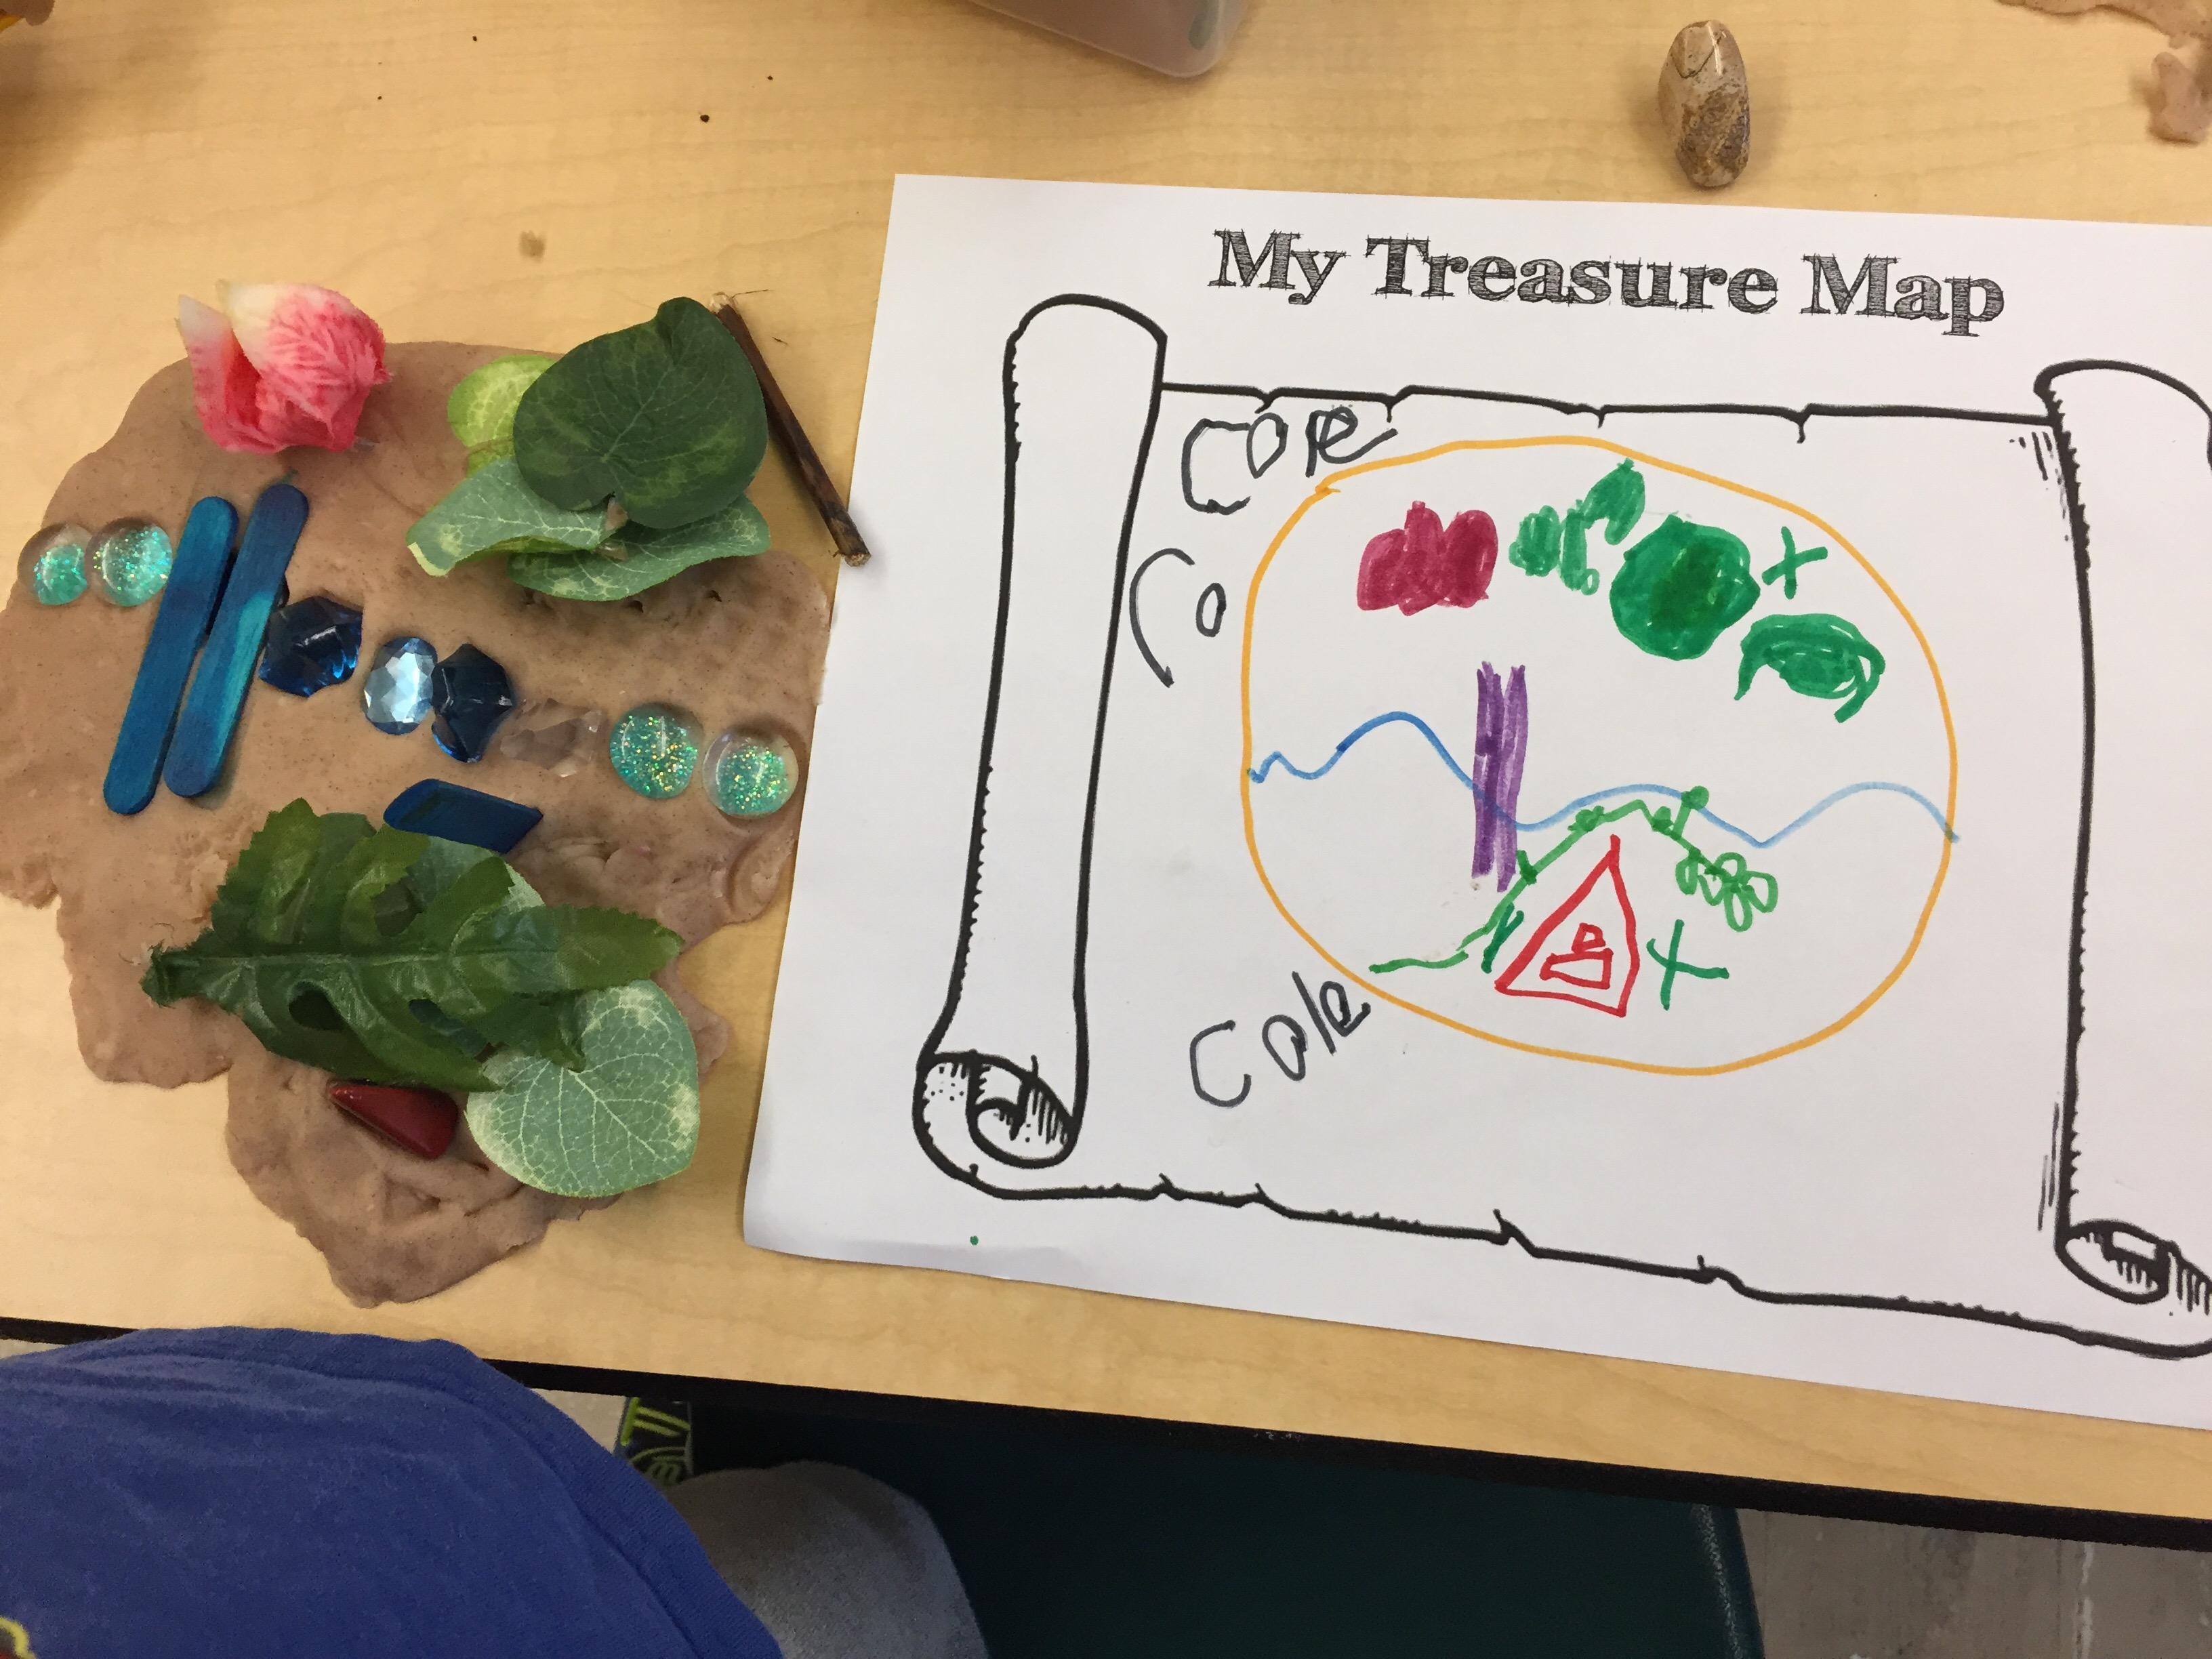
Treasure Maps!  The book in the background is My Map Book by Sara Fanelli.

This provocation combines three of my favourite things: play dough, loose parts, and maps! Children often have a natural interest in map making – and why not? Maps are often associated with fantasy and appear frequently in children’s books. They also appear in many electronic games, are used in many vehicles (I had a student lecture me on the benefits and uses of GPS recently), and can help children make sense of their environment. Map making is also an accessible way to engage beginning writers as they can include any combination of pictures, symbols, and words.

For this provocation we were aiming for “treasure maps” as these were the kind of maps appearing in the children’s play at the small building centre and sand table, but the materials were open ended enough that the children could really create whatever they wanted with them. It is important to me that although we have an idea of what we think the children might do with the materials we set out, there is always room for the children to use the materials creatively.

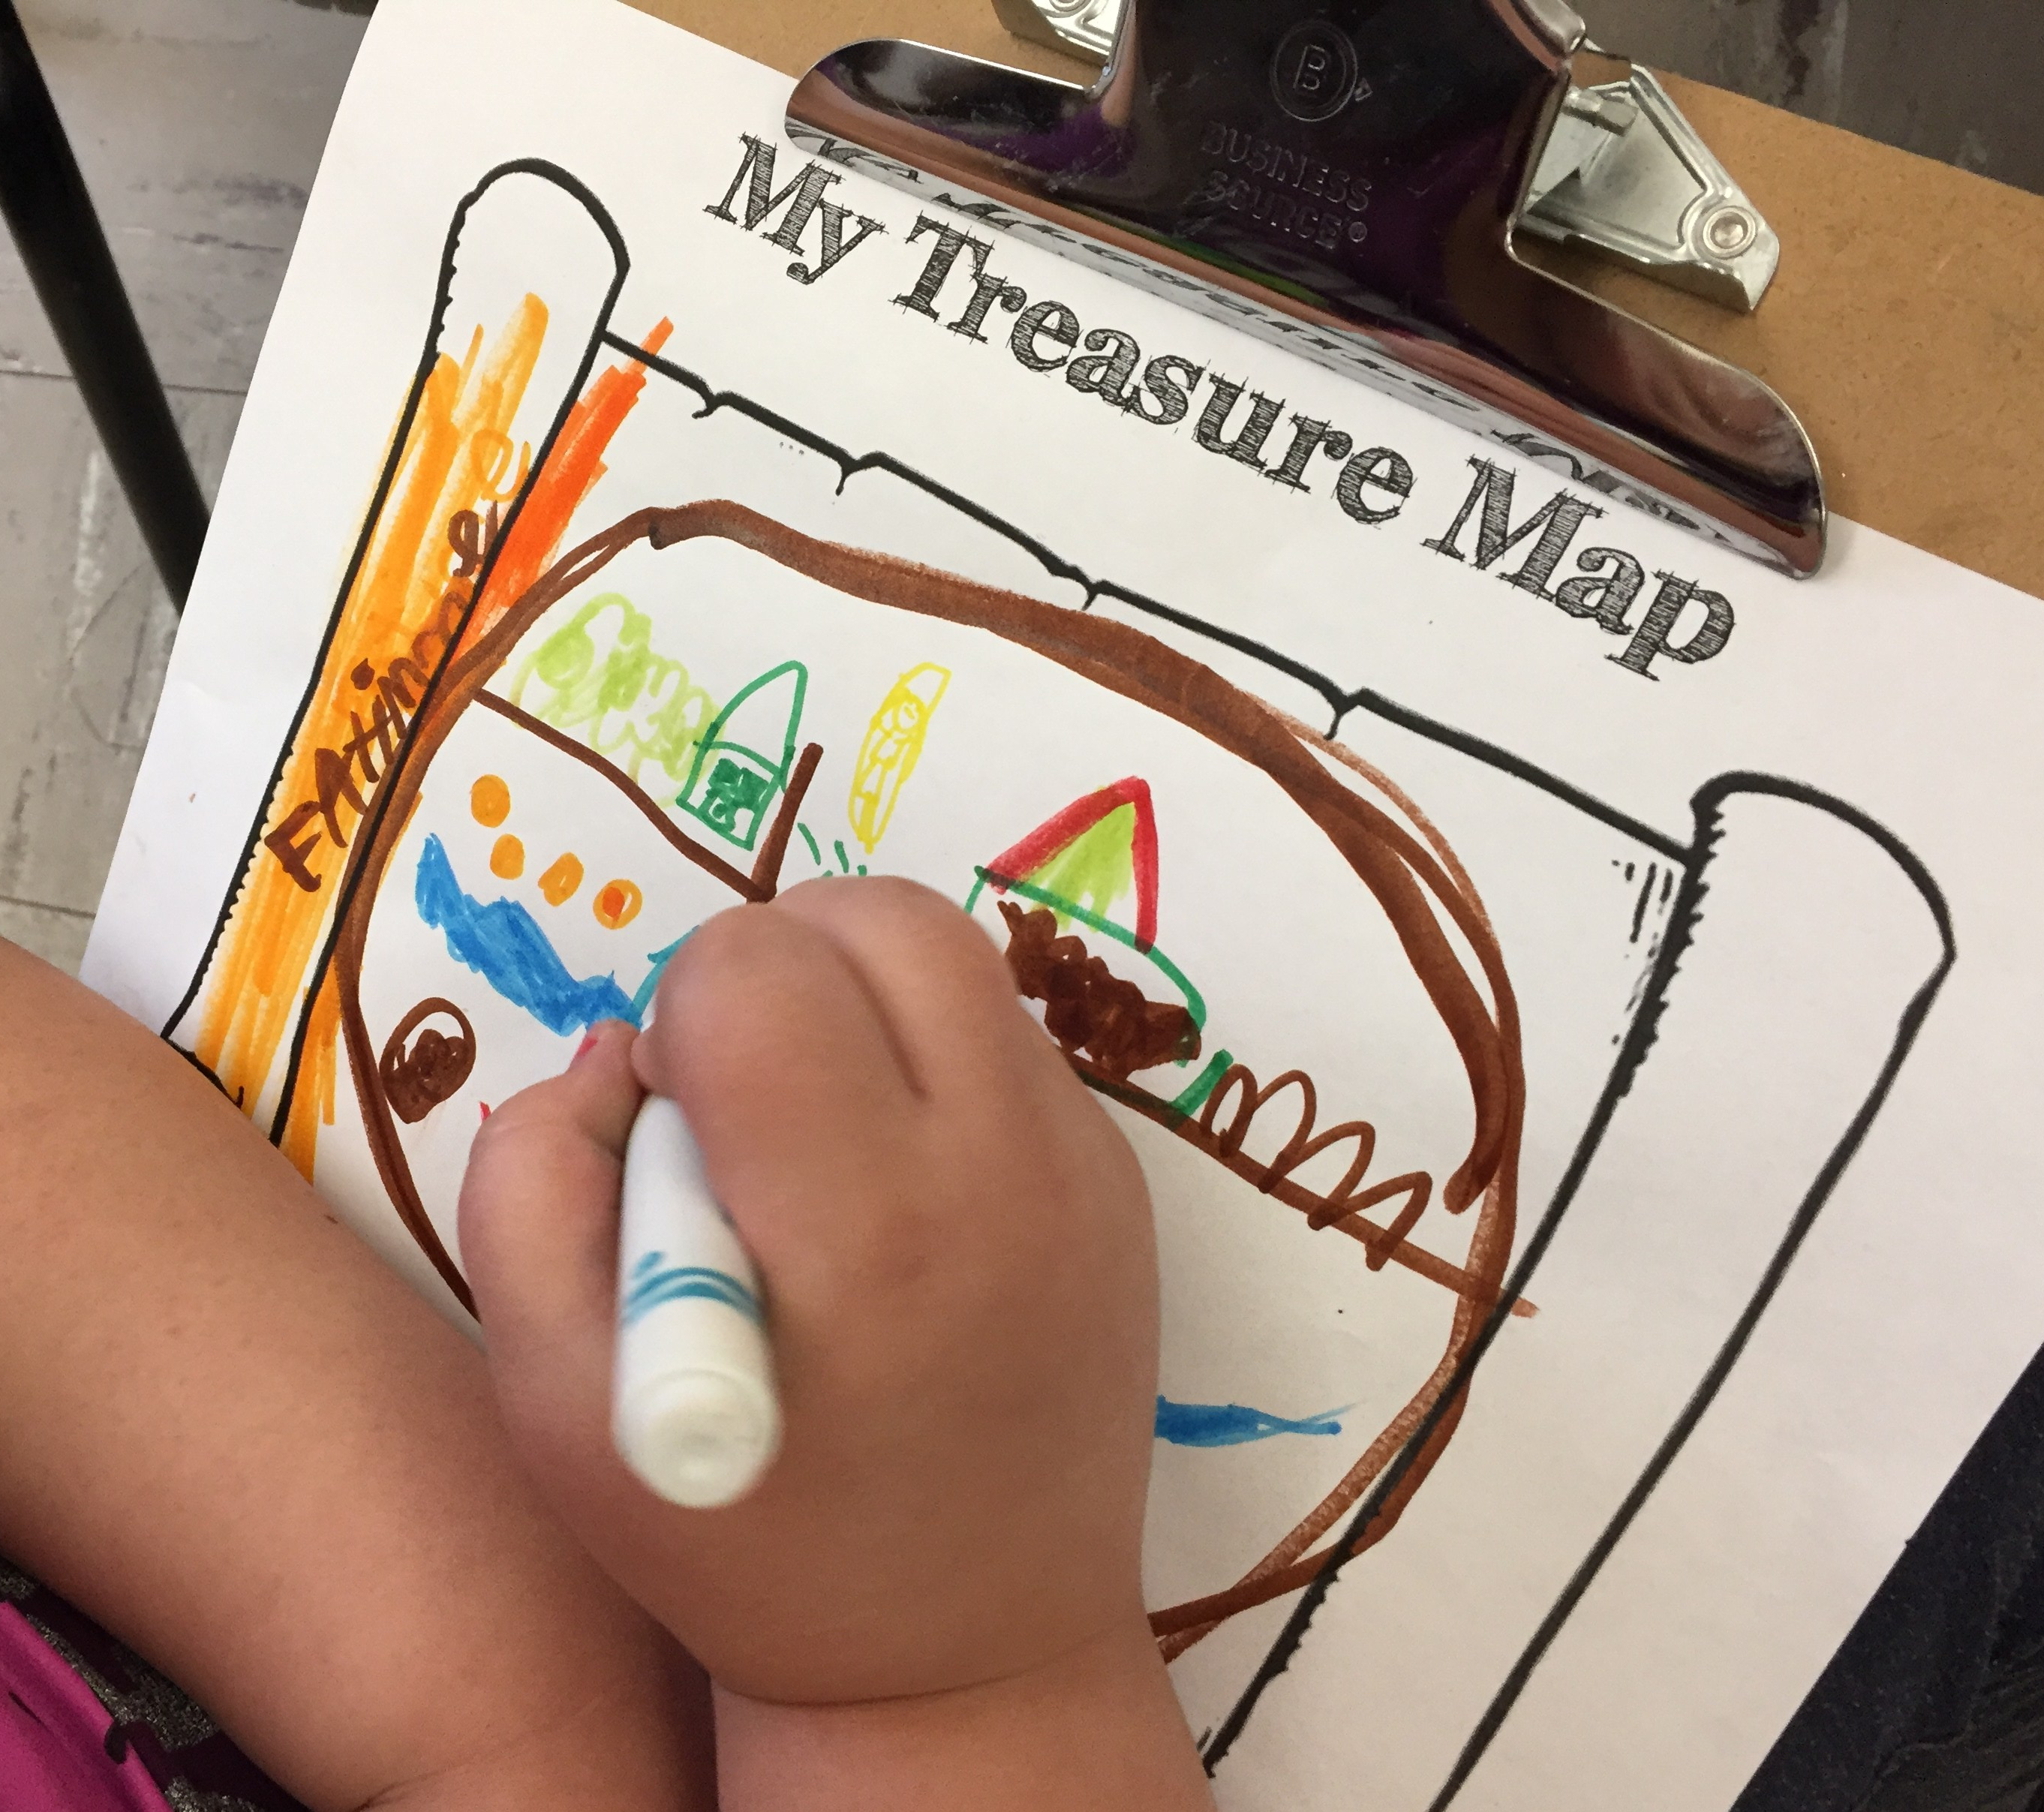
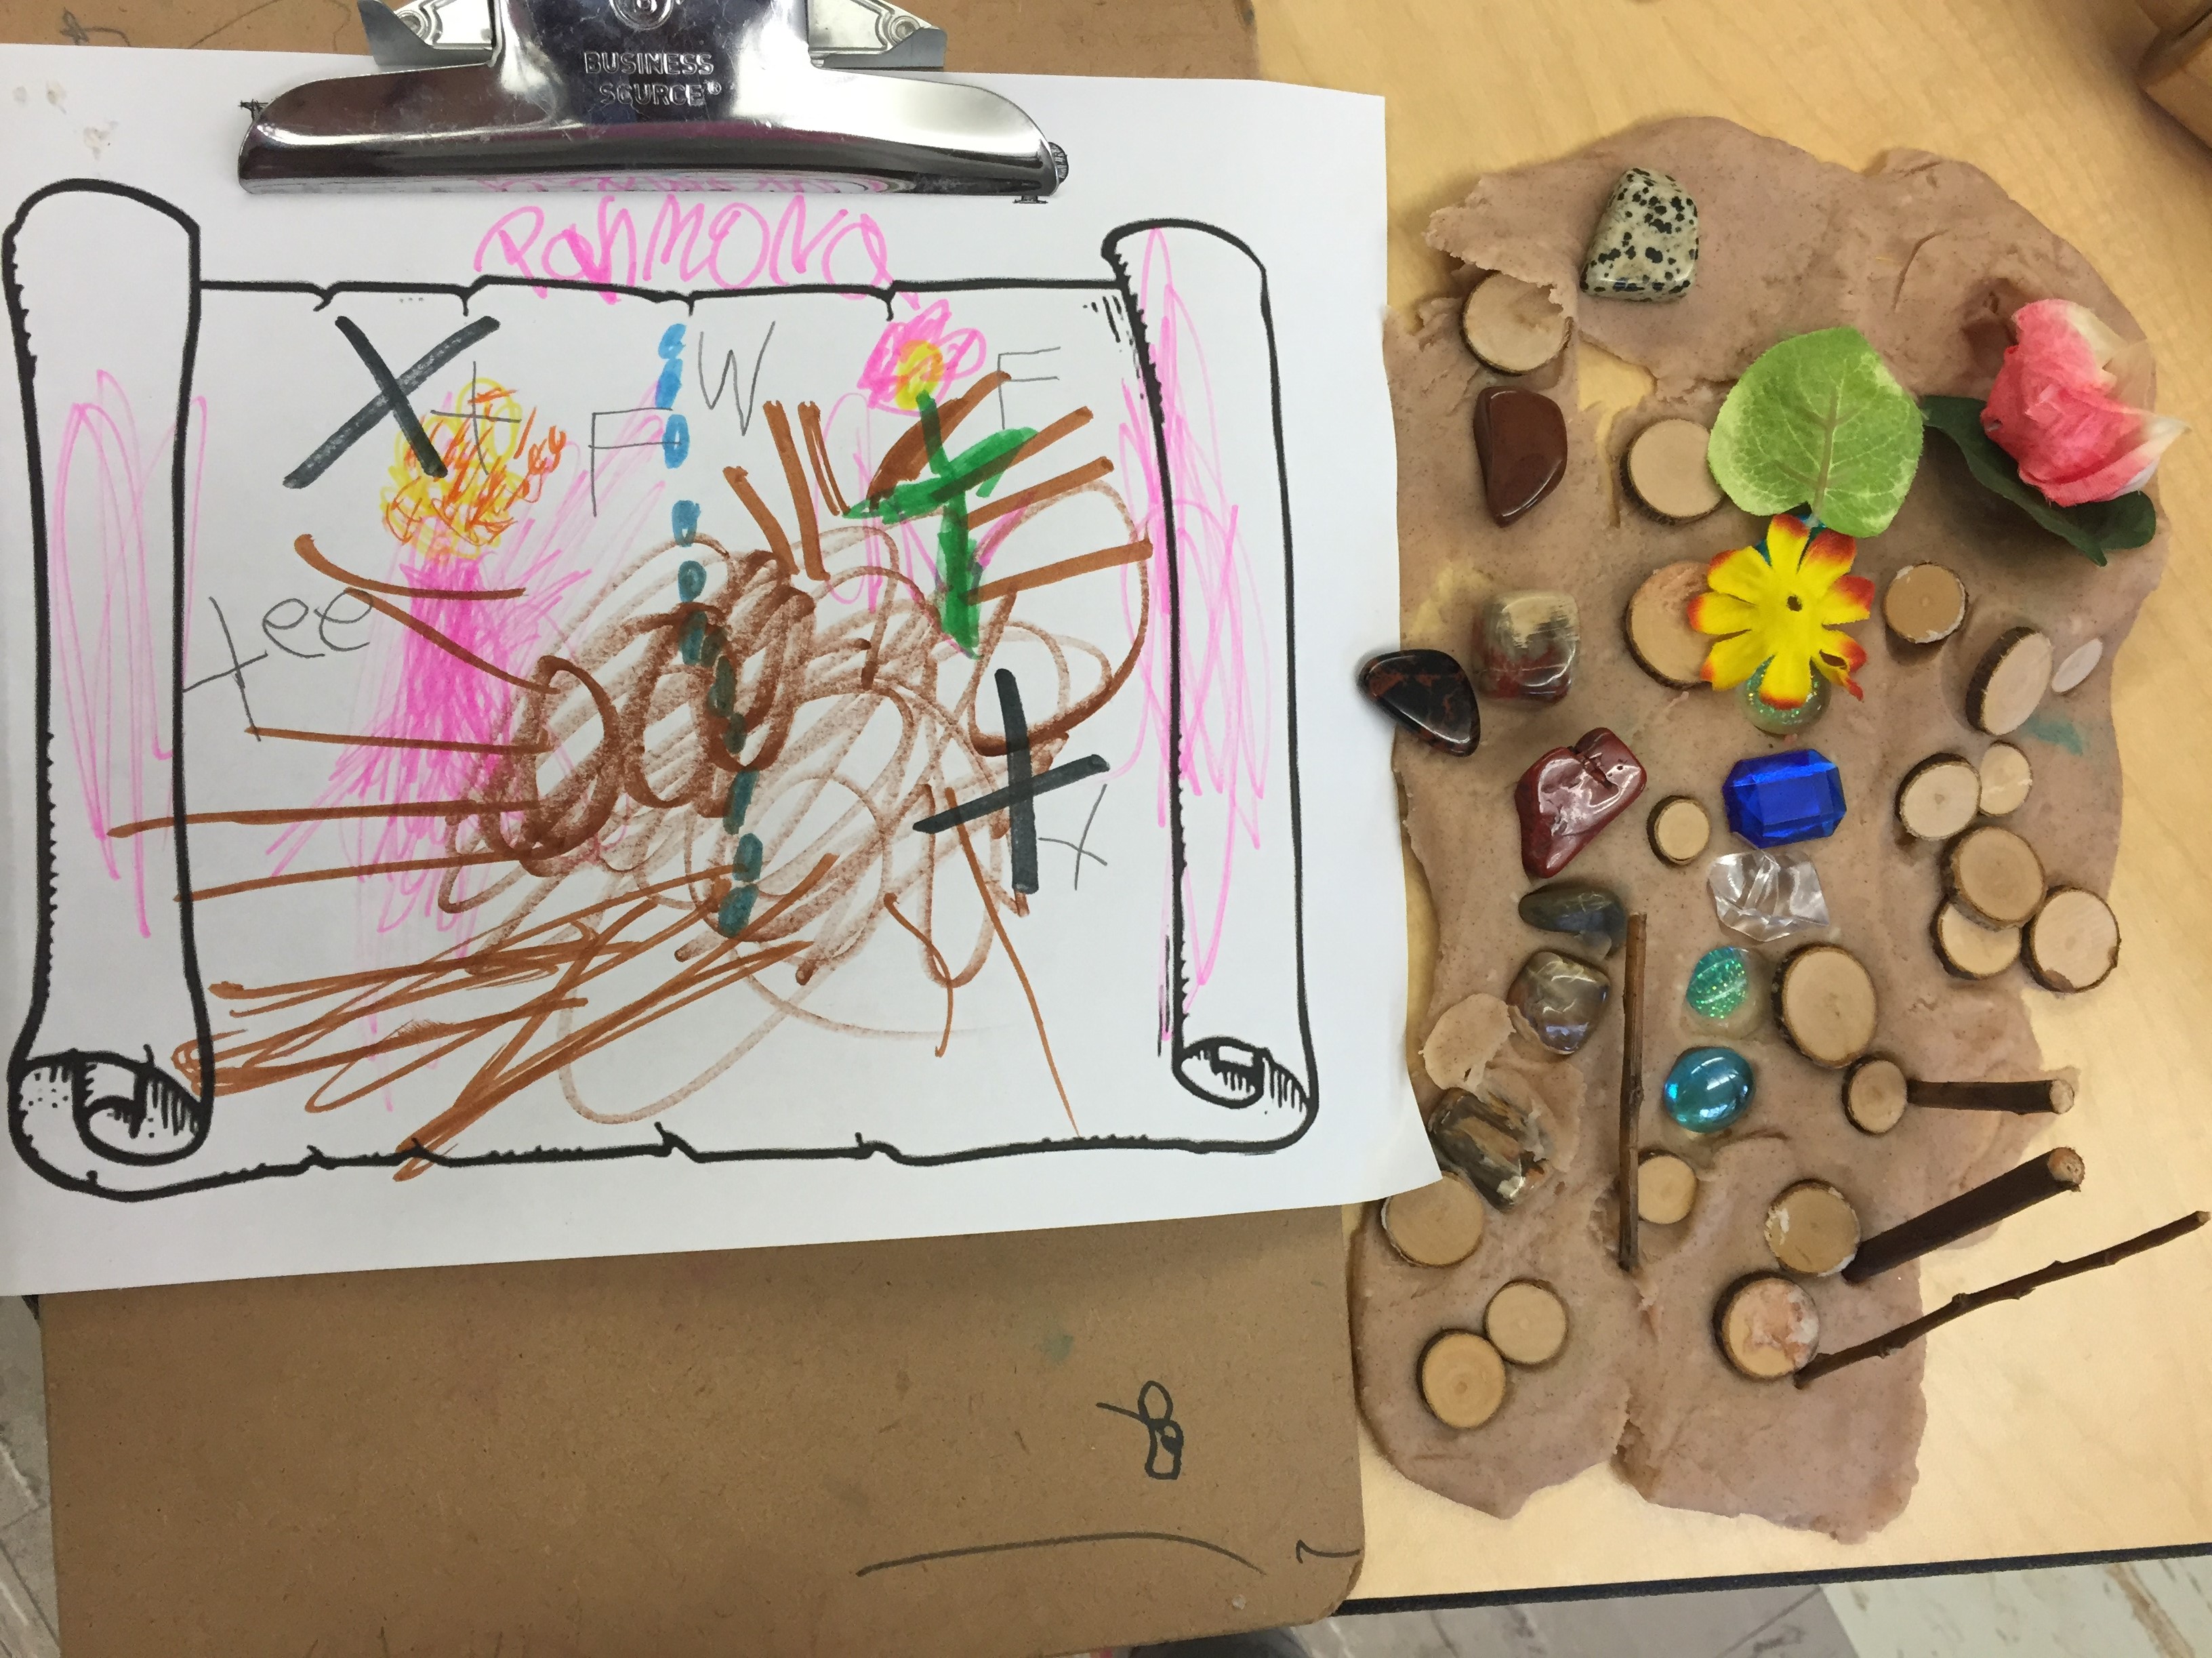
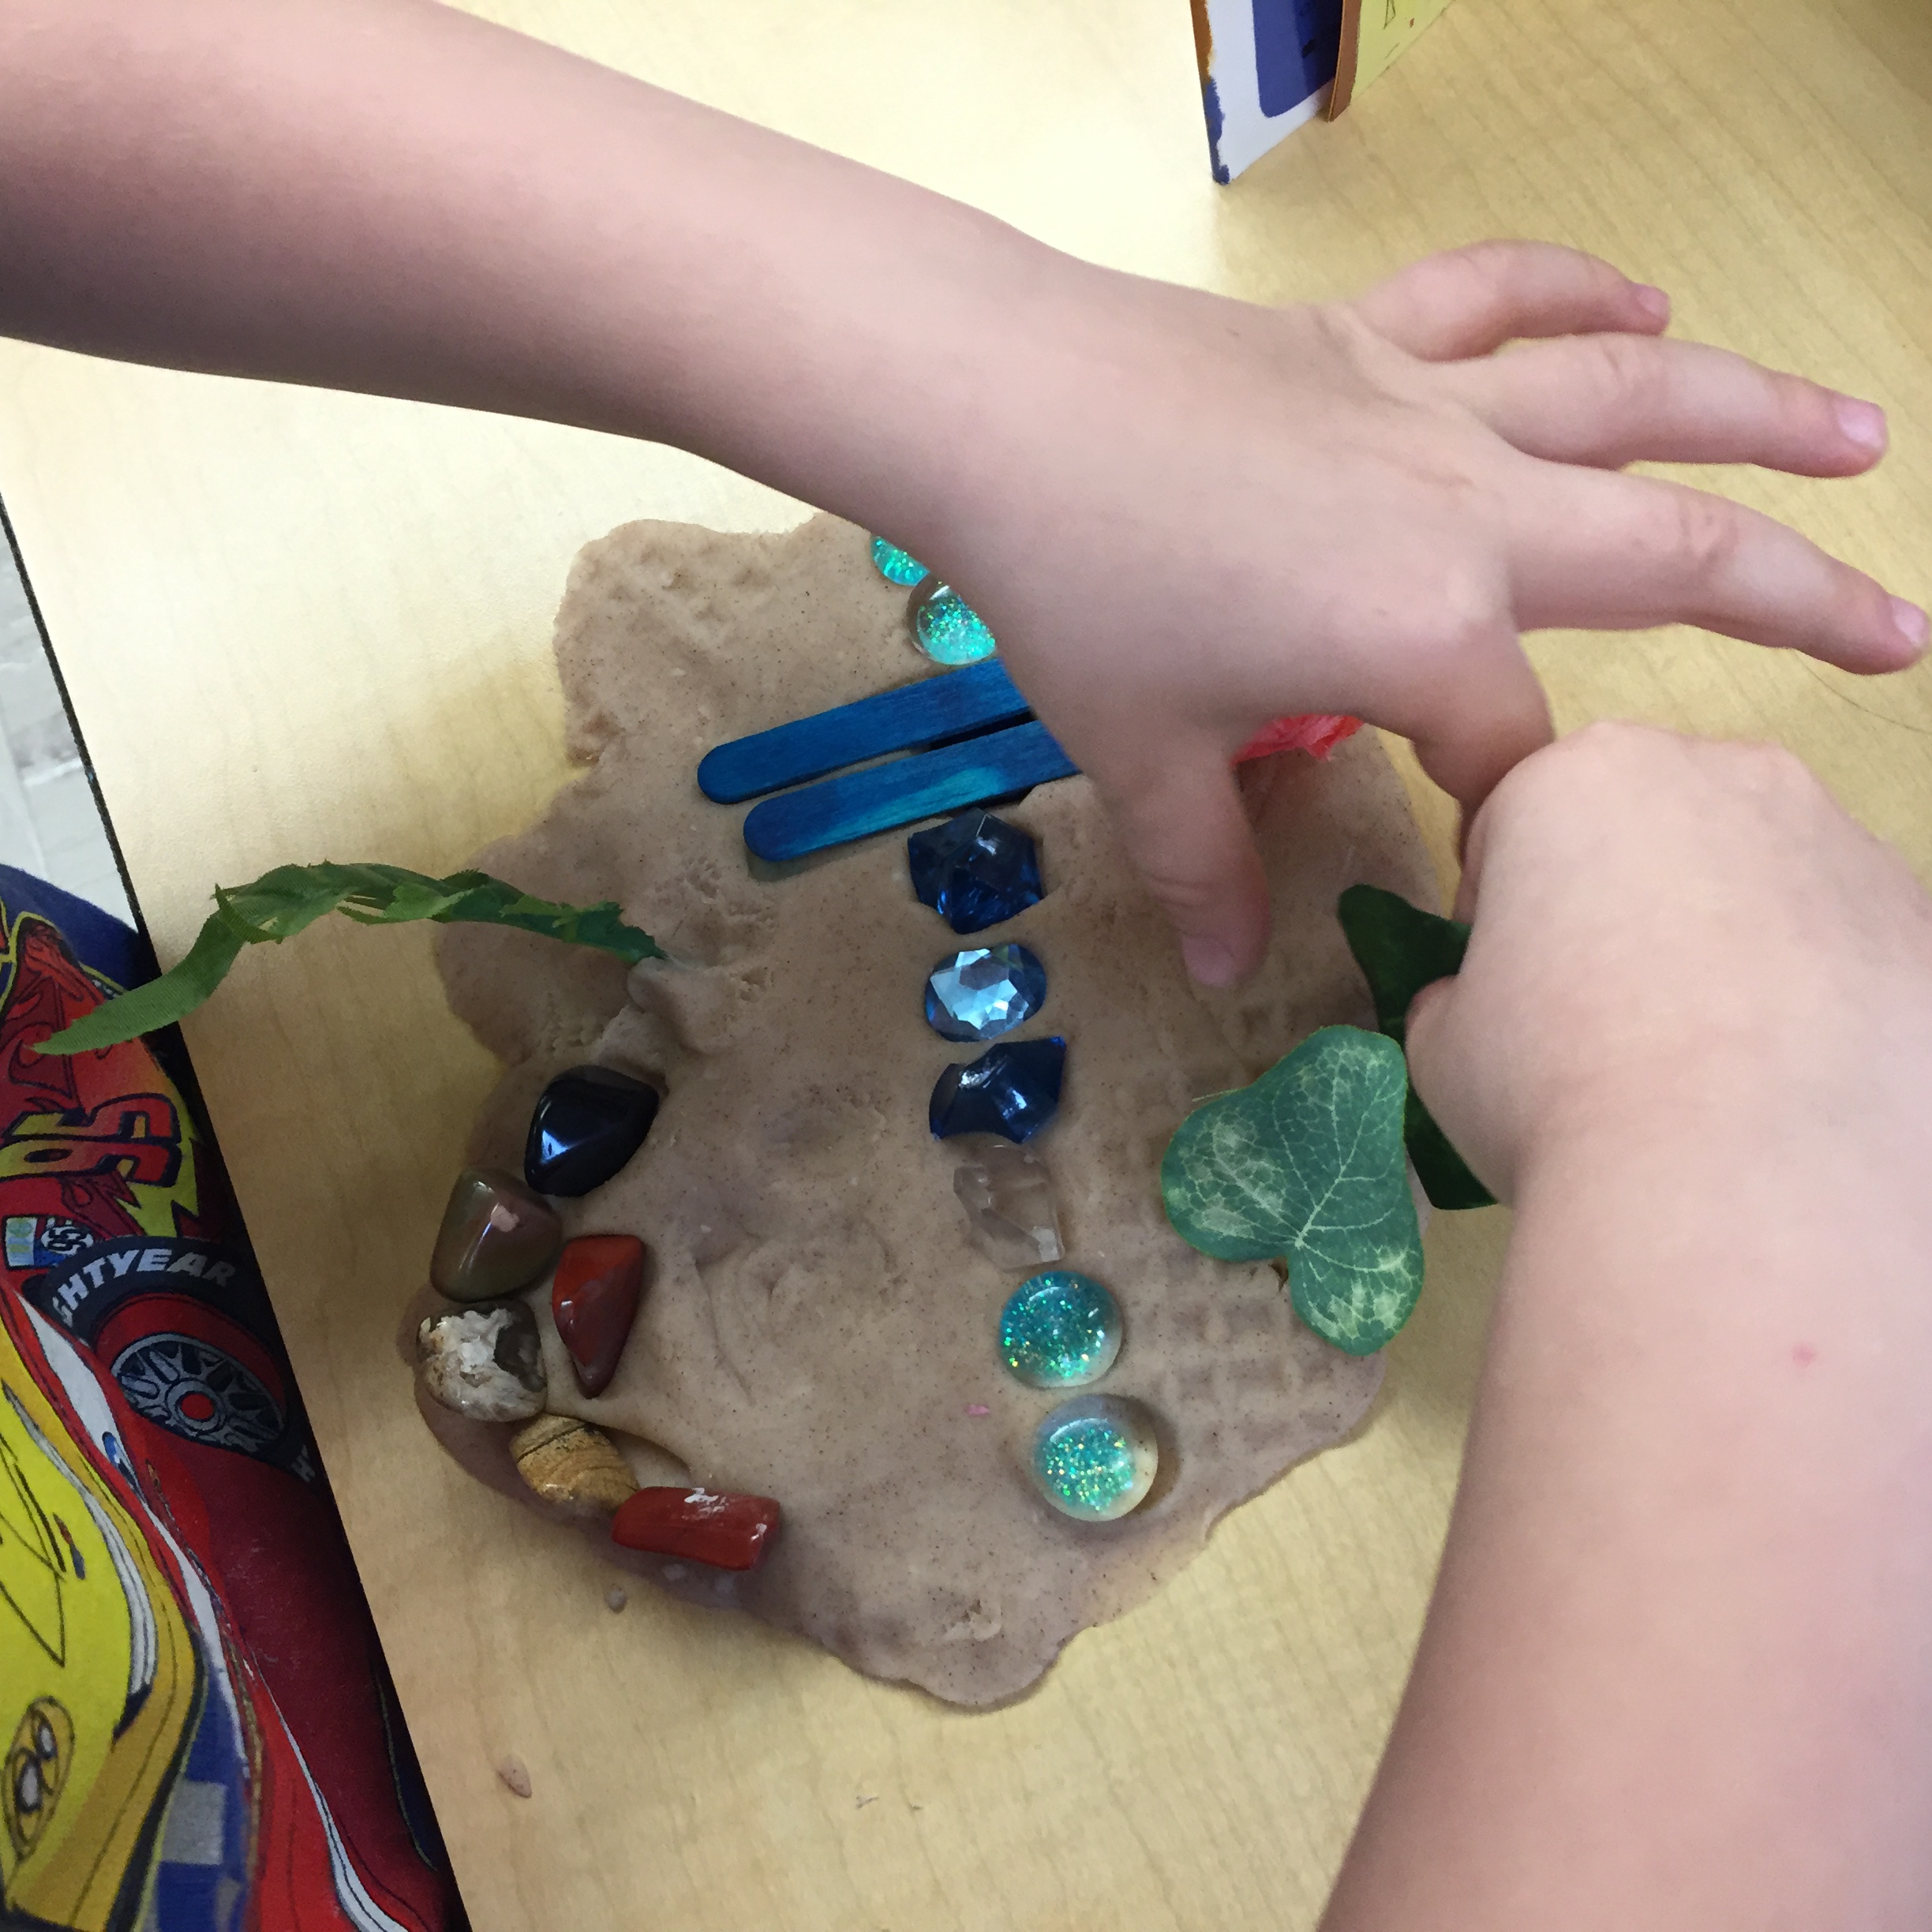
First, the children rolled out their sandy play dough. Then, they used the loose parts to create a map on the dough – blue gems for rivers, stone walkways, flower gardens, forests, stick bridges, etc. The children were encouraged to draw their maps and landmarks on a treasure map recording sheet (you can download a copy here: My Treasure Map). We had gold coins that the children hid under their playdough maps. We talked about marking the location of the treasure on their maps with an “X” and had great fun trying to figure out where the coins were hidden by reading the maps the children had created.


We continue to be impressed with the children’s ability to record their creations on paper. The children put a lot of detail into their maps – looking carefully at the shape and location of their landmarks and choosing coloured markers to match their loose parts exactly. Here are some pictures of the children’s work:

IMG_8699

S.E.: My island has a fire, a tent, a garden, a forest, a river with a bridge going over it, and a house. Can you tell where the treasure is hidden? I marked it with an ‘X’!

IMG_8711

B.B.: I made a treasure island. The guy is guarding the treasure. I put an ‘X’ to show where the treasure is.

IMG_8697

C.G.: I hid two coins! I made a river with a bridge, a house, a forest, and a garden. There’s a jungle too!

IMG_8678

F. M.: I’m making people on the sticks so they can look for the treasure.

IMG_8695

IMG_8702

IMG_8720

IMG_8685

Have your students shown an interest in map making? What are some of the ways you’ve responded to this interest in your class?

The Super Hero Inquiry Project

IMG_7950

Last year my class was absolutely OBSESSED with Super Heroes. They were everywhere in the children’s play, indoors and out, but most especially at the small building centre. It really all started with two boys who began creating super heroes out of linking cubes. After sharing their creations with the class, more and more children began turning up at the small building centre to make and play super hero games.

IMG_7970

Can you guess who these Super Heroes are??

At the same time all this was going on, one of my favourite bloggers was also experiencing some Super Hero mayhem in her class. Mrs Meyers began posting some amazing STEM ideas based off the characteristics of Super Hero stories (along with many other super hero related questions, which she wrote about in her blog here: http://mrsmyerskindergarten.blogspot.ca/2017/03/what-we-learned-by-investigating.html)

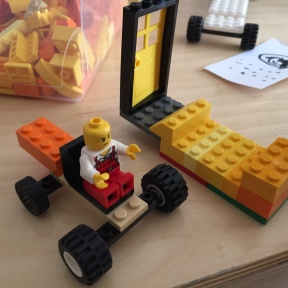
All of the ideas we tried were hugely popular and led to a lot of experimentation and conversation in our class. We added some of our own provocations based on the children’s overall interest in certain materials (e.g., Plasticine, Lego). Here is a gallery of some of our work:

32a235eb56fb

IMG_7739

283586756858

This STEM flying challenge was VERY popular and led to a lot of collaboration and teamwork. In fact, many children challenged themselves to come up with multiple ways of making these Duplo characters fly. One group of boys was ecstatic when they figured out how to make a catapult. For days, Duplo Super Heroes were flying across the classroom!

e91c2a177239

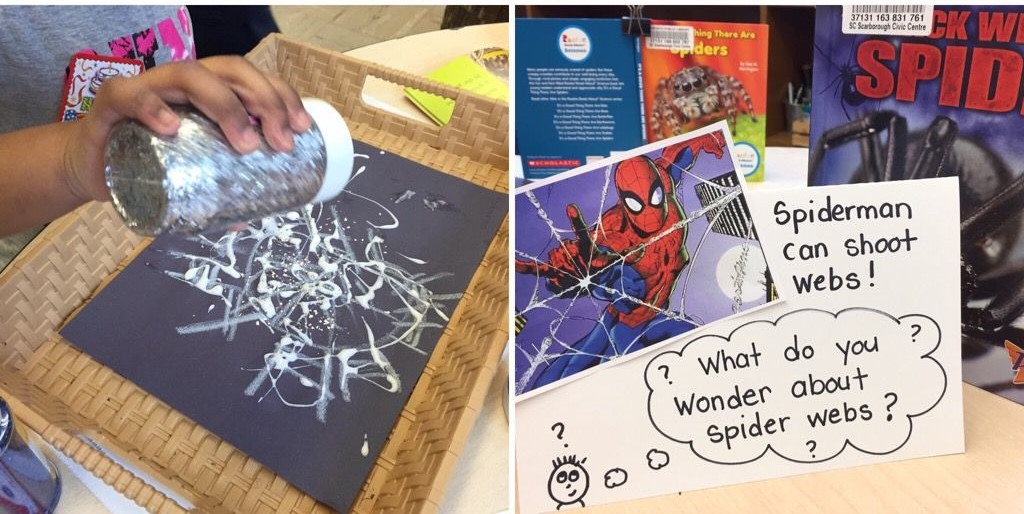
Another gem from Mrs Meyers! Our students loved making their own spider webs and looking in the non fiction books to learn more about them.

FGZJ4032 - Copy

By far the most popular provocation was this one which gave the children an opportunity to create a Super Hero out of Plasticine (modelling clay). Most students came here often to make a number of different Super Heroes. We loved sharing these at reflection time and talking about the aspects of the costumes that helped us identify each Super Hero’s identity. I was amazed at how detailed these creations were! We had a collection of Super Hero readers which I gathered from the library that the children were intent on consulting as they worked to make sure they got everything just right.

IMG_2594.JPG

A few of the super hero readers we had out in the classroom. These were SO popular – even the most reluctant readers were eager to look at these.

One of the thinking routines we relied on heavily for this project was “Can…Have…Are…” This unique take on a concept web really helps focus the children’s thinking on a specific topic. We used it to organize our thinking about villains, specific superheroes like Spiderman, and about Superheroes in general. Each time we used it, the children got more skilled at communicating their ideas.

5477c5962e05

What Superhero inquiry would be complete without some creative costume making? The more we talked about superheroes, the more interested the children were in developing their own superhero personas. We used small cardstock cards to make masks and plastic table cloths to make capes.

We wrapped up our learning with a “superhero day” where everyone came to school dressed as their favourite superhero.

IMG_2597

In addition to celebrating our learning with a Super Hero day, we also celebrated by creating a display of our work. The children were so incredibly proud to see their work on display and could often be found admiring their work with classmates and friends.

89855ba4e949

A BIG thank you again to Mrs Meyers for sharing her class’s learning online and continuing to inspire me and my students!


The First Day of School

Featured

20170901_152655993_iOS

Waiting for children…

I’ve spent a lot of time thinking about the first day of school lately. Even as an experienced Kindergarten teacher, the first day/few weeks of school are always a bit daunting. In August, I often still have my wonderful “June kids” in the front of my mind. It can be hard to remember where we started in September and just how far we came in our year together. If you are new to Kindergarten, I hope this post will give you some practical strategies for how to approach your first days with your new students. I should also be honest and say that I am also writing this for myself – to help me get my mind back into “beginning of the year” mode.

First…organization. Prepare a clipboard. The style of it doesn’t matter as long as you have a place to record anything important you’ll need to remember as you meet and greet your students and their parents before the bell. I like to have a class list where I’ll make note of who is staying for lunch and who is going home. Any important information that the parents need to share – like who might be picking their child up after school (daycare, bus, etc.) can also be recorded here. I actually use this all year long to record info that is relayed as children are dropped off. Both my partner or I may receive a child and the clipboard also helps us communicate with each other important details about our students. I always think I’ll remember when a parent says something like, “I’m picking Sarah up today at 1:30 for a dentist appointment…” but the reality of our busy day often means I will forget. Write it down.

Entry time. We always start our day with extended play in our outdoor play yard (I highly recommend this if you can arrange it in your schedule) but when it’s time to go in, I’ll blow a whistle and have the class line up. After we line the kids up, I usually give a little pep talk about what the children need to do when they move inside: Find your cubby, hang up your backpack, change your shoes, take out your lunch bag, go to the carpet (in the first week we will co-create an anchor chart with the class with these “to dos” on it and post it in the cubby area). Returning children are usually excited to see where their cubby is located. My verbal instructions serve more as a reminder for them about what they are expected to do. New children will obviously need help with the entire process. Many Year 1 children have never worn a backpack before and will stand helplessly unsure of how to get it off once we get inside. Many children will never have had to take off or put on their shoes by themselves before. Some children may have difficulty separating from their parents. All of this is the work of September…being patient, teaching the children what they need to do when they arrive, and helping them learn how to do it themselves. Be prepared for entry time to take a bit of time. It will become more streamlined as the days and weeks go on. It’s pretty amazing how quickly the children learn what they need to do each day!

Gather on the Carpet. Some teachers prefer to do a “soft opening” where the children go straight to centres. Others may have reading time or meeting time. I opt for reading time (later in the year, we will move to math bins, but at the beginning of the year we keep it simple). I place name cards in a circle on the carpet and ask the children to find their name and look at a book. Year 2 children are familiar with this routine, so I let them choose a book from the bookshelf (you can put a book at their spot if you wish). Year 1 children will have a book already placed with their name card. Again, new students may not recognize their name yet, so a staff member should be on hand to help them locate their spot. Students read until most if not all the children are seated and then we begin our day by putting our name cards and books away. I usually do so by holding up a letter of the alphabet and asking the children whose name starts with that letter to put their name card in the basket and their book on the shelf. My partner will help children identify their starting letter and put their book away. If you have any shy/nervous children you can always ask a classmate to help them out by putting the materials away for them.

Morning Circle. Our welcome circle in the morning is very brief. On the first day we will warm up with one or two easy songs or finger plays. I have included a few here you can download: Sticky Bubblegum, Roly Poly, Shut the Door, and Great Big Sneeze.  You can also read a brief story (perhaps a song book, pattern book, etc. I usually pick something light and fun – this year I’ll be reading You’re Finally Here! by Melanie Watt).

Centre Time. It may be tempting to do a “tour of the room” but in my experience with a large class, it’s pretty much impossible. You can’t crowd 30 kids around a centre and expect that anyone will be able to see what you’re talking about. Most kids will be too excited and overwhelmed to pay attention and might just start wandering around or go right to playing. Skip the tour and let the kids explore on their own when it’s centre time. In our class, we set up centres with materials that will be familiar to the children and activities that don’t need teacher assistance or explanation. When a child arrives at a centre, I want them to look at the materials and know what it is they can do there. I steer clear of activities that require teacher assistance like a special craft or project because we need staff free to supervise and observe the children. We might have children who are crying or upset and need comforting, children who need help with toileting, etc. We need all hands on deck!

Here are some of the centres we have set up for the first week:
IMG_0181

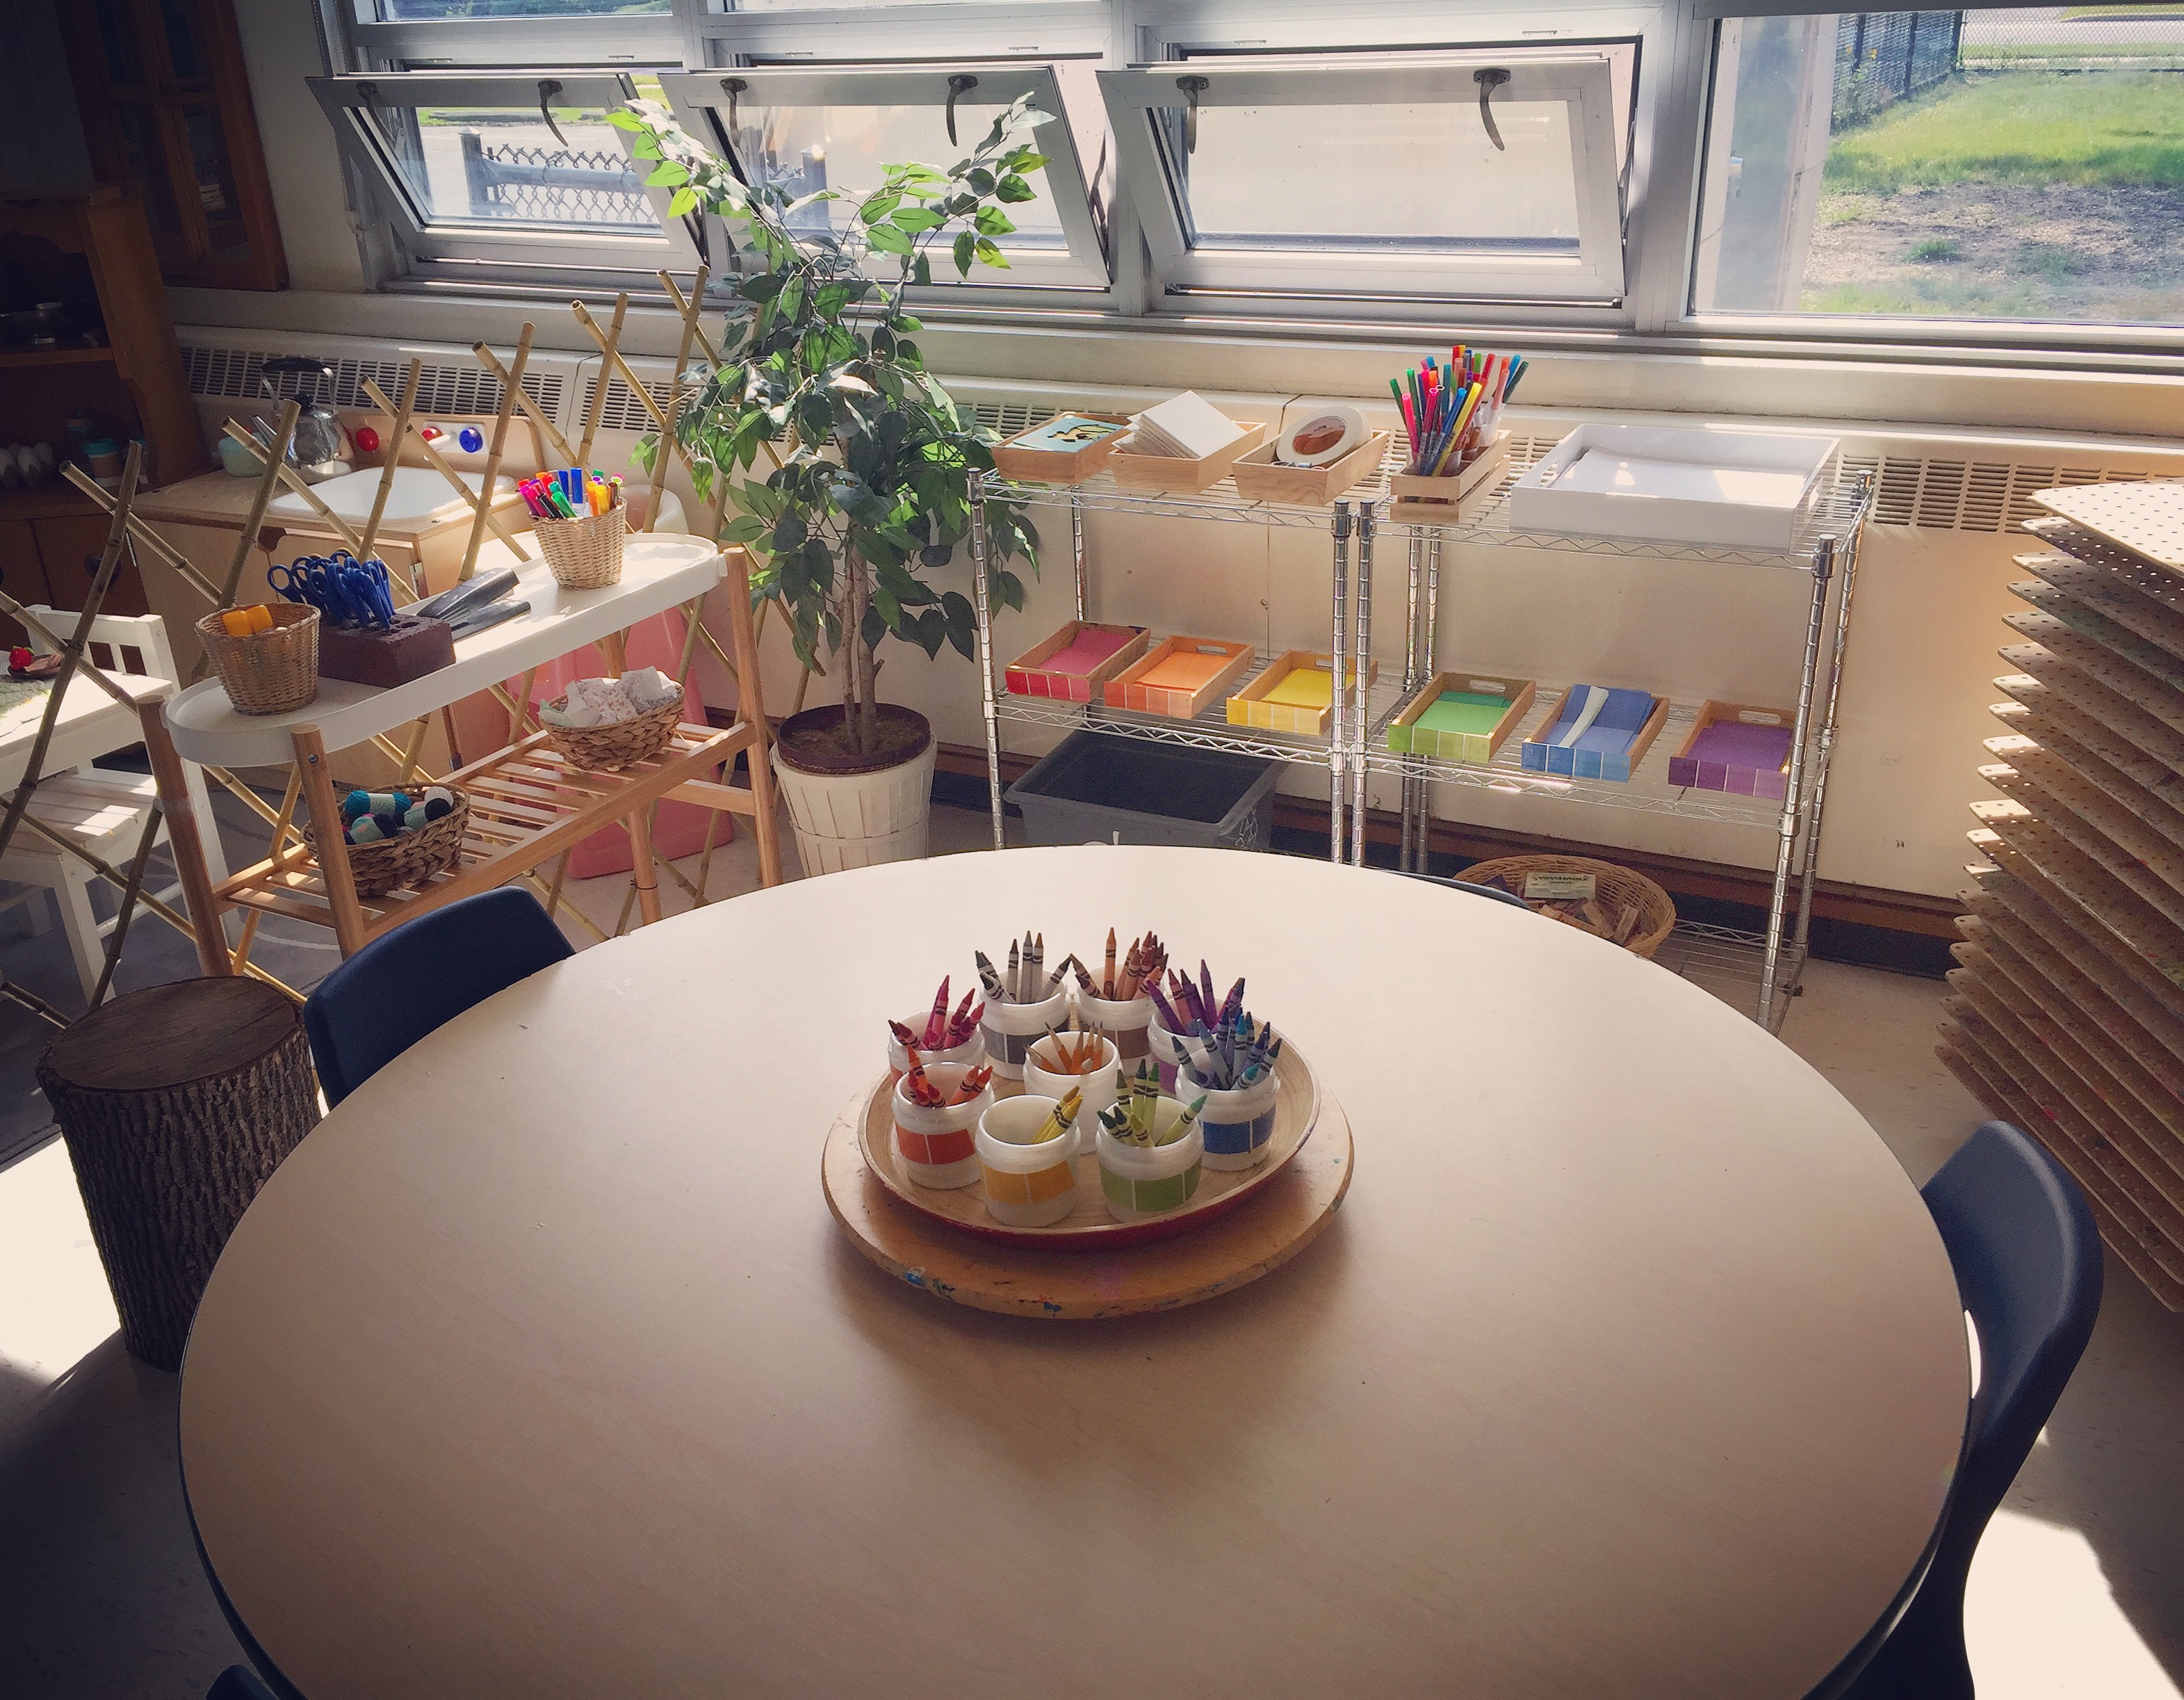
Simple cut and paste materials are available for the children to create with at the Art Studio.

IMG_0180

We set up the dollhouse at the small building centre. We like to provide ample opportunities for the children to engage in dramatic social play. When the children see this set up, they know exactly what to play here.

20170901_152624242_iOS

This is our water table, but with the lid on it creates the perfect space for Lego creations. This is another material most children will be familiar with.
IMG_0175

The Drama Centre is set up like a house to provide comfort and familiarity. We don’t have too many materials set out on the shelves at the moment so it will be easier to clean up at the end of the play block.

20170901_152639851_iOS

Sand table materials.

20170901_152642419_iOS

We have a number of returning students this year. We will be starting with monarch caterpillars. I usually try and set up something from nature for the children to explore with magnifiers and clipboards; in other years we’ve put out rocks, shells, or flowers. Magnetic items are always a popular material that doesn’t require too much explanation.


Before the children choose their centres, tell them how you will get their attention when it’s time to stop and clean up. Many teachers use a saying like “1, 2, 3, Eyes on Me” or “Hands on top, that means stop.” Maybe you have a rain stick or plan on turning out the lights. Whatever your method of getting the children’s attention, make sure you explain it to the class and practice once or twice before the children go off to play.

To choose centres, start with the kids that absolutely know where they’d like to go. Most Year 2 students will have an idea of what they want to do during their choice time. You can go centre by centre (“Hands up if you would like to visit the play dough table today. We can choose 5 children”) or just have children raise their hands and tell you where they’d like to go. After you’ve gone through this process, you will likely have children still sitting on the carpet who have no idea what they want to do. At this point you can offer some suggestions or take a walk around the room with them to help them find an activity that interests them. Remember to remind the children to visit the washroom during this play block. Many children get engaged in their activities and forget to answer nature’s call. Also, don’t be surprised if the children quickly move from one activity to another. They will be excited and want to explore many different things! During this time, my partner and I are on hand to make sure the children are making good choices, using materials appropriately, and cleaning up their activities before they move on to something new.

Tidy up time. Use the signal you practiced earlier to get the class’s attention. In our class, after I signal the children to tidy up, I usually put music on the CD/iPod player. Eventually the children will learn that when the music is on, they need to tidy up and head to the carpet. You can use the same song as a “tidy up song” (one year we used “Mama Mia” by Abba) or mix it up. When several children have gathered at the carpet, one staff member will join them and lead the class in some action songs with the CD. The children will likely need the opportunity to jump some jiggles out. I also find that the songs and games we play at this time are so engaging that the children want to tidy up and join the fun. It’s a bit like playing the role of the Pied Piper.

Snack/Nutrition Break. Normally in our class we have an “open snack” which means the children can choose to eat their snack any time they are hungry during their extended play block. In fact, we’ve even had students who needed to eat their snack when they first arrived at school in the morning. We are flexible on that. However, there are a few routines that are required when eating snack so we opt for a group snack time for the first week of school so that we can teach the children what they need to do: how to wash their hands, get their snacks, eat, tidy up their spot, put their snacks away. When the children know how to get this done on their own, we move to the “open snack” system at a designated snack table.

After snack our students will go for a prep – to gym or library depending on the day, so after they eat we will show them where they need to line up. We use this time to talk a bit about “line behaviour” and how we need to move quietly through the school.

Reflection. When the children return from their special program we meet briefly on the carpet for reflection time. On the first day, I will only choose one child to share their learning from our play block. I will use this time to talk more specifically about a particular centre and show the class what kind of learning can happen there (for example, I may choose a child who created something at the art studio and highlight the materials that were chosen, how the student put their creation together, etc. The student will model talking about their work and I will model how we ask them good questions about what they’ve accomplished). You can read more about reflection time here. After we reflect we might do a brief message (the special helper of the day helps me do this). My first message of the year is:

________ is the Special Helper.

________ is in [SK/JK card].

________ is [dice number card] years old.

________ is feeling [emoji card]

This message highlights the word “is” and also focuses on the name of the child, which is an excellent way for the class to learn each other’s names and also begin to associate letters of the alphabet with the names of their classmates.

Children going home for lunch (check your clipboard!) will go with a staff member to the cubby area to get ready for home. The rest of the class will get ready for outdoor play before lunch (at our school the children play first and then eat).

After lunch meeting/play block/snack. In our class, whichever staff did not do carpet time in the morning will lead carpet time in the afternoon. We like to make sure we share leadership duties so the children get used to working with all staff on a regular basis. We usually begin the afternoon with attendance, a brief story, and some mindful minute exercises. Our afternoon closely mirrors the schedule from the morning. The children will have another opportunity to choose a centre/centres during the play block, practice tidying up, and revisit the procedures for a group snack.  As a staff, we will decide if any centres need to be closed or changed for the afternoon depending on how things went during the morning session. We have a few “back up” activities prepared to put out in the afternoon (lacing beads, colouring) – if not on the first day, maybe later in the week. I find that novelty is important in all-day Kindergarten. It’s nice to have some new materials/activities to offer as the week goes on to keep the children engaged.

Home transition. Getting ready for home means changing our shoes again and packing up our backpacks. Again, this will take longer on the first day/first few weeks as the children learn what stays at school (you would be surprised at how many children do not want to leave their indoor shoes behind. We tell them their shoes “sleep at school now” and we’ll see them tomorrow!).

We try and end the day with an extended play time in the outdoor play yard. The day is long and we find the children need the time outside to run around or sit under a tree. Parents will begin to arrive to pick up their children and before we know it, the first day is done! I hope my students go home on their first day feeling like school is a safe, fun, enjoyable place to be.

Remember, it is the slow, patient work of September that will set up your learning for the rest of the year. Try not to get discouraged if things appear to be moving slowly. Establishing routines and classroom expectations are the main priorities at the beginning of the year. It’s important to take the time to really get to know your students and for them to get to know you. Relationships are everything!

For more information on our classroom layout you can read: The Third Teacher: Classroom Layout 2017.

For more information about setting up your weekly schedule and day plans you can read: Planning for A Full Day of Inquiry Based Learning.

Wishing you all a wonderful start to the school year!
The Third Teacher: Classroom Layout 2017

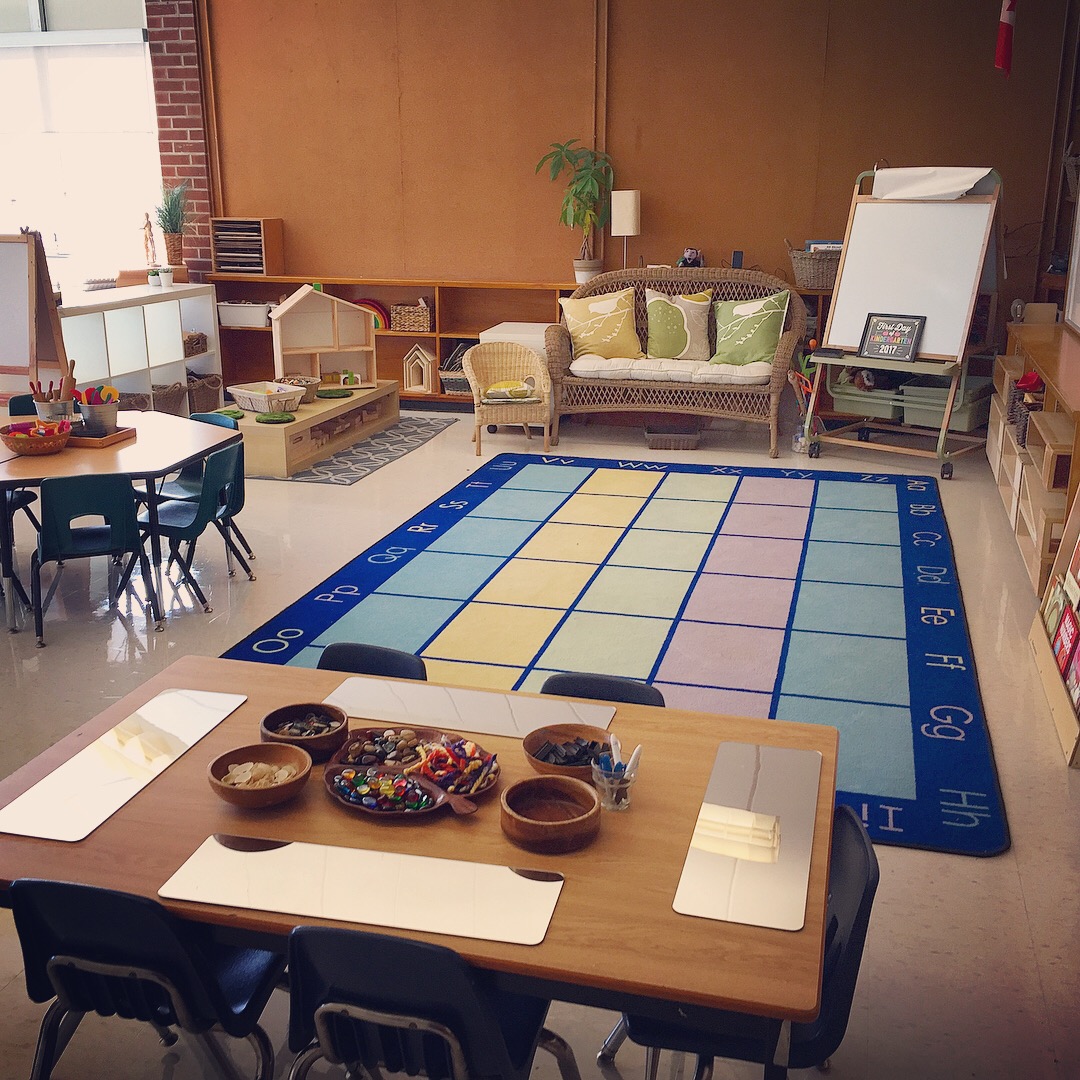
I can’t believe we’ve arrived at another September. This year I moved rooms so I had the opportunity to design a new learning space – which is really one of my favourite aspects of teaching. I take classroom set-up pretty seriously, because I know in the end, the way the room is designed is going to do a lot of teaching for me. When I’m setting up a learning space I’m thinking mostly about how I want the space to feel – homey and inviting are two adjectives that come to mind. I want my students to feel comfortable, to feel the space is theirs and ours together. I also want the space to communicate to anyone who comes in that we believe the children are capable, creative, respected, and valued.

The first thing I do when I’m laying out a new space is make a list of all the centres/learning areas we’d like to include (large gathering space, big blocks, writing centre, play dough table, snack table, water table, sand table, science centre, art studio, small building area, drama centre, math centre, quiet centre, light table, computer area, guided reading table). Then I take out a pencil and paper and start drawing floor plans. There are always elements in every room that dictate where certain things have to go – outlets and internet drops determine where computers will go (although I have been known over the years to use 20 foot cords and duct tape to make things fit where I want them to…); flooring (if you have carpeting and tile) will often dictate where sand and water will be located. I prefer to have art spaces and science areas near windows, so I try and arrange that in my planning. Once I have a few plans worked out, I get started moving the furniture. My partners and I had to move the furniture around a bit before we got everything where we wanted it. Some days I went home knowing it “wasn’t quite right” only to go in the next day and know just how to fix it. It’s a process.

Once the furniture is in place, it’s time to decide what materials we will offer. At the very beginning of the school year, I prefer to have most of my centres open, but with limited materials (the exceptions are: water and sand are not open at the same time, and I tend to leave the paint easel closed the first couple of weeks). I generally select materials that are inviting, but familiar. I steer away from anything that will require teacher help (like art projects or work we will put up) simply because the first days can be unpredictable. We want all staff available to observe the children, help them find learning opportunities that interest them, model tidying up, etc. Sometimes children are upset and need comforting, leaving one staff member to manage the larger group on their own. For this reason, I want the materials and provocations to be safe, easy to tidy up, and accessible to the children. We don’t put anything out on the shelves that the children are not allowed to play with. I also lean towards more open-ended materials such as loose parts and materials that encourage social play and interaction. Since writing is such an important skill we want to encourage, I try and include writing materials (pencils, crayons, paper and clipboards) at most centres. This sends the message that writing is important and it also helps the children develop independence by having the materials they need at their fingertips.

So here we go! A photo tour of the new space…

20170901_152653892_iOS

Our main meeting space. This space also doubles as our big blocks area during discovery time.

IMG_0180

The Small Building Centre. We have the doll house, people, and furniture out at the moment. This centre will need no explanation to the students and is always a popular choice during discovery time.

20170901_152608100_iOS

The Writing Centre. We have it set up with mirrors on which we will write the children’s names with a whiteboard marker; the children can cover the lines with loose parts.

20170901_152614003_iOS

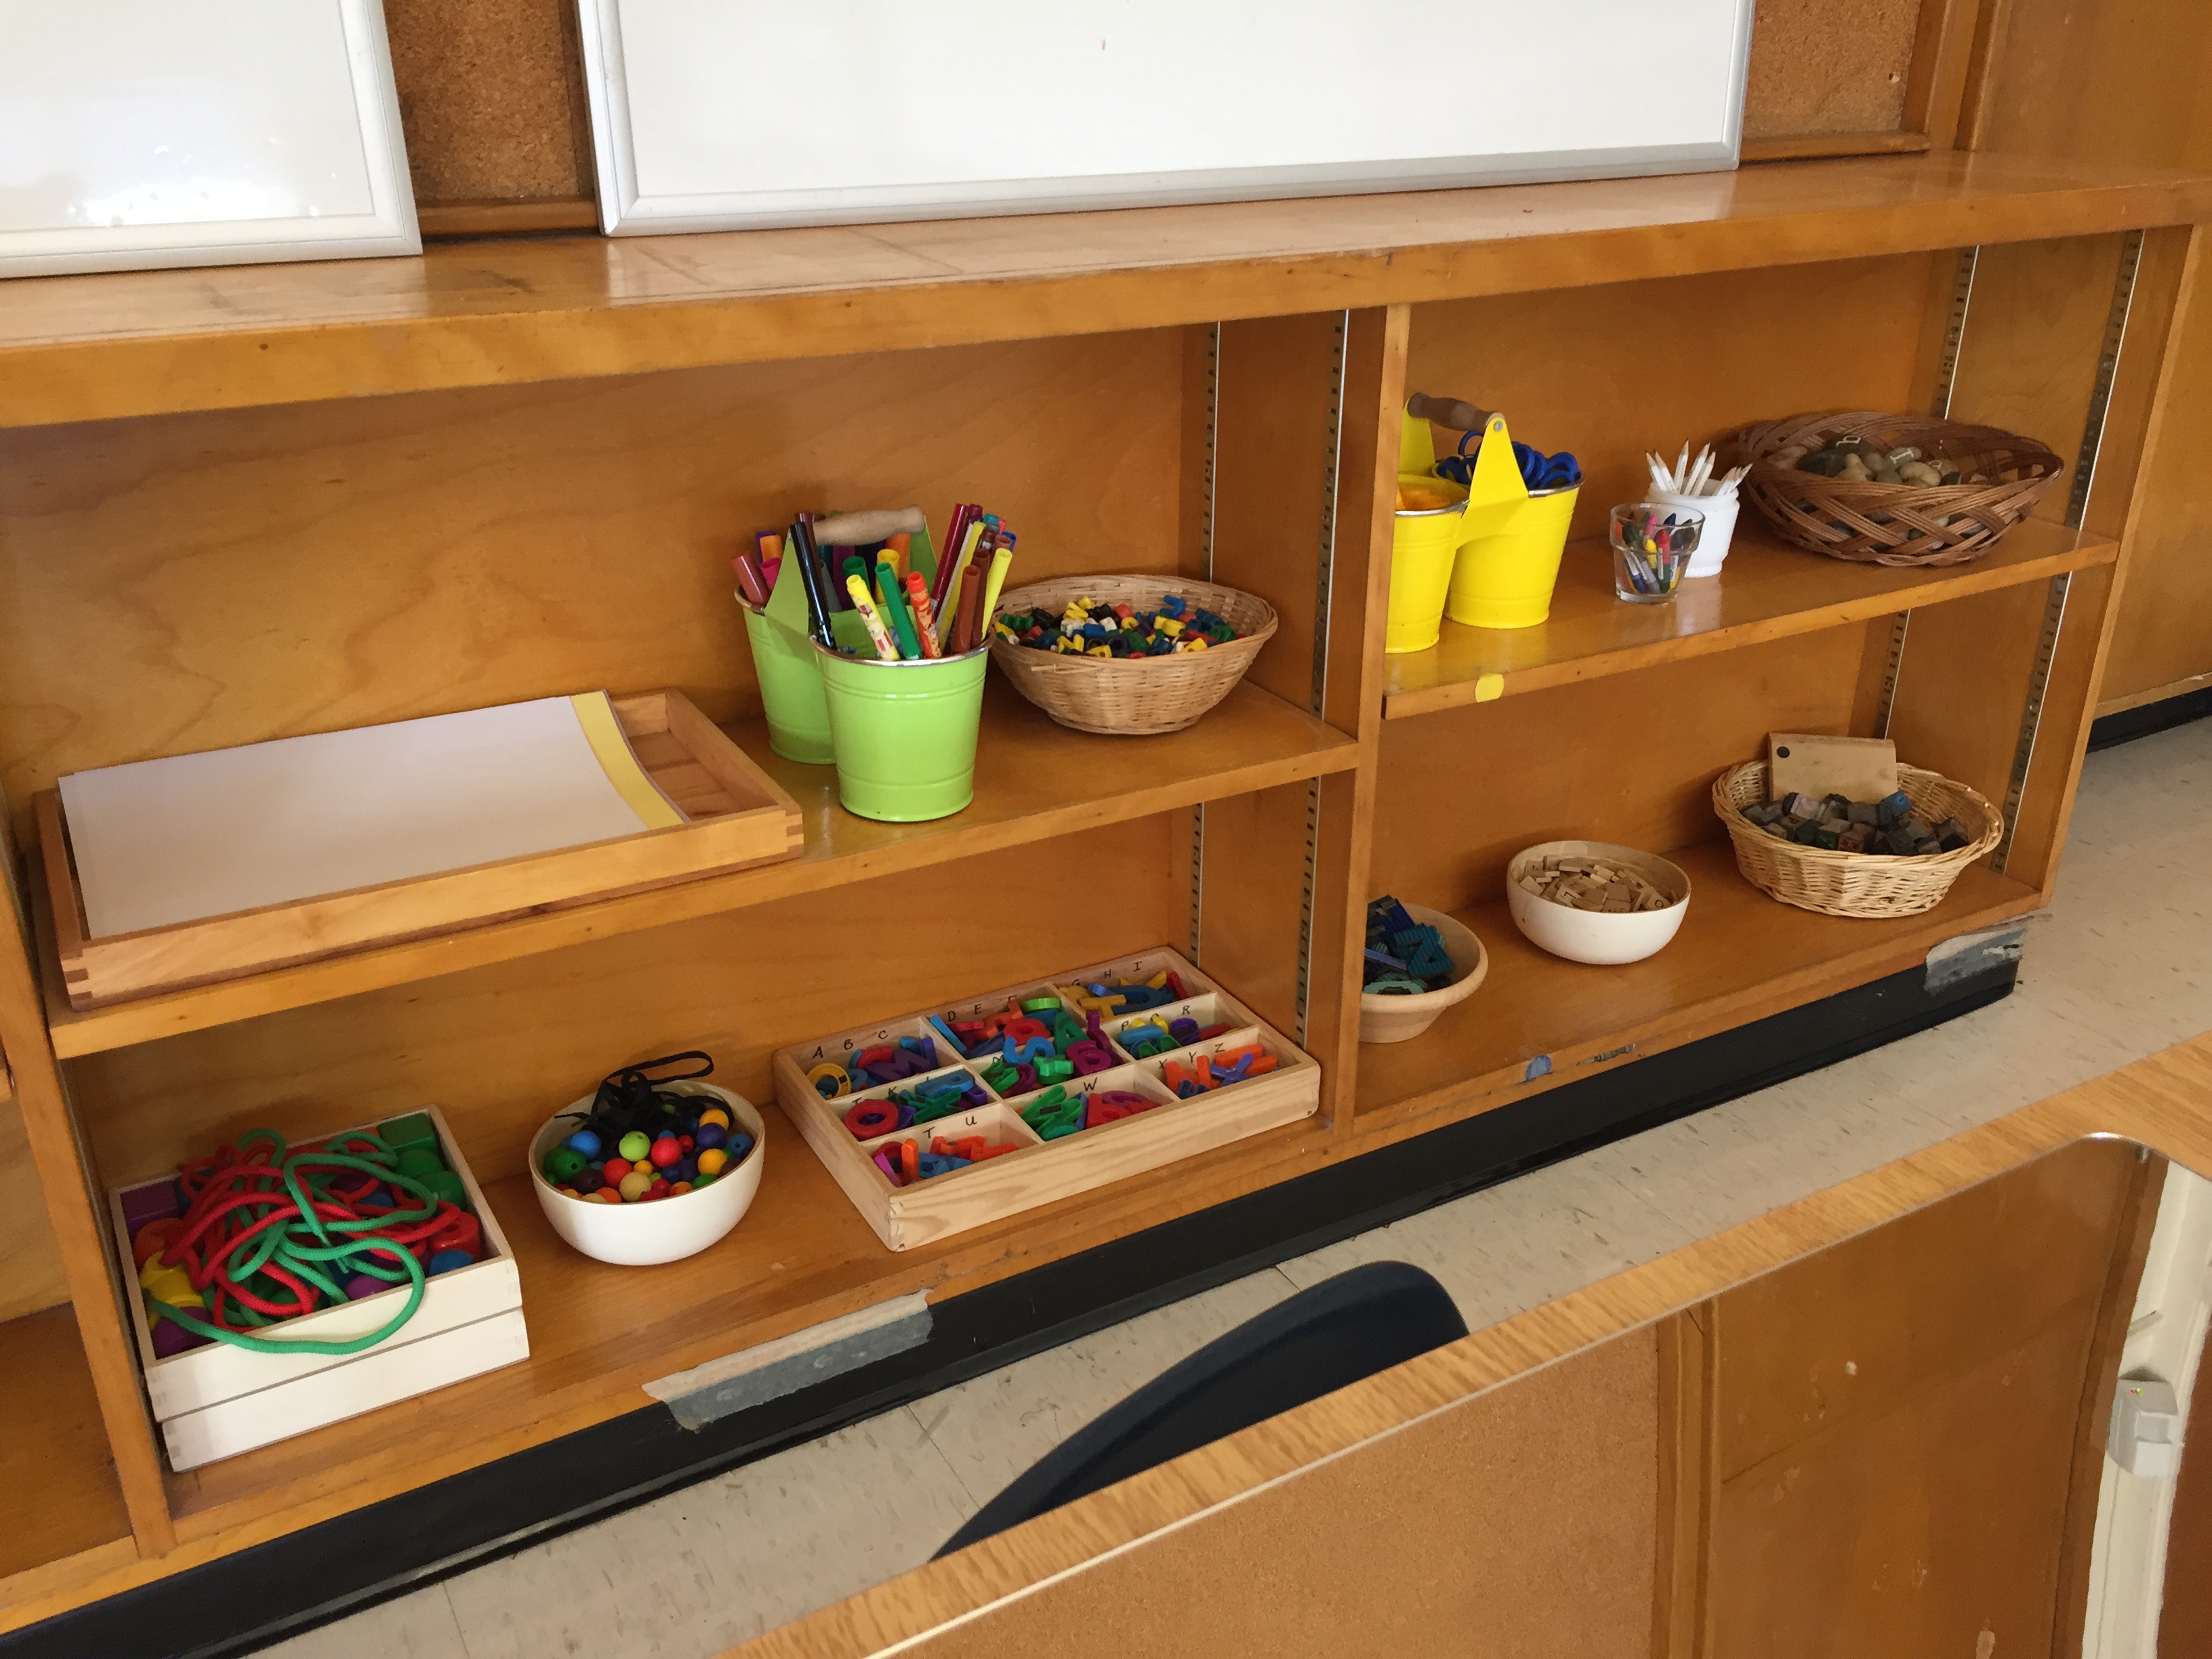
Writing Centre materials. We have beads with laces for fine motor development, magnetic letters, paper, markers, pencils, crayons, glue, scissors, letter tiles, and letter stamps.

IMG_0181

The Art Studio. Simple materials for making and creating are out right now. My students from last year were very interested in creating with recycled cardstock that a parent donates regularly. They love the stencils and making books with tape/washi tape. All of those materials are out for them to use as they wish and I’m confident the returning students will model for their new classmates how to use these materials creatively!

20170901_152549456_iOS

I love this simple shelving for storing supplies. We can easily switch out or add new materials as interests arise.

20170901_152556494_iOS

I like to have these guys on hand at the Art Studio. We will be getting to self-portraits this month and I find them helpful for that process! You can also see one of my many plants in the room. This one is fake, but I have a number of real plants as well. I think the greenery adds a softness to the space. Plants are also supposed to be calming.

20170901_152551357_iOS

This shelf at the Art Studio doubles as a divider for the drama centre. I attached the bamboo trellis to the legs of the shelf for stability. Sometimes you have to get creative!

IMG_0175

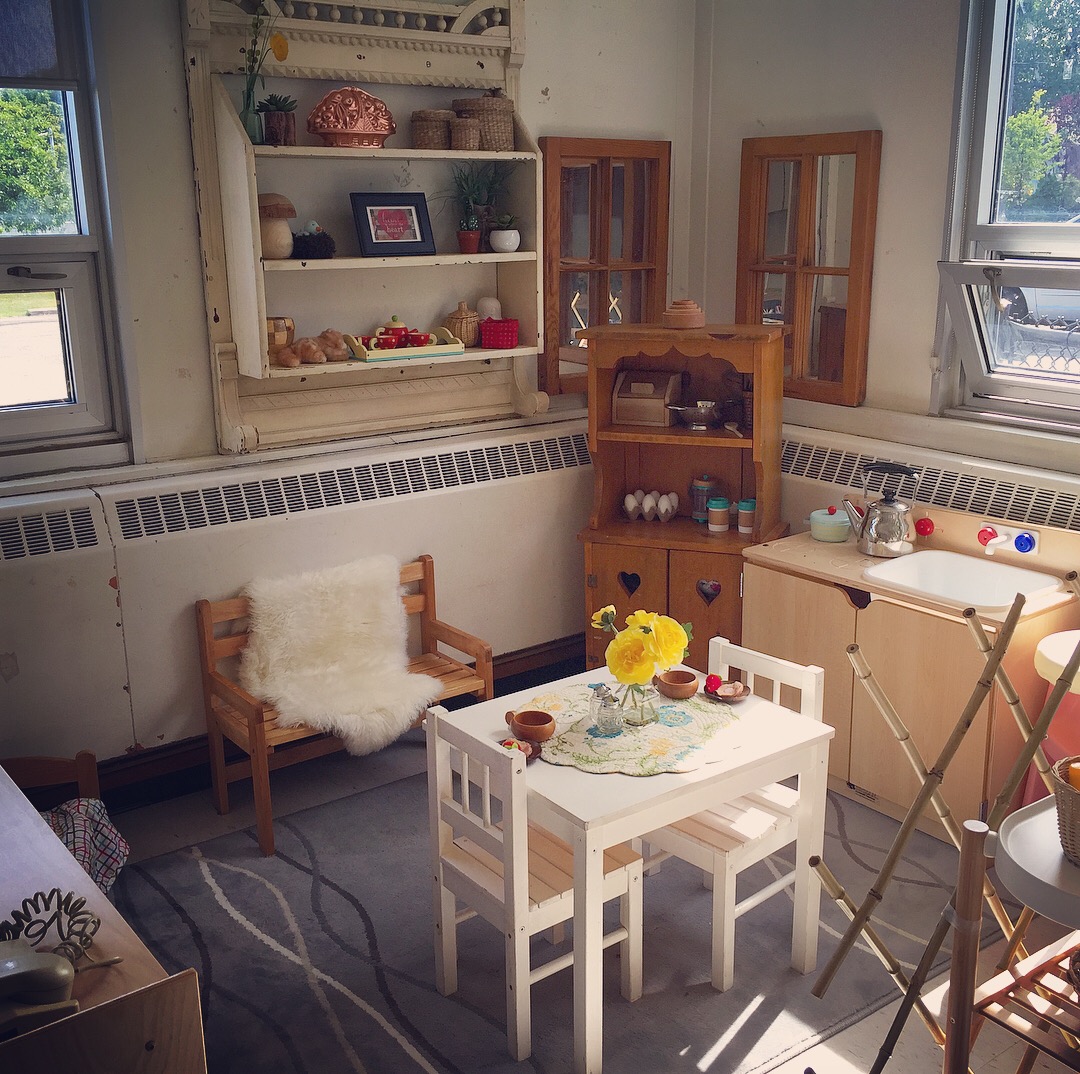
Drama centre. I always start the year with a “home” set-up in the drama centre for comfort and familiarity.

IMG_0177

Home is where the heart is! This shelf has homey knick-knacks now, but I hope to add some of the children’s creations to it later.

IMG_0176

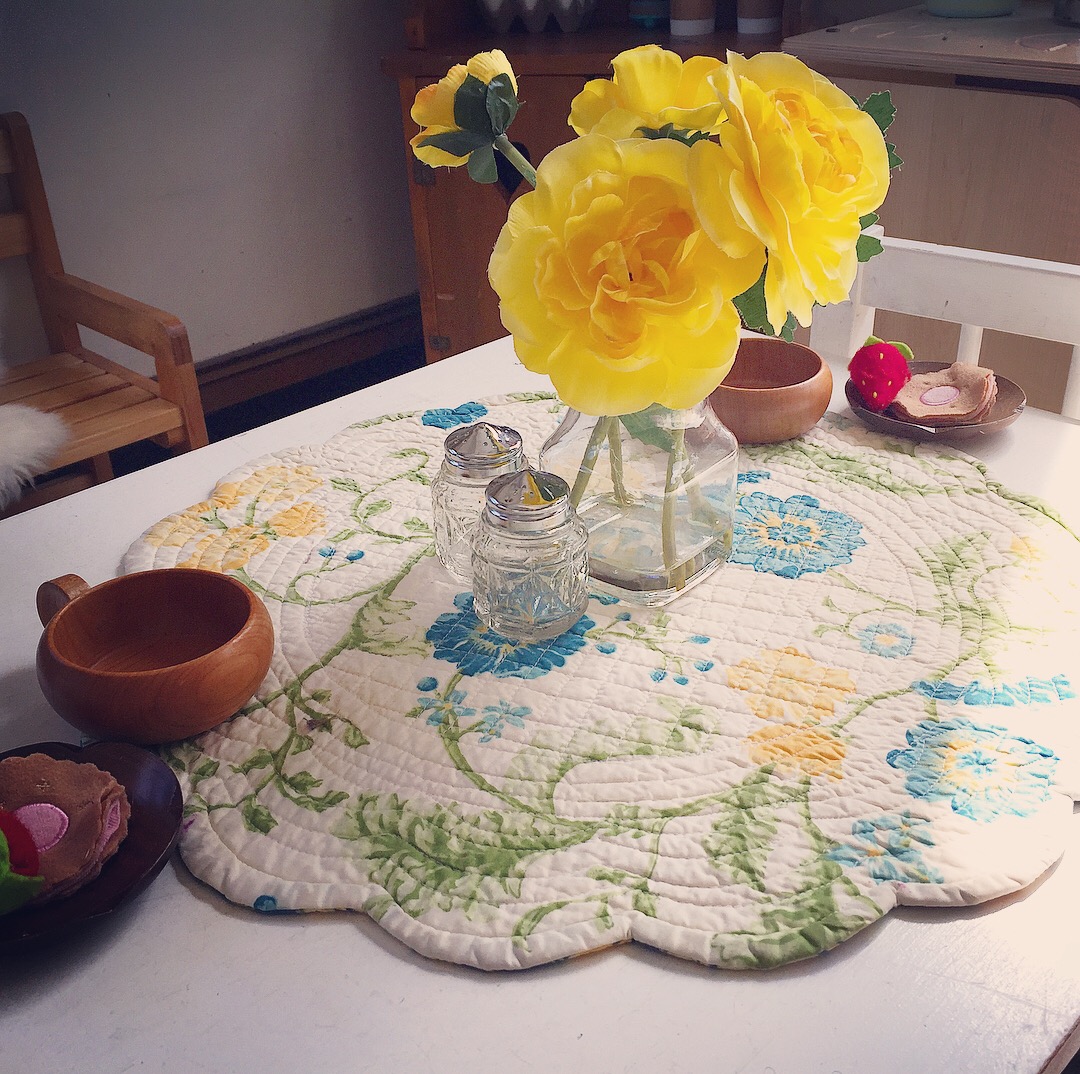
Tea, anyone?

IMG_0178

Math Centre. We have materials for sorting and counting out at the moment. I love my number line cards from Right Brained Mom – you can download them for free on her website: https://rightbrainedmom.com/2017/08/28/free-printable-numbers-1-10/

IMG_0179

Close up of math materials. Sorry for the fuzzy photo – it was particularly sunny when I took the picture!

20170901_152758507_iOS

The Quiet Centre. A space for children to “get away” and have a moment to themselves. I introduced a quiet centre to our class last year and it was absolutely invaluable for encouraging the children to self-regulate. We have a number of children with special needs and they also found comfort in having a spot in the class to go and “take a break.”

20170901_152642419_iOS

Science Table. I have a few monarch caterpillars at home so I will be bringing one in to school. We had Painted Lady butterflies in our class last year, so I thought the children would enjoy seeing another species of butterfly. We also have some milkweed plants in our outdoor play space so I hope to teach the children how important the milkweed is to the monarch species.

20170901_152624242_iOS

This is actually our water table, but we are choosing to set out Lego for the beginning of the year. This is another centre that will need no explanation to the children. Lego always inspires  creative work and the children often work collaboratively on these green building mats.

20170901_152655993_iOS

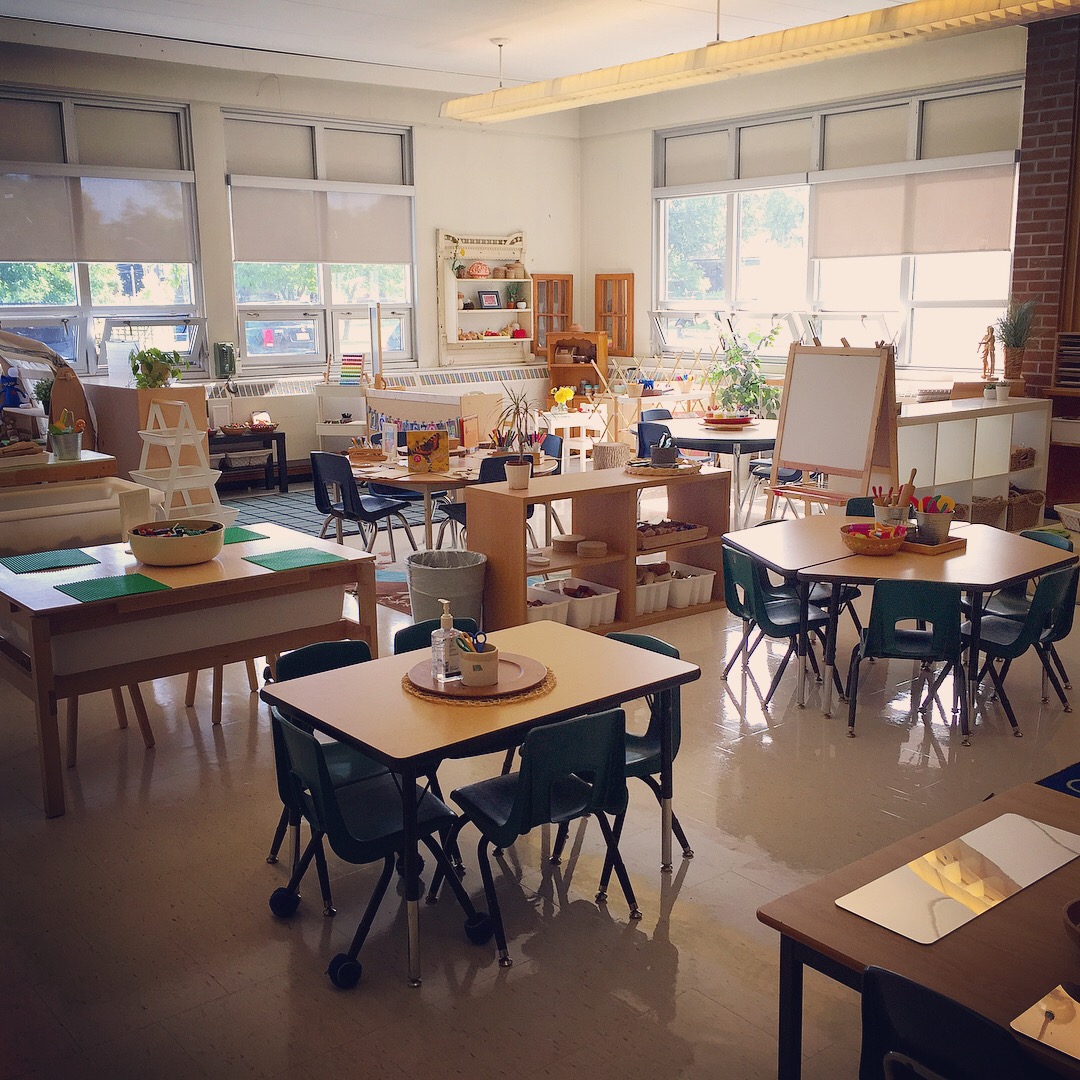
Here is a picture of the whole space. You can see the snack table and the play dough table in this picture.

So there it is! A new space for learning together. Today while I was working, a family who was registering their child came in and exclaimed, “Wow! It looks just like a home!” I hope our students feel the same way when they see their new home away from home next week. Happy weekend, everyone!

Playdough Provocations: Inventor’s Workshop!

img_5627

If you are looking for a way to jazz up the materials at your playdough table, I have a tried and tested provocation that I’m sure your students will love: The Inventor’s Workshop. I stumbled upon this amazing idea while perusing one of my favourite blogs: The Imagination Tree. On her blog, Anna has a list of over 50 ideas for using playdough which I go to whenever I’m in need of some inspiration. You can find her list as well as her recipes for playdough here: http://theimaginationtree.com/2013/01/the-z-of-play-dough-recipes-and.html

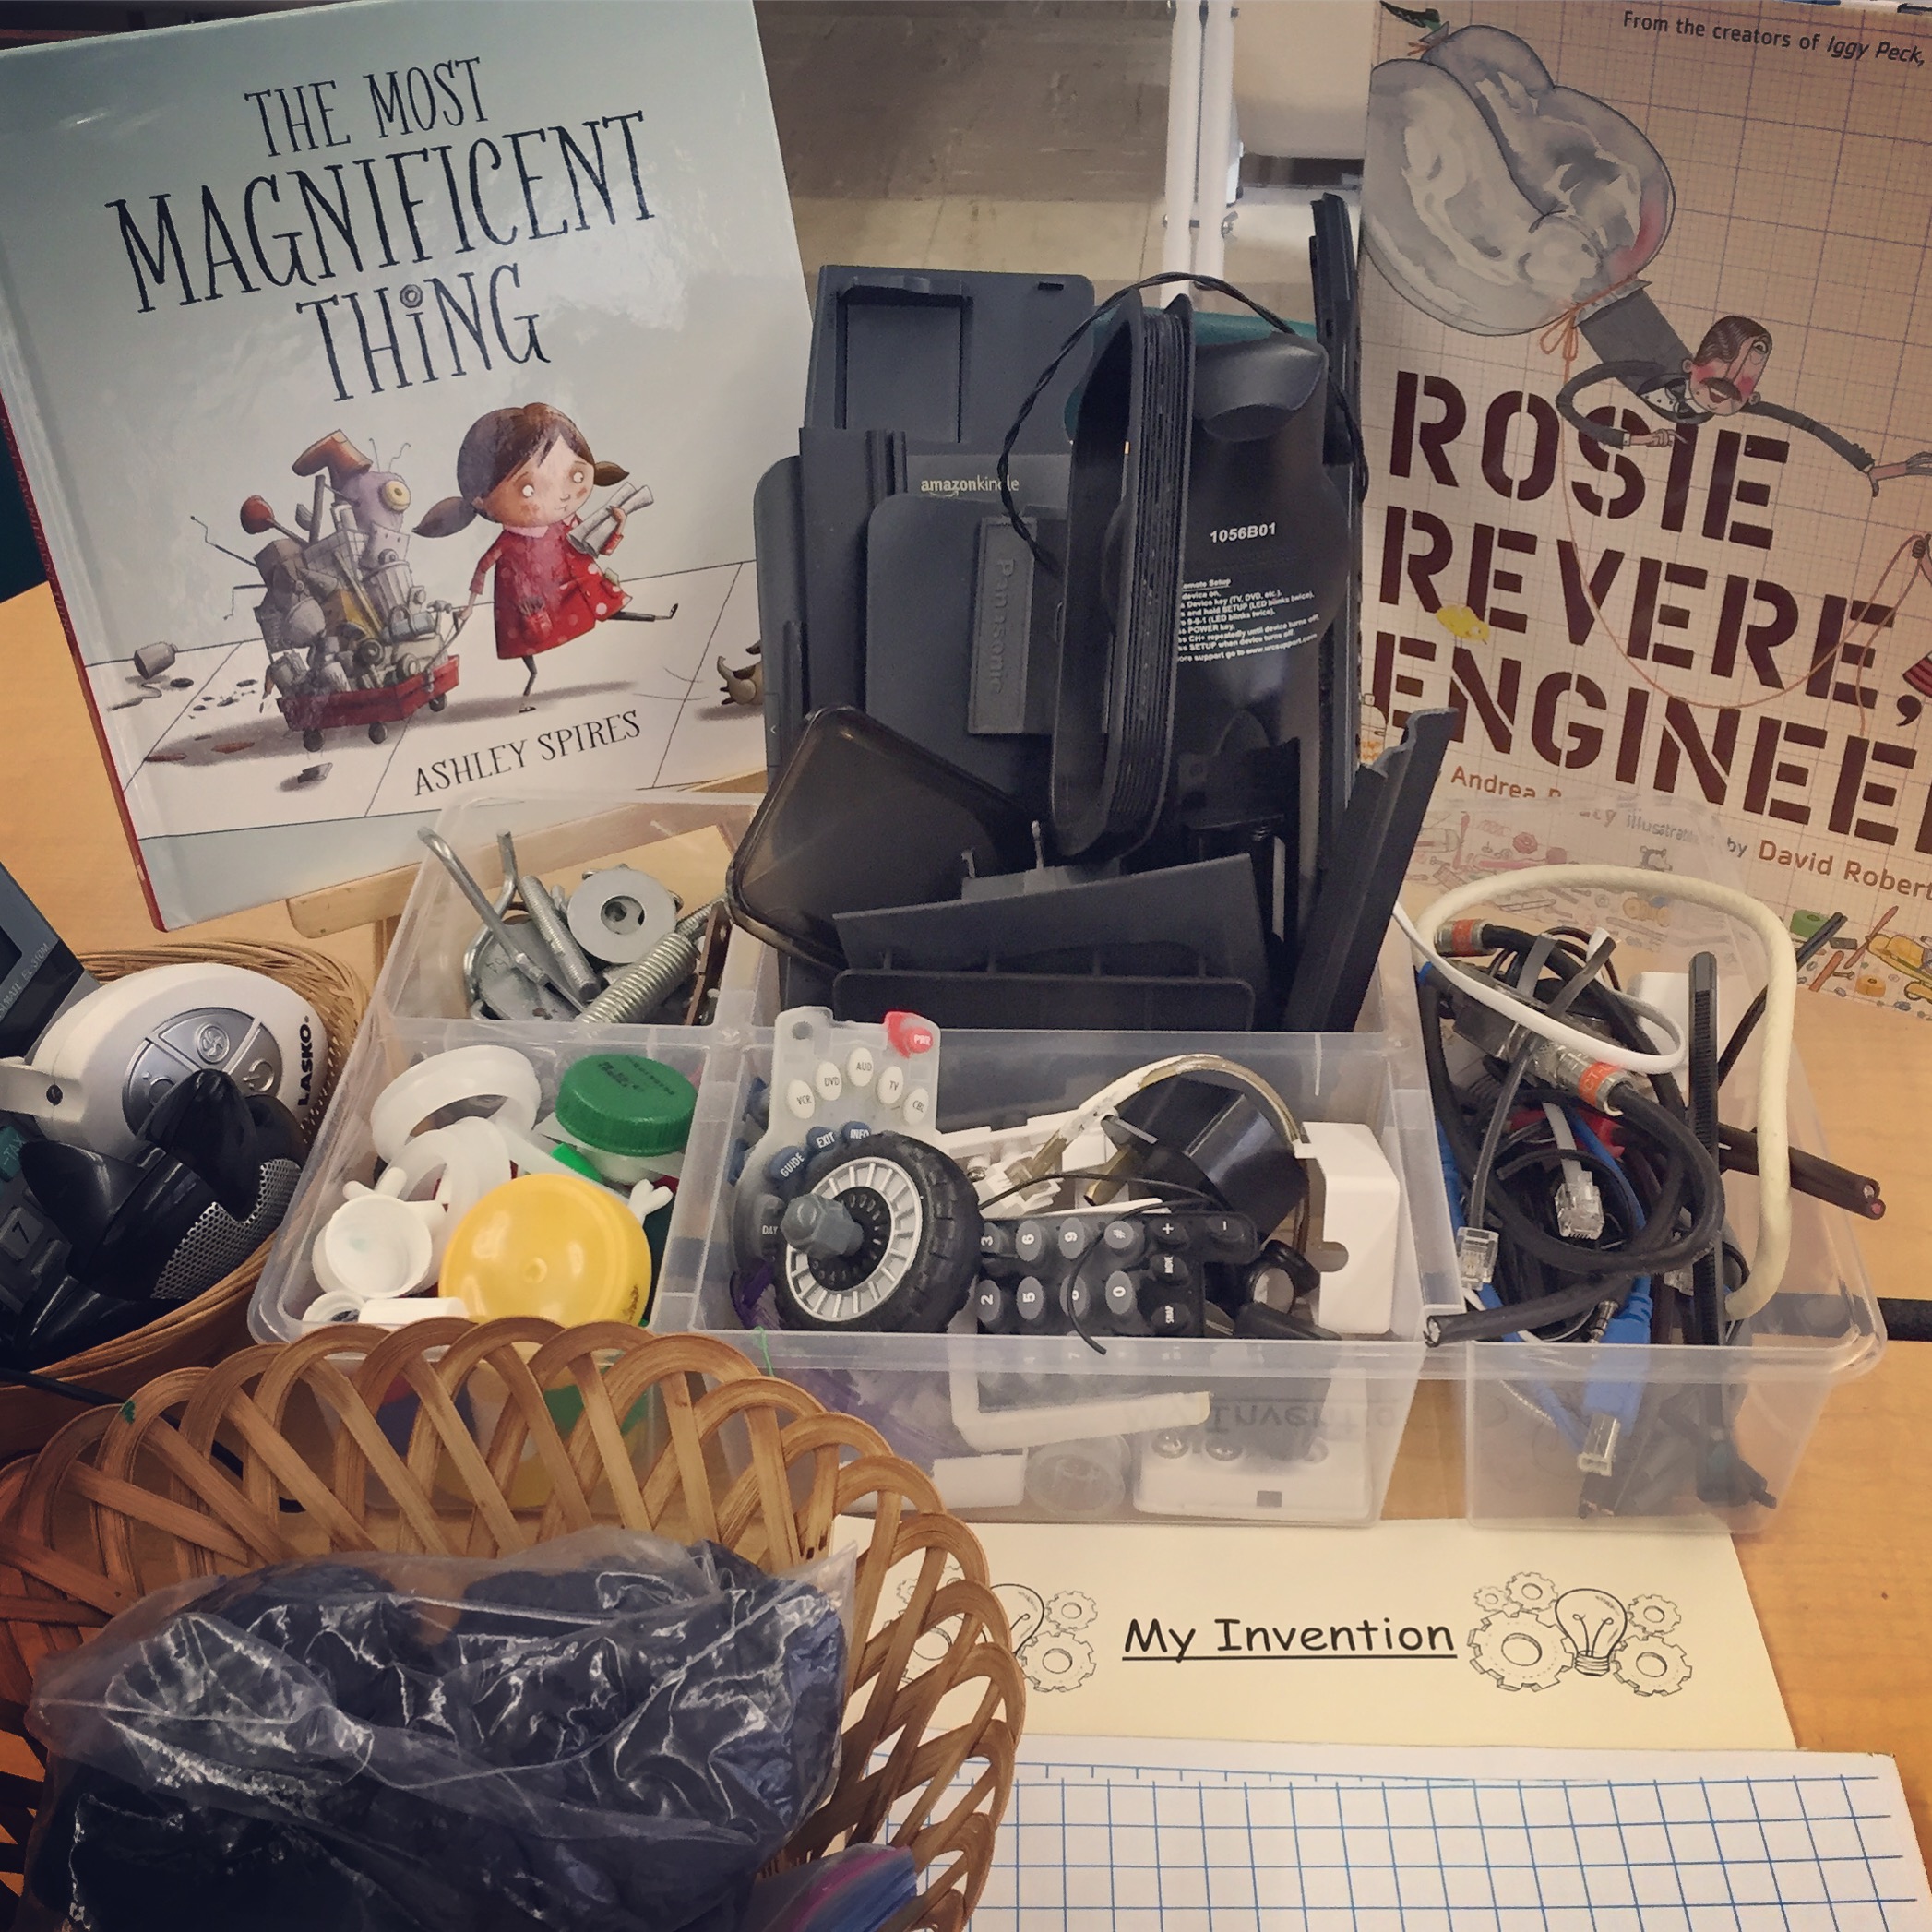
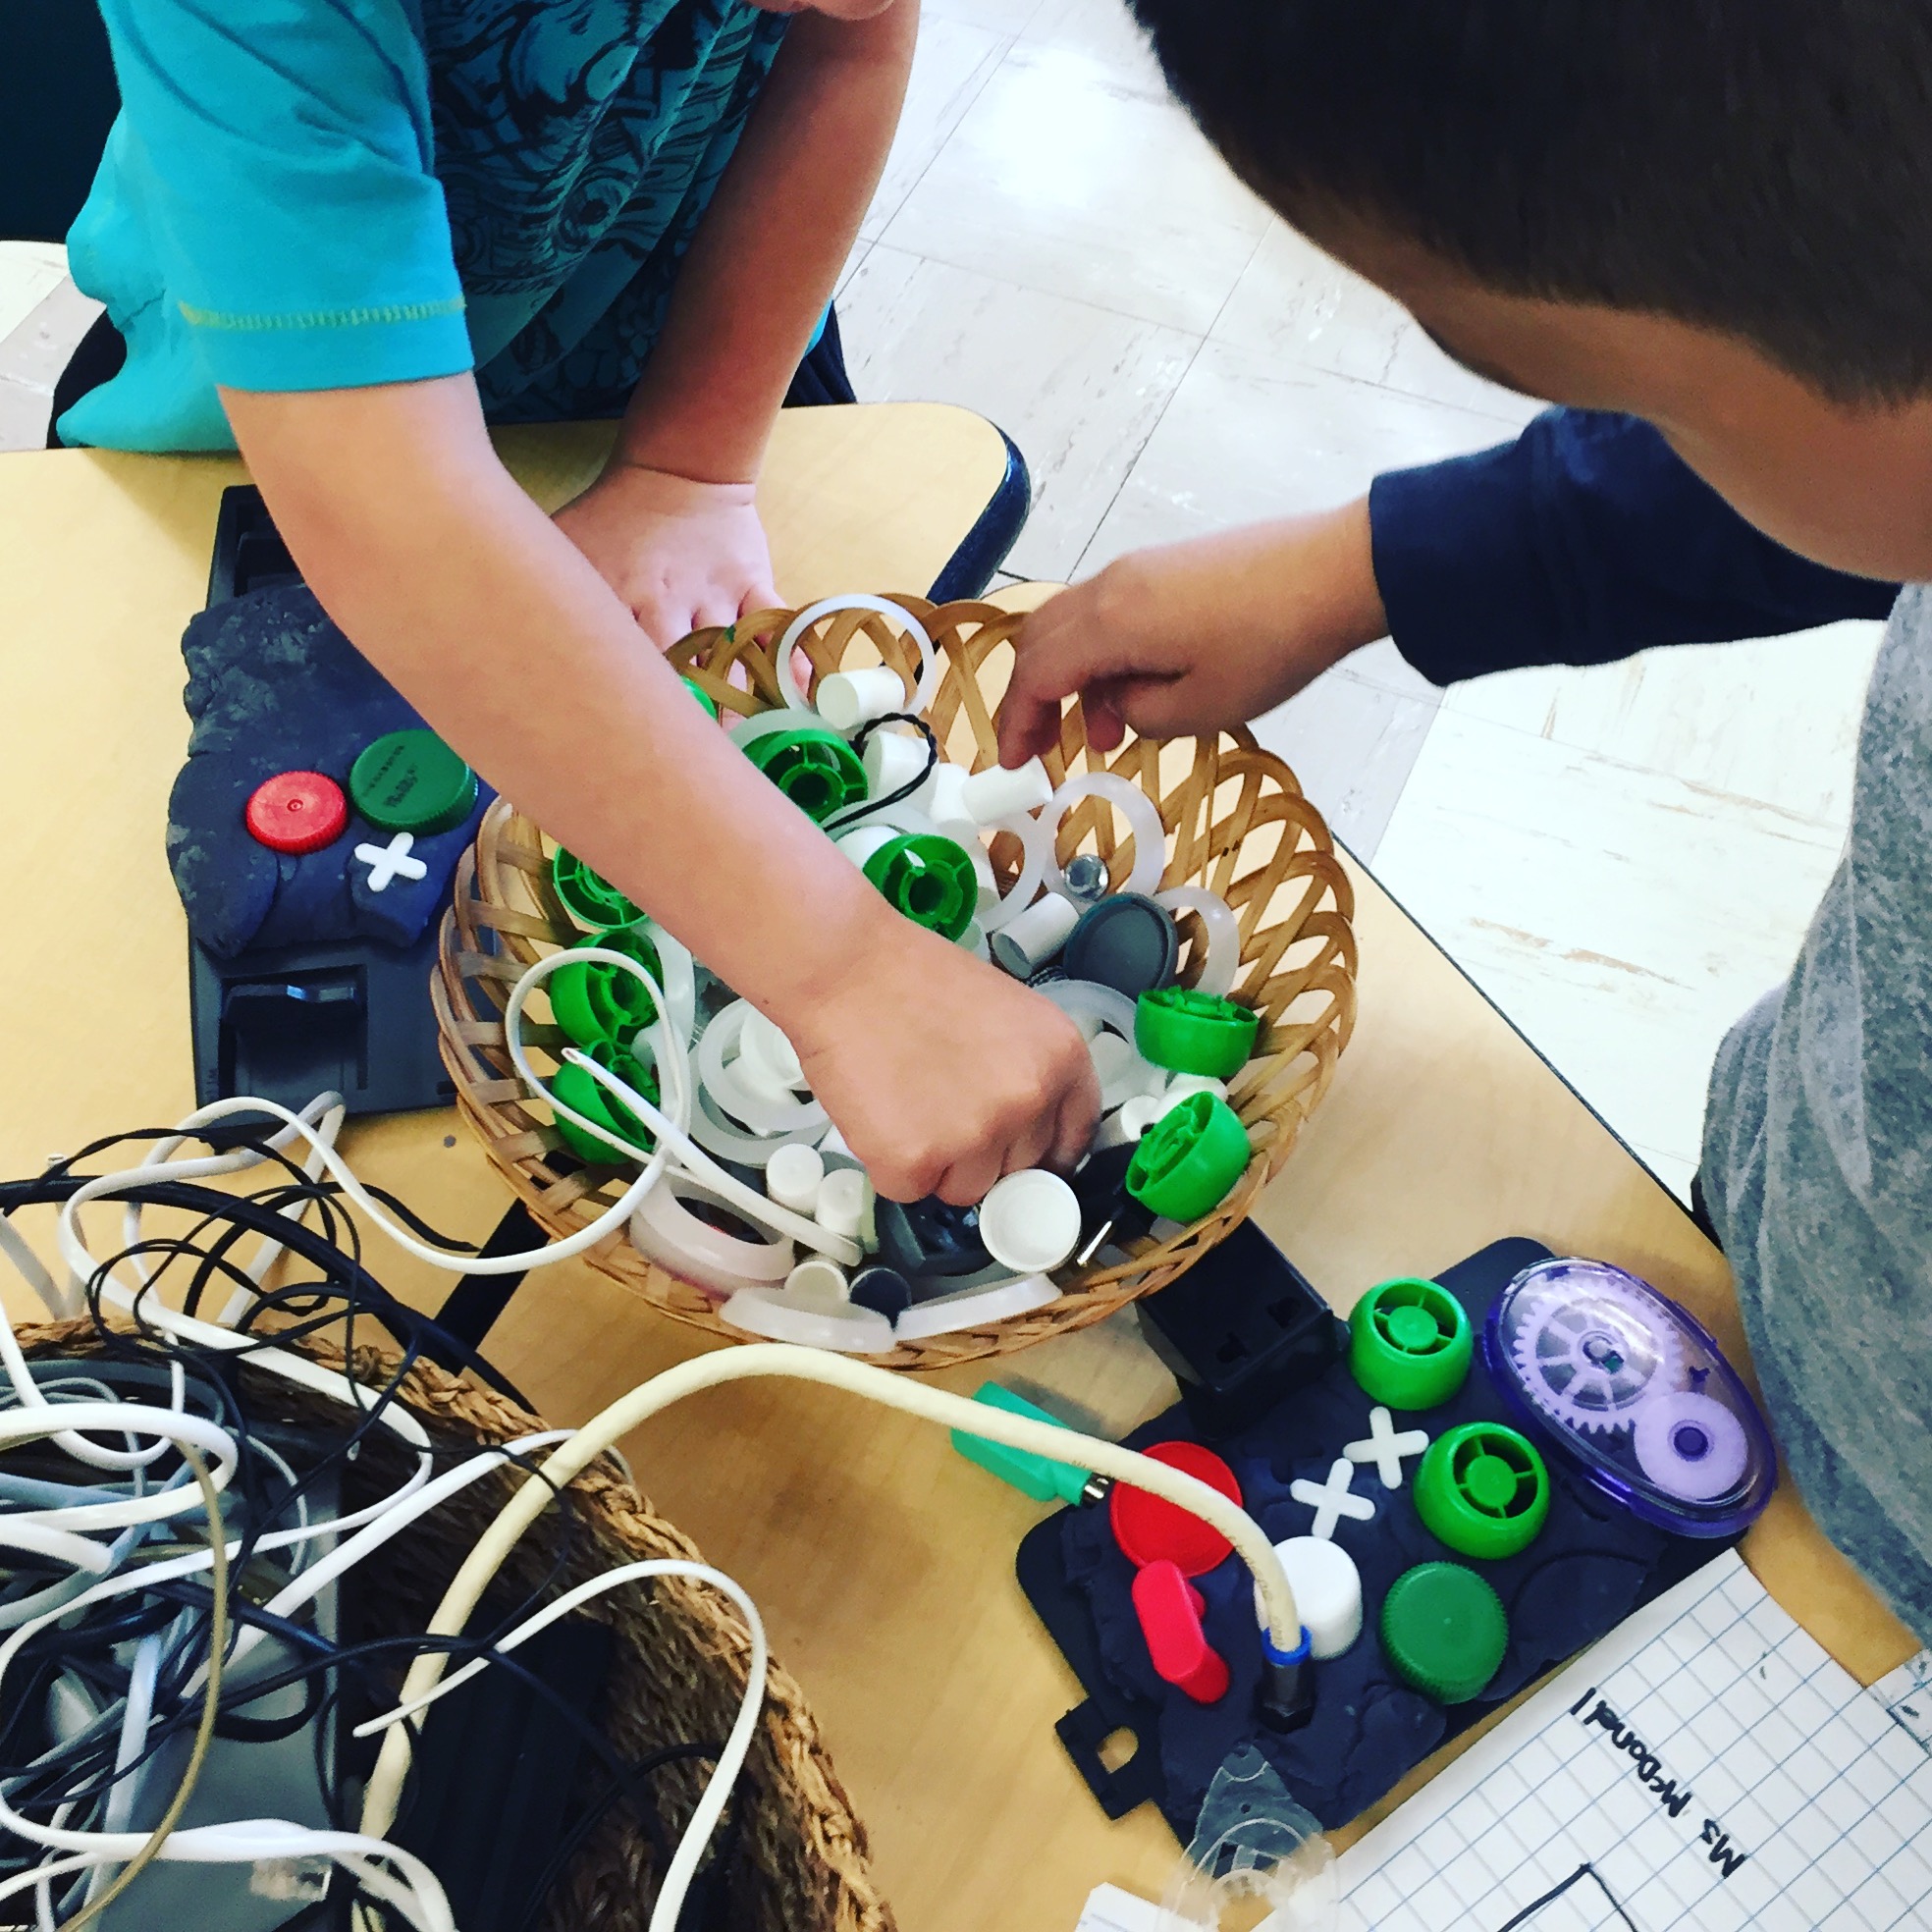
Before the children visited this centre, I set them up with some schema about what an inventor is by reading The Most Magnificent Thing by Ashley Spires and Rosie Revere, Engineer by Andrea Beaty (both titles pictured above). I have my own collection of technology cast-offs, but I also wanted to involve the children in the creation of this centre so I sent home a note asking parents for any old electronic materials that we could use. The very next day we got an awesome assortment of old wires (which we trimmed for ease of play), speakers, remotes, cell phones, etc. which we sorted into our loose parts tray. I also added some plastic caps and metal loose parts I had in my loose parts bin.

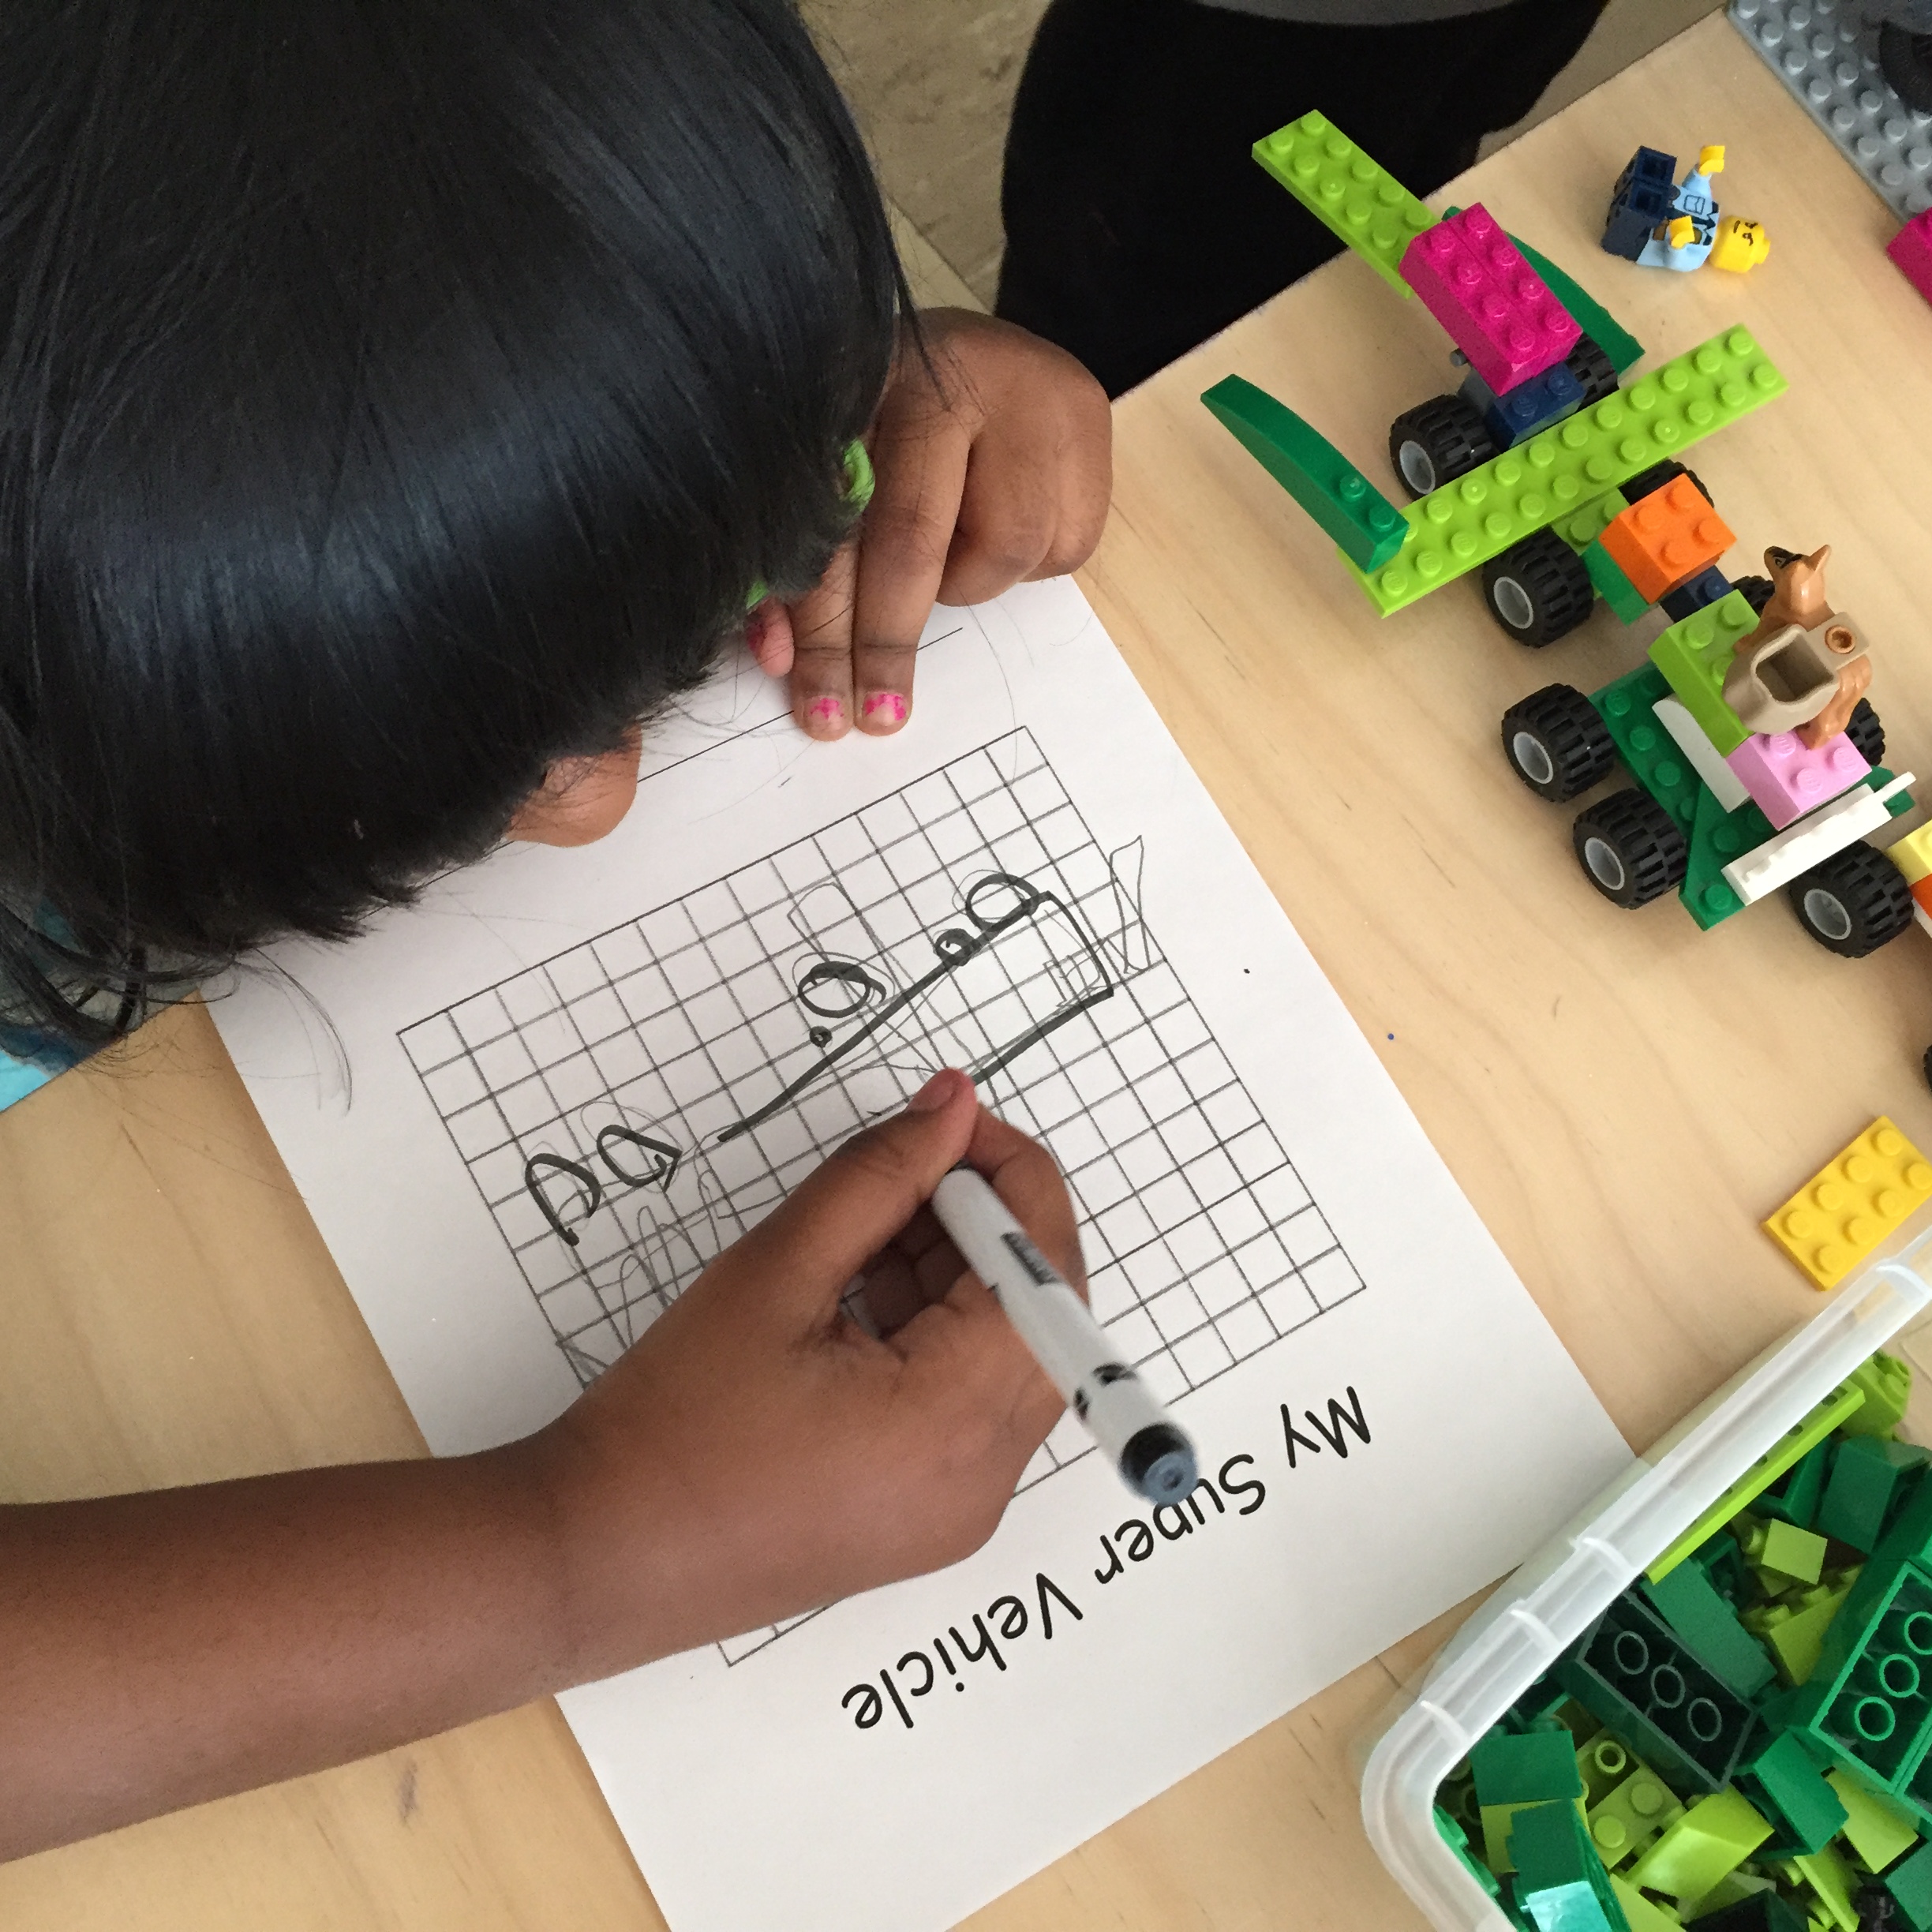
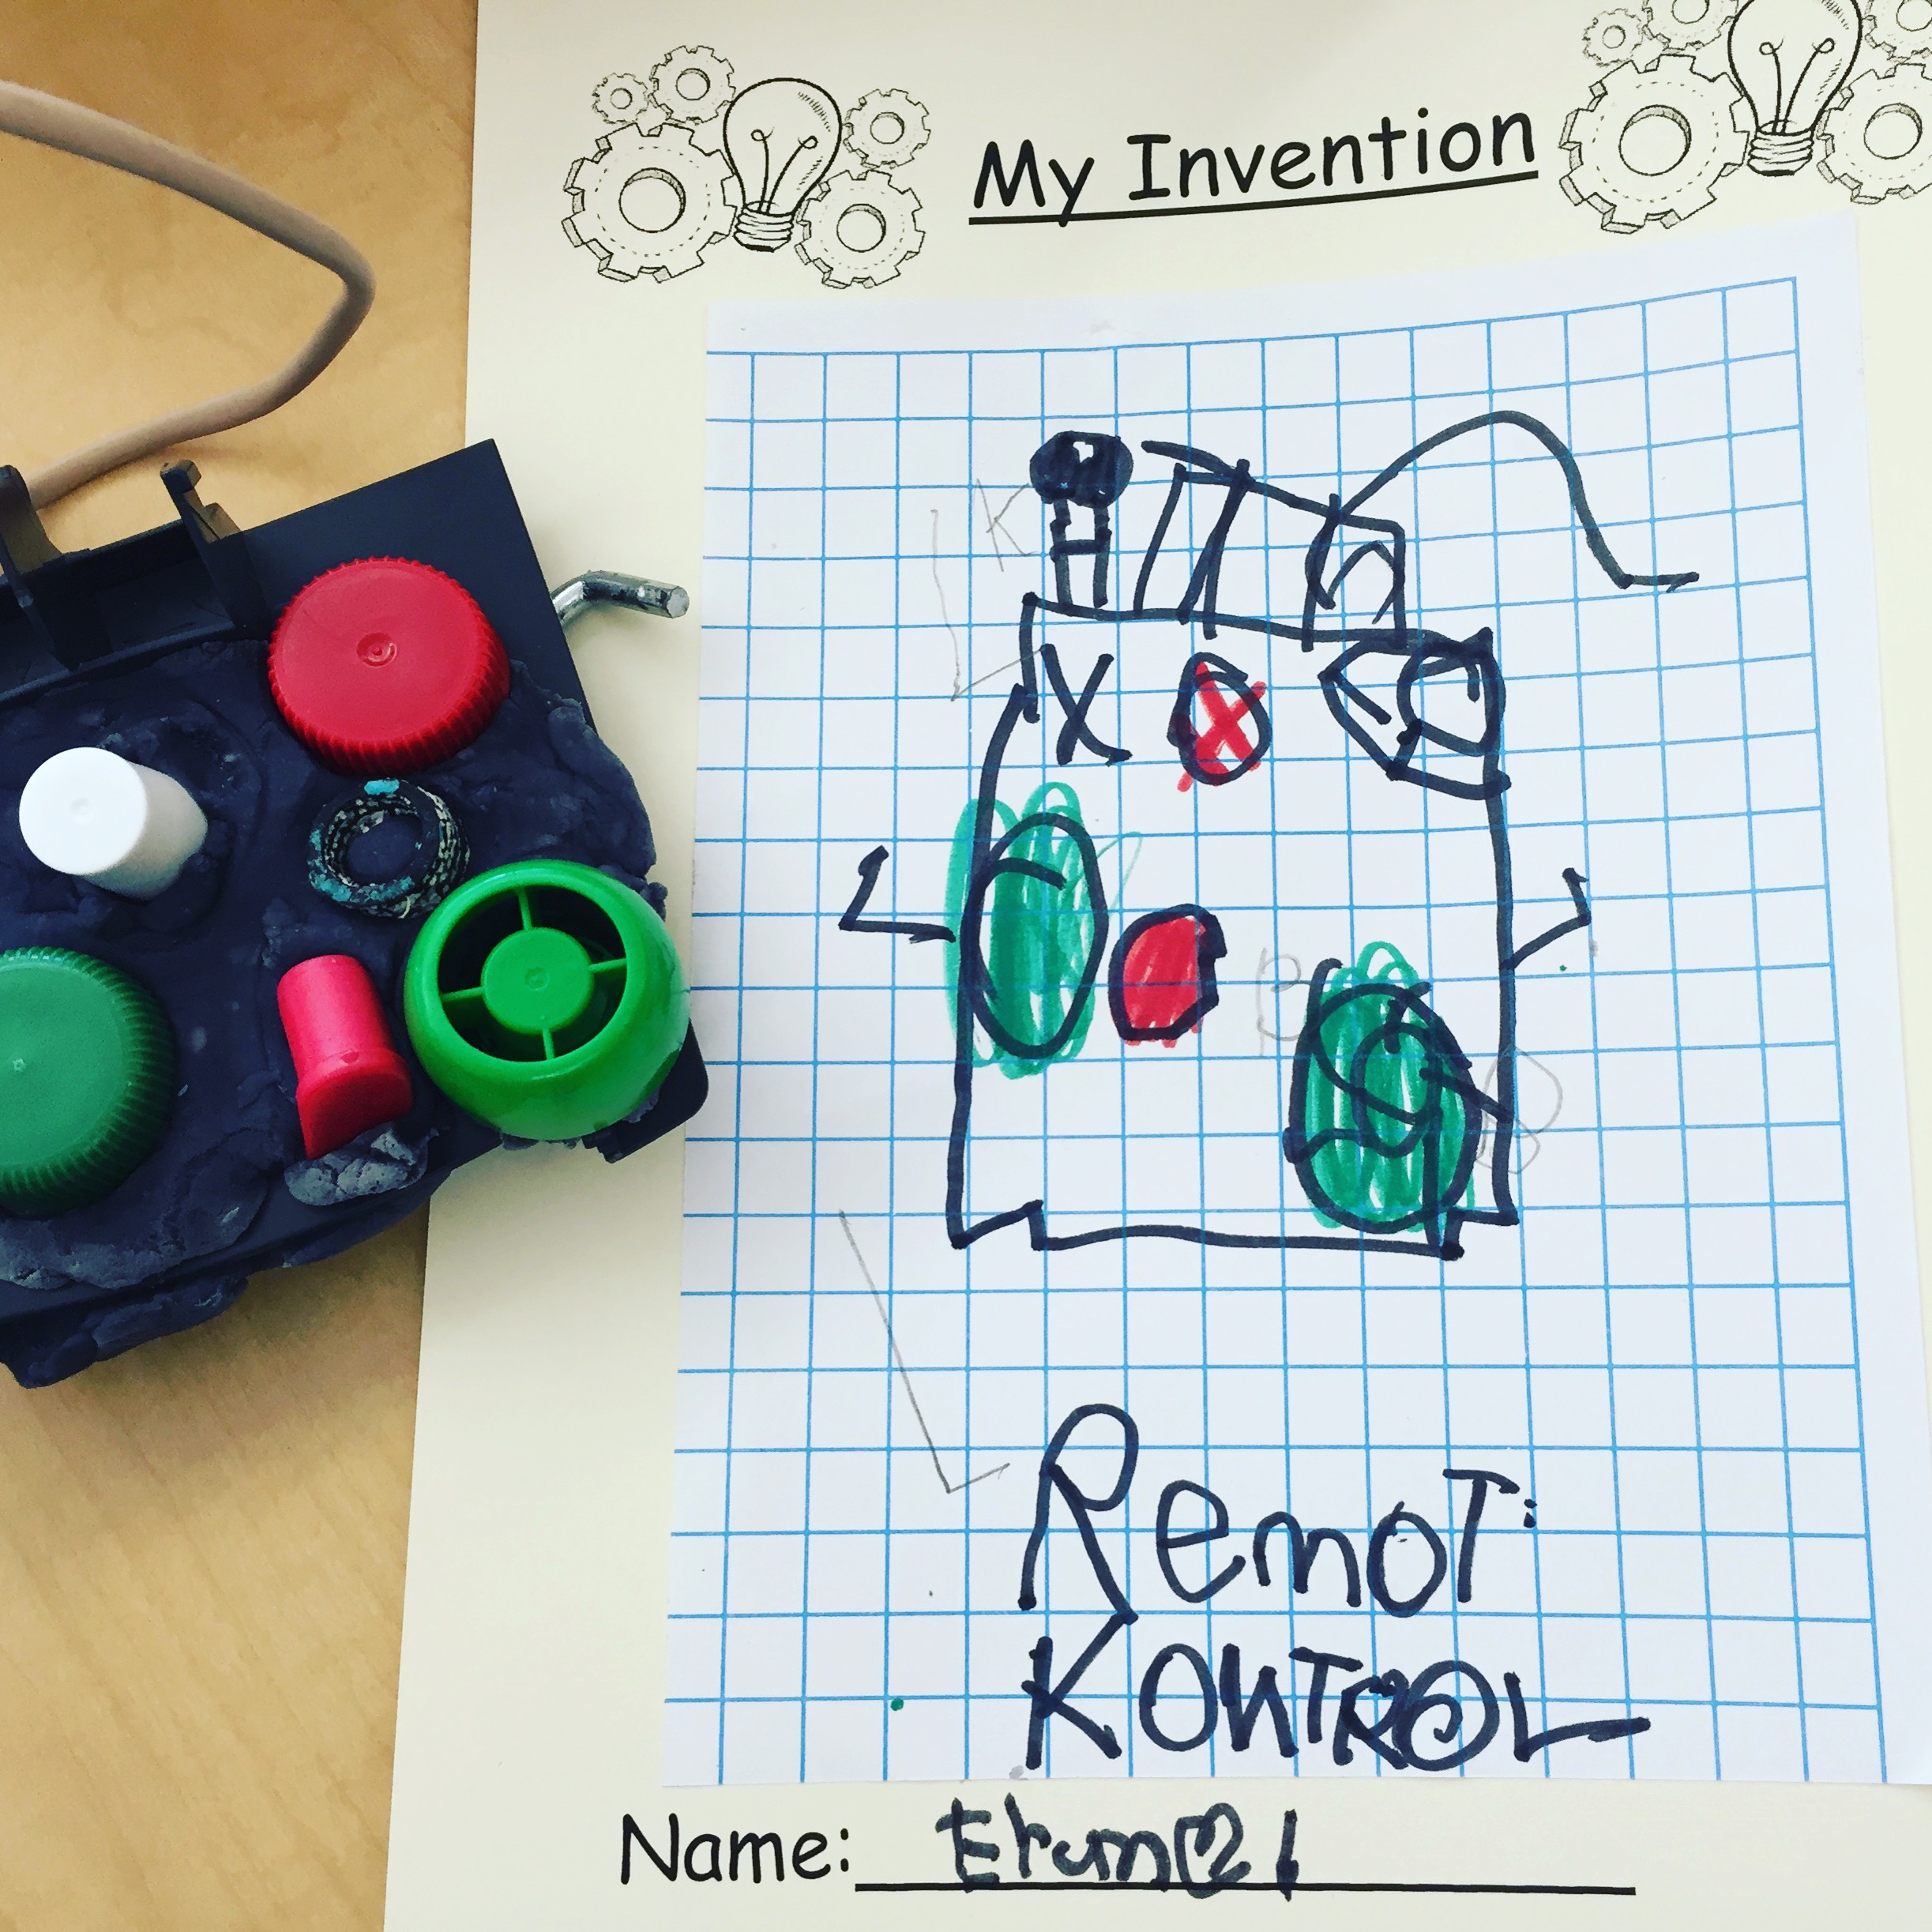
In addition to the playdough and a collection of loose parts, I also wanted the children to record their creations on paper. I created a recording sheet with “My Invention” at the top. I also provided the children with a new kind of paper to sketch on: graph paper. I told them it was a special kind of paper that planners and inventors might use. I even modeled how to draw a creation I made by sketching and labeling the parts of my machine (like the on/off button, etc.). The children couldn’t WAIT to give this one a go!

img_5565

img_5570

“This is the ‘off’ button!”

img_5596

These students were working independently until they realized they could connect their inventions together with a long wire. They were so excited about this discovery!

img_5712

“This is a ‘potato maker’ – it can make all kinds of potatoes: chips, french fries, mashed potatoes…”

img_5595

This student took time to colour and label her drawing to match her creation. “I put a check mark to show that it’s done!”

img_5591

“A Tic Tac Toe machine.”

One of the interests that developed from this provocation was an interest in robots. This was in part due to our experimentation with the apps ChatterPix and ChatterKid. Both versions of the app are nearly identical but ChatterKid has a three second countdown before it starts recording so that students know when to start talking.

chatterpix.png

Basically, ChatterPix allows you to bring photos, drawings, and creations to life. You simply “draw on” a mouth and record your message and your image will talk! Here is a sample that one of my students made. This particular student is generally quite shy, so him having the confidence to not only record something but then share it confidently with the class at reflection time was a breakthrough (you can click on the link below to see the video on Twitter)!

Here are a few of the robots the children created:

What I liked most about this provocation  (besides the fact that it is engaging, creative, and fun!) is that it provided so many opportunities for our students to engage in literacy behaviours. The children were actively telling each other about their inventions as they worked, negotiating the use of special materials, and of course recording and writing about their inventions. During reflection time, the class was rapt with attention listening to each other describe what their inventions could do and how they were made. Many students were inspired to visit (or re-visit) this centre after hearing about what their classmates had created there.

Have you ever tried an Inventor’s Workshop in your class? Are you using ChatterPix with your students? I’d love to hear about what you’re doing!

Snowflake Loose Parts

img_6187

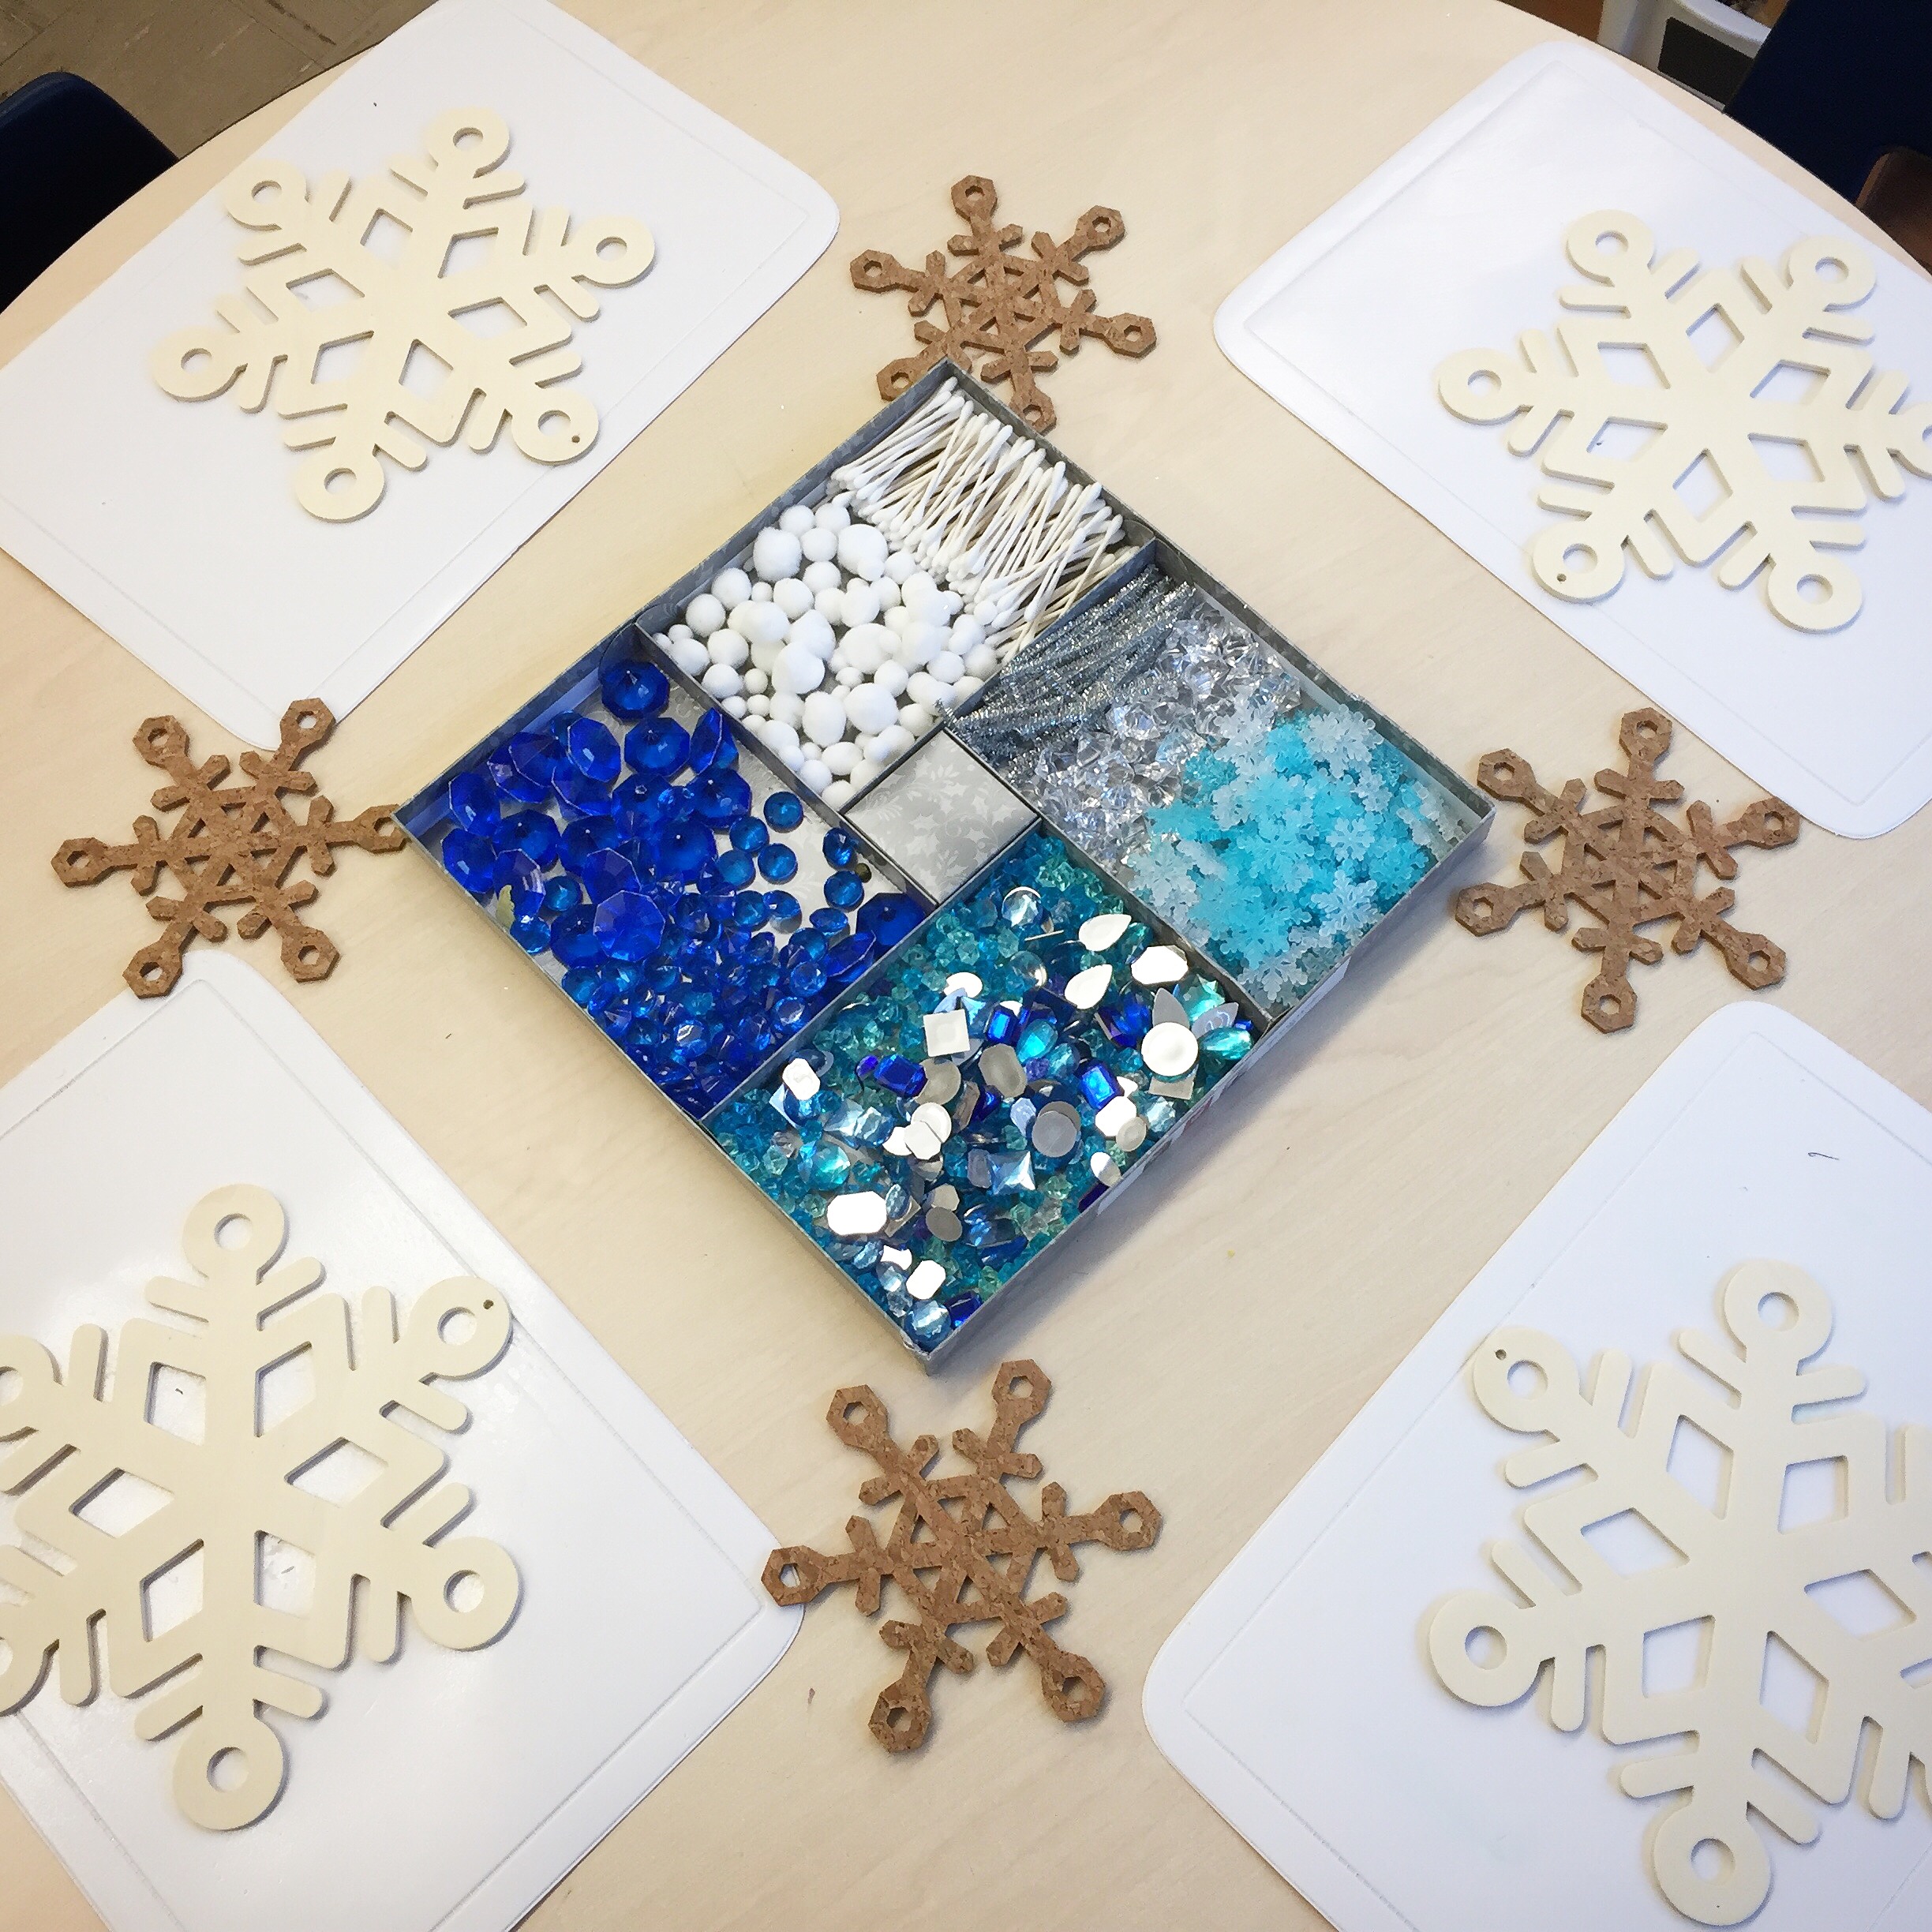
Before the winter break we set up this loose parts provocation at the science table. The children thoroughly enjoyed touching and combining the materials to make stunning snowflake designs. I watched with interest to see how some children randomly placed their materials on the snowflakes (by clumping, stacking, and piling materials together) while others were meticulous about creating symmetrical designs. All you need for this provocation is a selection of colourful loose parts (I went with blue, silver, clear and white pieces. The children particularly loved the gems!) and some snowflake designs. I found these wooden and cork snowflakes at my local dollar store, but printed out templates would also work. This activity would also be beautiful on the light table!

Take a look at some of the children’s stunning designs:

img_6242

Happy winter!

Writer’s Workshop

img_3905

Writer’s Workshop. I’ve been meaning to get to this post for some time. I often have visitors in my classroom, and when I do, Writer’s Workshop is by far the aspect of our program that gets the most interest and generates the most questions. There are MANY ways to run a writing program and mine is but one way to go about incorporating explicit writing instruction into the day. I have modeled my approach after the one created by Lucy Caulkins and modified it over the years to suit my own style and the needs of my students, as well as to include new learning I have gathered from current research and new publications.

So to start, here are the resources I recommend for learning about how to begin a Writer’s Workshop in your classroom: What’s Next for This Beginning Writer? by Janine Reid, Betty Shcultze, and Ursula Peterson:

whats-next-for-this-beginning-writer

And, Launching the Writer’s Workshop (from: Units of Study for a Yearlong Curriculum) by Lucy Caulkins (*all of the books in the Units of Study collection are wonderful). When I first began implementing Writer’s Workshop many years ago, Lucy’s book “Launching the Writer’s Workshop” would sit perched on my lap during every lesson. In the beginning, I read her mini lessons out loud verbatim until I was able to find my own voice and comfort level for teaching. They were wonderful models, easy to implement, and engaging for my students. If you aren’t sure where to begin, I recommend starting with this book.

launching

Preparations for Writer’s Workshop begin even before the first day of school. I start by finding the special place in our schedule where Writer’s Workshop will take place. Although it doesn’t have to be at the same time each day, I find that having it occur as a regular and predictable part of our routine is helpful to my students. We do Writer’s Workshop after lunch about 3 or 4 days per week. The children are used to this routine, and are prepared and excited for writing each afternoon as they return from lunch. Many children are prepared as soon as they arrive in the morning, telling me exactly what they plan on writing about later in the day!

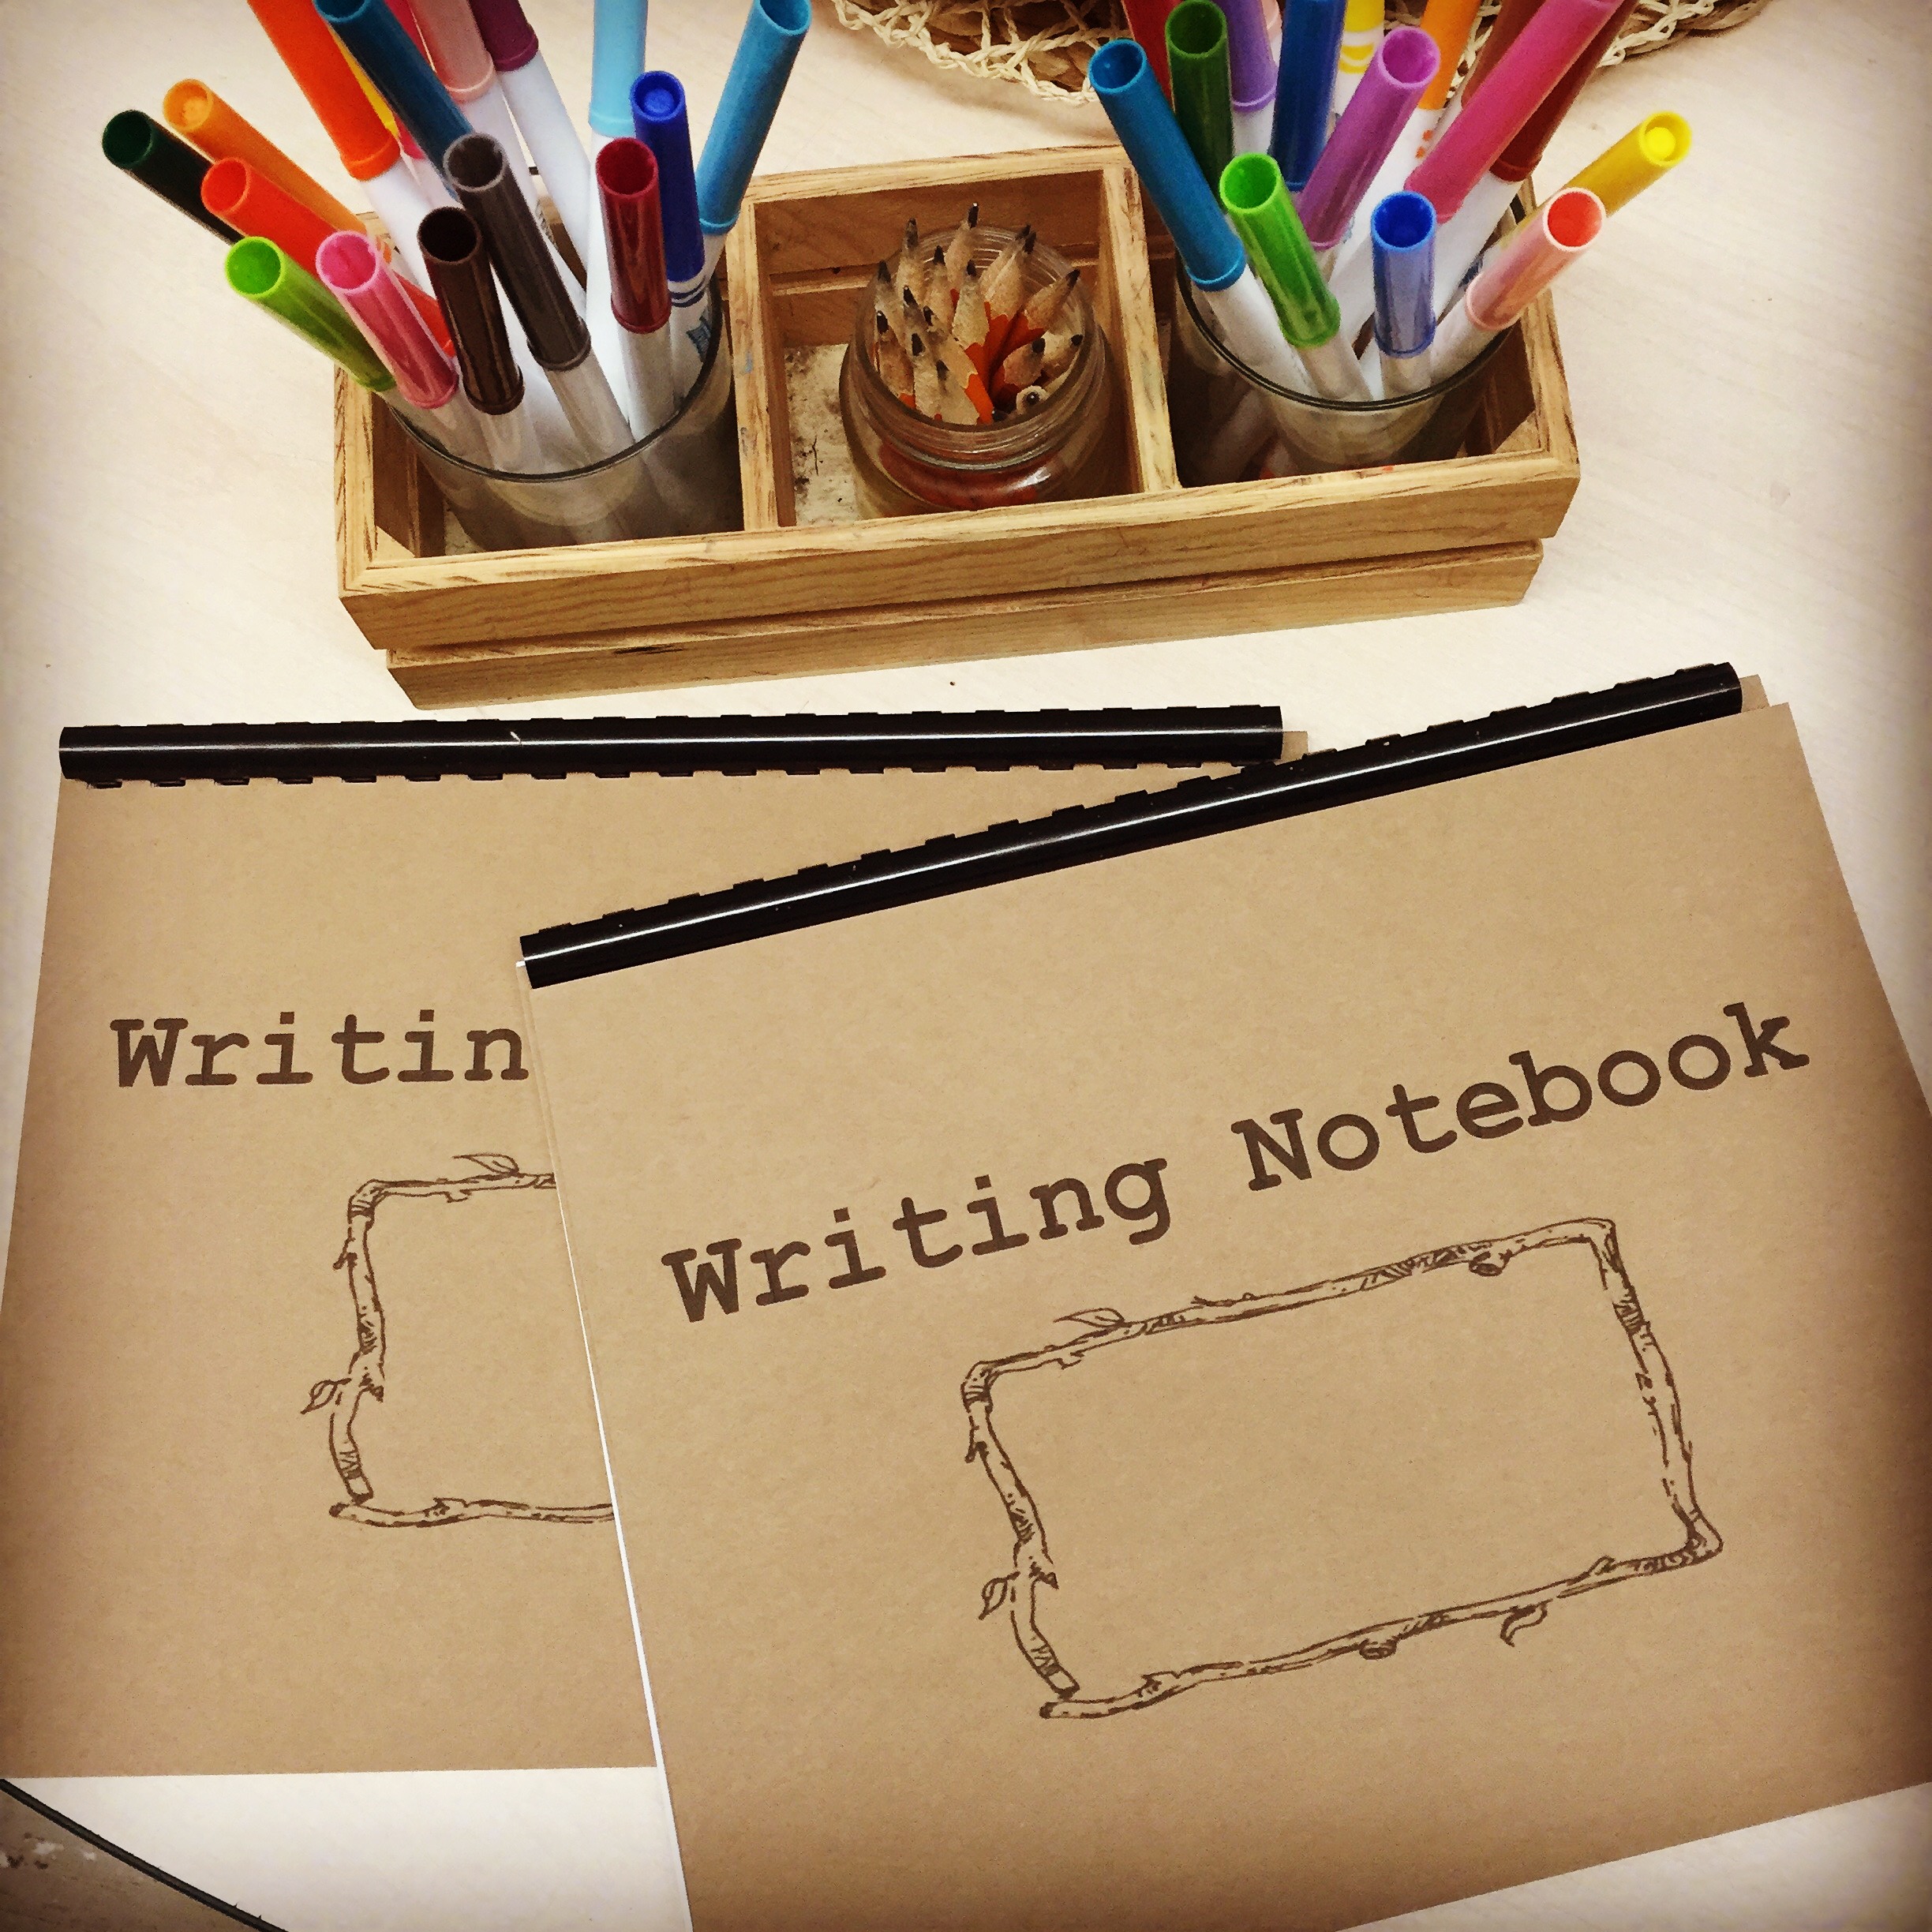
The other way I prepare for our writing time is by constructing our writing notebooks. You can purchase books from your school supplier, but I have found the quality of what is offered to be sorely lacking. The books are often too small, the paper too thin, and the number of pages fixed. I make my books using 8 x 11.5 inch paper with a cardstock cover and backing which I bind together using our school’s binding machine. I calculate how many pages I will need from September – December (we will use another system after the holidays – more about that later!) and voila! Our special notebooks are ready for the children’s wonderful ideas! You can download a pdf copy of the cover page I have created here: writing-notebook

img_3905

At the beginning of the school year, the goal for our Writer’s Workshop lessons is for the children to learn what is expected during writing time: what they are expected to do, what materials they are expected to use, what they do when they’re finished, where to put their materials, etc. Every Writer’s Workshop involves a mini lesson, writing time, and reflection. In our class, the reflection or sharing time always happens at the end of the day. I save a few pieces of work to share later so that the children can get on with discovery time as soon as they are finished their work. This is how we set it up: The classroom tables are cleared of their provocations (which are put aside on adjacent shelves) and the children’s notebooks are placed on the table along with the writing materials they will need to create with (pencils, markers, crayons, etc.). Pro tip: I date stamp each child’s page for the day and add a picture stamp (a smiley face, a heart, a sun, etc.) on the page the children will be writing on. This helps the children flip to the correct page for writing and focuses them on just that one page for the day (so the children don’t flip through and write or scribble on every page…which some children will do, out of pure excitement of course!). As the children finish their work, they bring it to a teacher to share what they have done and then put it away in the bin on the writing shelf and immediately choose a centre for discovery time. As the tables empty of writers, we re-set up the provocations for discovery time. I find that doing it this way allows for greater flexibility and flow in the classroom, i.e., the children don’t have to wait for the whole class to finish their work before getting on with their other learning centres, and those that finish early are able to get themselves engaged in other learning without the assistance of a teacher.

The mini lesson is extremely important. When I do a mini lesson I am explicitly modelling the writing behaviours I want to see my students exhibit. I draw my own picture each time, modelling with a think-aloud everything I think about and consider while writing. Where was I? What was I doing? Who was with me? What was the weather like? etc. I model how I choose colours. I model how I add details. I model how I draw myself. After I draw, I model how I can label the details in my picture. Over time, this is something I ask the children explicitly: “Can anyone tell me something in my picture I can label? ‘Me’? Great! How do I spell ‘me’? M-E. Wonderful!” We usually label using initial consonants at first, or names like “mom” and “dad.” Then I will write my sentence. At the beginning of the year I do this quickly. Over time, the children help me with this as well. We share the pen in an interactive-writing way. The children sometimes help me generate a sentence based on the picture I’ve drawn. This is where I teach the children about sounding out words, using finger spaces, directionality and punctuation. It all happens rather quickly, given that the mini lesson is only 10 minutes or so. But the practice we get doing this almost daily sinks in and I will see my students begin to use these strategies on their own during writing time.

Writing time immediately follows the mini lesson. All the children find their writing notebooks and get to work on their pictures. The teachers circulate and talk to the children about what they are writing about. Sometimes children need help thinking of a topic, but after a few weeks of Writer’s Workshop most children do this independently.  I should make clear that writing time is not a quiet working time. It is loud. It is lively. The children are engrossed in their work and love telling the classmates at their table what they’re writing about. They help each other spell things. They share markers. They give advice or feedback to each other.

img_0400

When the children finish their work they bring it to a teacher. This is when our mini “conferences” happen. I ask the children to tell me about what they have written and take note of the story they are telling. I do not scribe the child’s sentence on their work, but rather on a sticky note which I stick to the back of their work  (for my own reference later). I learned this from What’s Next for This Beginning Writer. The thinking is that the children lose ownership over their work once the teacher takes control of writing their thinking for them. Although skeptical at first,  I found the children were more likely to begin to write their stories themselves once I stopped scribing for them.

The feedback each child receives depends on what each child is working on currently. At the beginning of the year I focus heavily on picture making as a way of story telling. We work on choosing a good topic (I emphasize modelling events from my own life – from grocery shopping, to going out with my kids, to drinking coffee and reading books, etc.) and I encourage the children to draw themselves in their pictures. I want the children to write about authentic experiences so that they can simultaneously work on their oral language skills when talking about what they have seen/done. The children always have more to say about things they have actually experienced first hand rather than just things they enjoy (e.g., rainbows or monster trucks – though we often get a lot of those kinds of pictures too in the beginning which is ok. There is also a difference between a child writing about something they are inherently passionate about and something they just think is cool or pretty. I have students who’ve written many interesting stories about Minecraft for example.).

During writing time, I am busy looking for breakthroughs or roadblocks. I’m also looking for work to share during reflection time. Usually, it is work that reflects a concept I was teaching in my mini lesson. However, we also love sharing breakthroughs or personal bests, so if a child has suddenly started labeling or writing their own sentences we will share that new learning with the class.

After the winter break, I switch from using writing notebooks to using writing folders. These are two pocket folders that the children use to store their work. Instead of a notebook, the children use single sheets of paper to write on (I use the ones suggested by Lucy Caulkins). The paper reflects the needs of the students. Some children continue working on a blank sheet. Other children use a paper with space for a picture and one or two lines underneath for sentence writing. Still others use paper with space for a picture with lines underneath and lines on the back of the page as well. Again, the work is date stamped. At any time a child can use paper with lines if they need it. I mostly let the children self-regulate this step, but will also suggest it when I feel a student is ready. At the end of each month, the children choose their best work and that work is showcased on our Writer’s Wall. Before choosing their best work we spend time talking about what “Best Work” might look like and we co-construct success criteria together. I love meeting with each child to discuss the progress they’ve made over the month. It’s amazing how reflective the children become over time about their own learning and development as writers. Some children have a hard time choosing what their best work is and will invite their classmates to help them choose (last year one girl even took a survey of her classmates to help her pick!). Once the child has chosen their best work the rest of the work from the month gets stapled together with a cover page with the month on it. The children enjoy re-reading their “books”during writing or discovery time.

img_0184

Some children like to lay out all their work and narrow it down through a process of elimination.

img_0186

This student said, “It’s so hard to choose my best work because I always do my best!”

One thing I want to make clear is that Writer’s Workshop is for everyone. One of the reasons I dedicate so much time to it during the week is that for me, it is a high yield strategy. It is our reading and writing and oral language development all rolled into one. Whether or not a child can speak English or hold a pencil or draw figures or know their alphabet, they can all participate in Writer’s Workshop. The teaching, the individual attention, the flexible format of our writing materials meet our students where they’re at. If you are at all hesitant to give this a try, my advice would be just to go for it! Believe me, there are times in the first couple of weeks of school where I don’t see a whole lot of progress that I have to remind myself just to keep at it…keep encouraging, keep supporting, keep modelling..and always the payoff comes.

img_4904

The other thing I want to make clear is that our writing program is not limited to our Writer’s Workshop time. Most (if not all) our provocations encourage the children to draw or write about their learning. We use writing for routine tasks (like our daily message or calendar-journal, our sign-in, etc.), at learning centres, for special projects, at the writing centre, and during workshop time. Writing is encouraged always and everywhere in our classroom!

If you have any questions about our version of Writer’s Workshop please don’t hesitate to leave a comment below.

In the Art Studio: Plasticine Art Inspired by Barbara Reid

IMG_1838

This month we have been inspired by renowned Canadian author and illustrator Barbara Reid. Barbara Reid has worked on some of my class’s favourite read-alouds: Picture a Tree, Perfect Snow, and Subway Mouse. When reading, we often discuss how an artist may have created their illustrations. My students were very interested in how Barbara was able to achieve such realistic and detailed pictures using Plasticine.

Lucky for us, Barbara Reid has created a series of tutorial videos which you can find on YouTube (links below). In her videos, Barbara talks about how she goes about creating her artworks: from the planning stage (researching, sketching a picture), to creating a background, to adding fine details and textures to her work.

Video: Making Plasticine Pictures with Barbara Reid Part 1

Video: Making Plasticine Pictures with Barbara Reid Part 2

Video: Making Plasticine Pictures with Barbara Reid Part 3

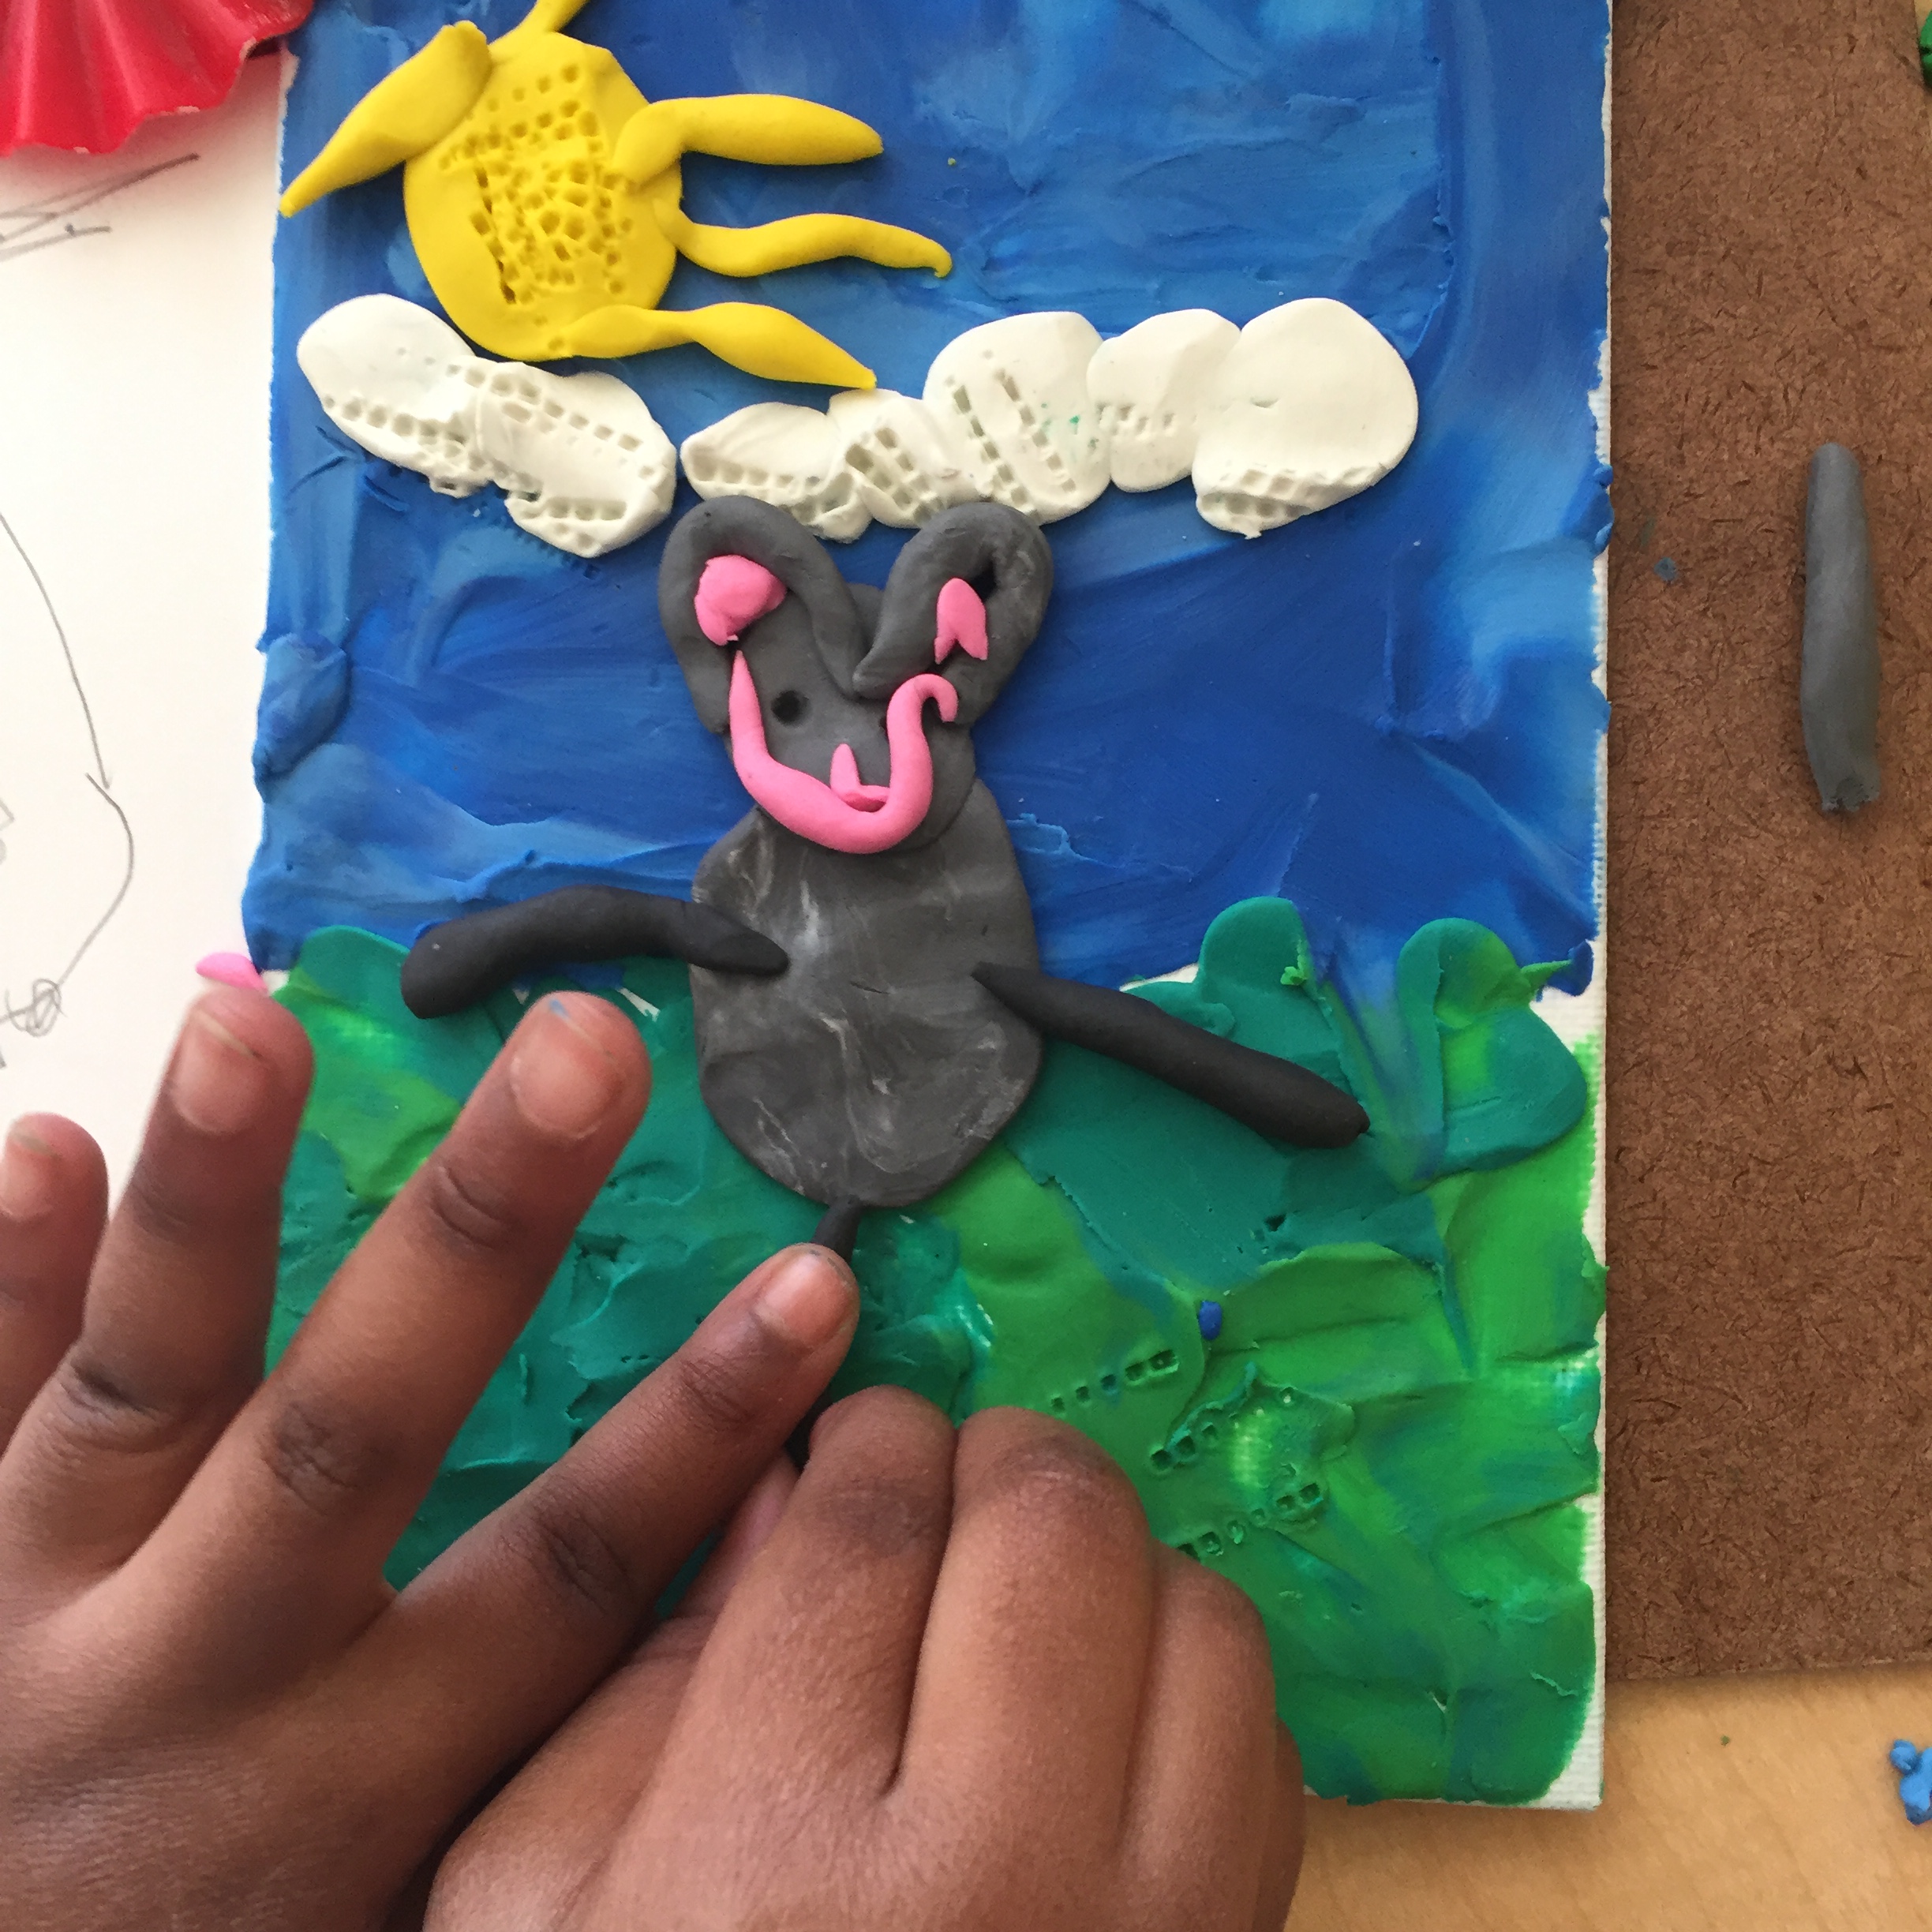
For this project, I cut our Plasticine into very small pieces so it would be easy for the children to manipulate (and because a little goes a long way!). I arranged the pieces in small containers by colour. I also included some of Barbara Reid’s books and a non-fiction book about Barbara Reid herself. We also had dry cloths for wiping our hands (as Barbara suggested) and some tools for adding texture. For the planning process, the children had pieces of cardstock and pencils for sketching. We made our Plasticine pictures on small canvas boards I found at the dollar store. The children were extremely excited to do their work with “real artist materials.” For me, it is very important to give the children beautiful and authentic art materials to use and work with. Their art is more than deserving of quality materials and in my experience, they seem to take their art more seriously when they perceive materials to be “special.”  For this project, the strength of the canvas boards was an added advantage, as it made it easier for the children to spread the Plasticine.

IMG_1813

During the planning process, I really didn’t meddle too much in what the children were sketching or wanting to create, thinking the children would figure out on their own what was going to work and what wasn’t. For example, the first group of children who visited the studio realized that creating people with Plasticine was a big challenge, and advised their classmates accordingly during reflection time. Spreading the Plasticine was also a challenge for some (and a great fine motor muscle workout!). Some children took a few sessions to complete their backgrounds, pausing and coming back later to give their fingers a rest. Other children wanted to persevere and complete their backgrounds so they could get to adding their flowers or bugs or animals. If you’re wondering how long it took the children to complete their pictures, it varied between one session (about half an hour) to a few days, depending on each child.

IMG_1809

Y.A.: “I want to make a picture of a cat.” 

IMG_1871

A.J. spreads the Plasticine to make a sky. “I’m mixing the colours. A little bit of dark blue and a little bit of light blue.”

IMG_1835

Y.A.: “I’m making my grass like Barbara Reid. I’m rolling snakes and making them flat like grass. I’m doing a pattern: light green, dark green, light green, dark green…”

IMG_1842

R.A.: “I’m making a little mousey like Barbara Reid. It’s just like The Subway Mouse.”

Here are some of the children’s completed art works. I have them displayed on a low chalkboard ledge in our classroom and the children can often be found admiring them!

IMG_1894

S.C. “I made a rainbow and a little girl is camping in the tent.”

IMG_1932

IMG_1846

IMG_1897

IMG_1853

Honestly, the children were SO proud of their completed art works. They loved showing them off during reflection time and talking about the process they used to make them. During one reflection session, we started talking about how Barbara Reid gets her Plasticine pictures in the pages of her books. One student remembered that Barbara’s husband photographs her art for her so the pictures can be used as illustrations. One student suggested that we take photographs of our work and use the pictures to make a book by writing our own stories. I loved that the children were inspired to create their own stories, so we set up a story-writing invitation.

At the writing table, I gave the children some mini easels to place their art on. I put out plain paper and some black pens. The children could choose to write about their own work or a classmate’s work that inspired them. This proved to be a popular invitation! Some children returned each day to write a new story! We loved listening to each other’s stories during reflection time – some children’s stories were so popular, the class asked them to read it aloud more than once.

IMG_2043

IMG_2045 - Copy


IMG_2095 - Copy

E.H. “Once there was a little ladybug. She wanted to rest on a flower. The red flower was wet but the purple flower was just right. The End.”

IMG_2077 - Copy

“I went out on a stormy day.”

We are still in the midst of our story writing. I was interested to see the emergence of a narrative voice in the children’s work and am curious about exploring this further with the class. Stay tuned!