The Mystery Object Inquiry Project

Featured

IMG_1302

Don’t you love a good mystery? I know whenever I’m reading a book or watching a film with an element of the unknown, I am always SO curious to see how things will turn out in the end. This year, I decided to spark some interest in a new inquiry by adding in an element of surprise: a “mystery object.” I started with an amaryllis bulb. You can really use anything for this project, but a plant was a great option because of the fact that a plant is always growing and changing. I knew the focus of this inquiry was going to be on building the children’s capacity for making good observations and predictions, and I wanted them to be able to revisit their predictions as the plant grew and changed. An amaryllis blooms in about 6-8 weeks from the time of planting so the children had plenty of time to practice their inquiry skills!

I introduced this project with a game that our music itinerant taught us: “What’s in the box?” I placed the bulb, pot, and bag of soil in a box marked with question marks. We passed the box around the circle asking each child in a sing-song voice, “What’s in the box?” and the children sang back their guesses in turn. After everyone had had a guess, we opened the box to reveal what was inside. I passed around the bulb and each child tried to guess what it was. I recorded their predictions in my notebook. After we had all had a turn at guessing, I asked the class what they thought we should do next. Since there were no instructions with our mystery object, we would have to figure out for ourselves what to do. Right away, many of the children suggested putting the object in the pot with the soil. One child suggested that we need to put water in it too…because that’s what you do when you put something in a pot of dirt.

IMG_1303

Our Mystery Object in its bed of dirt. One student suggested we leave it on the windowsill at the science table so it could catch some sunshine!

We placed our mystery object at the science table. It was the first place most children visited when they entered the classroom each day! Every time there was a change in the mystery object, we took time to discuss our observations as a group. The children had access to our See Think Wonder and “My Prediction” recording sheets throughout the project. It was interesting for me to see which children changed their predictions based on new information and observations as the mystery object grew (and which children held fast to their original ideas).
IMG_1473

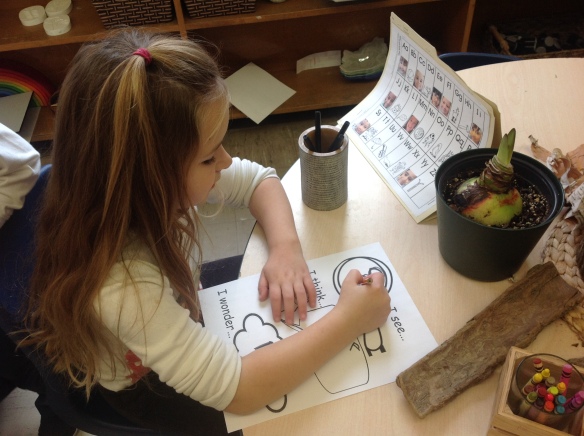
A.R. records her thinking about the Mystery Object on a “See, Think, Wonder” recording sheet.
IMG_1959

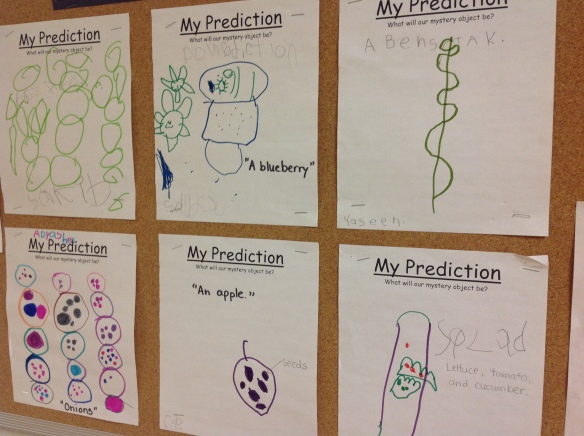
Some of the children’s predictions about what the Mystery Object might be/grow into: beans, a blueberry, a beanstalk, onions, an apple, salad.

IMG_1444

Our object changes! The students were excited to see these “sprouts” emerge – first one, then two, then three, then four!

One of the interesting questions that arose from one of our reflection discussions was “Is our mystery object a living thing?” This was a question that divided the class! We decided to do some further research to find out. Our librarian gave us a book called “What is a living thing?” which we read in hopes of answering the question once and for all. Again, some children could see right away evidence that our object was indeed living (it was growing, changing, requiring our care and attention) while other children had difficulty connecting the information from the book to their observations of the mystery object.
IMG_1616

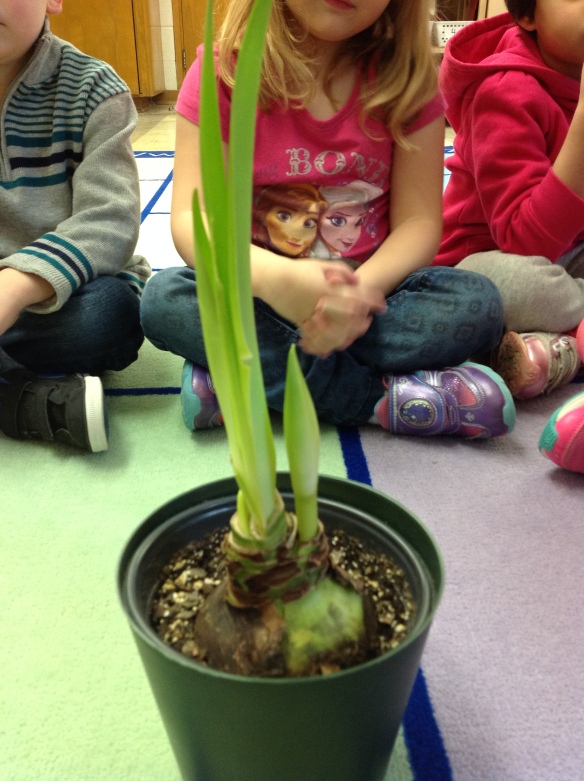
The discussion this day revolved around the growth coming from our object. Many children noticed that the new “sprout” looked different than the previous growth. I was encouraging the children to be specific with their observations and descriptions. The leaves were described as “smooth,” “flat,” “pointy” and the new growth as “fat,” “curvy,” and “round.” Many children felt there might be a surprise inside the new growth which caused them to rethink their original predictions.
measure

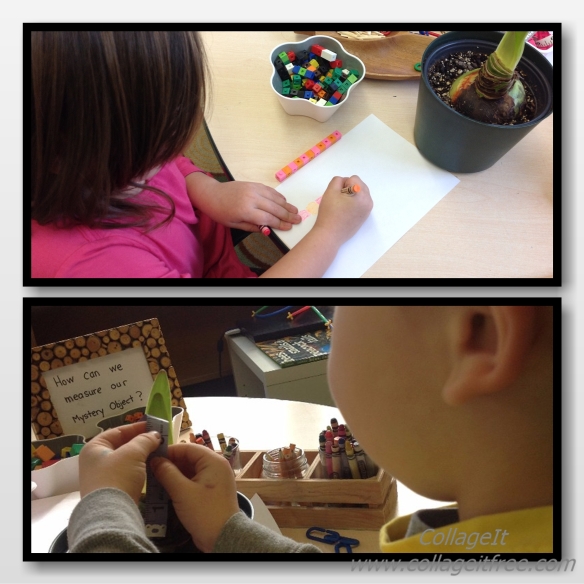
The children measure the mystery object to keep track of its growth. J.T. visited the science table every day to measure the mystery object and update the class on how much it had grown!

The day our mystery object bloomed was incredibly exciting! We decided to google “bulb plant that blooms after 8 weeks” and found a matching image for our flower in our search! Giving our plant a name (Amaryllis) was quite satisfying to the children. Every visitor to our classroom was immediately shown to the science table and told about our mystery object – “Do you wanna see our mystery object? It’s an AMARYLLIS!”

IMG_1793

Our beautiful amaryllis bloom. We were shocked to discover that each pod (we ended up with two) held not one, but 4 blooms inside! Amazing!
IMG_1822

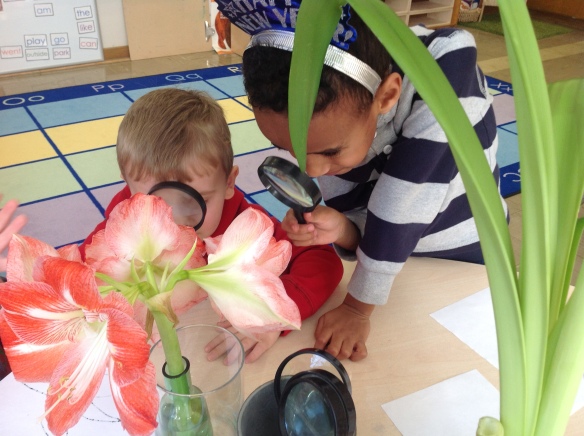
Taking a closer look with the magnifiers…

IMG_1953

Counting the blooms…and wondering what might be inside this little pod??

Overall, I feel like the mysterious element to this inquiry was an asset to piquing the children’s initial interest and keeping it sustained throughout the project. My goal from the beginning was to provide an opportunity for the children to practice their inquiry skills – and in that, the mystery object inquiry was very successful!
IMG_1955

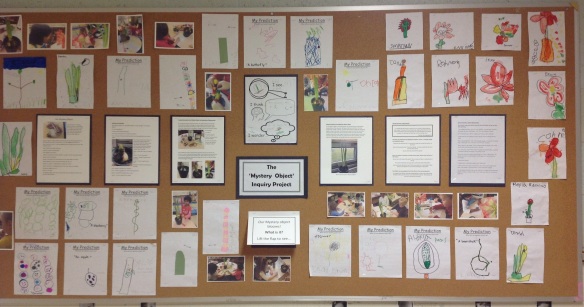
Documenting our work

IMG_1957

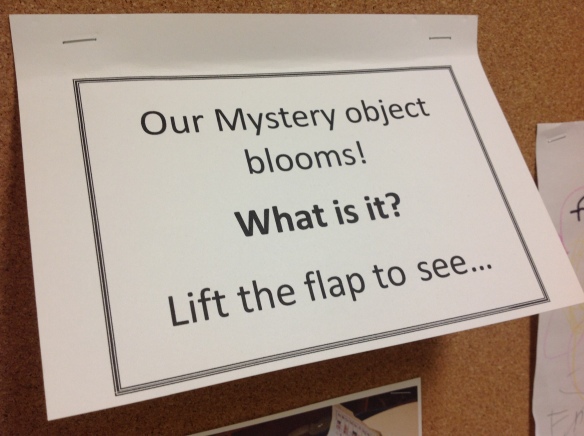
We thought we’d add a little element of mystery to our hallway display…

Have you ever tried teaching with a mystery object? I’d love to hear what you used as the spark for your learning!


The Wonder Window

IMG_1355

Do you have a wonder window in your classroom? Perhaps you call it something else – an observation window or a nature window? I first read about the idea of an “Observation Window” in A Place for Wonder: Reading and Writing in the Primary Grades  by Georgia Heard and Jennifer McDonough. It’s one of my favourite resources for ideas about developing an inquiry based program in the primary grades, in part because the ideas are so practical (as you read about them you can instantly picture how they could work in your classroom) but also because the strategies so clearly create opportunities for rich dialogue and deep learning.

wonder

I created a Wonder Window in my classroom because I wanted to give my students a dedicated space for scientific thinking…for looking out into the world, for noticing, for theorizing, for questioning. Our wonder window is located beside our Science and Nature Centre in the classroom, which gives me an opportunity to extend the children’s discoveries at the window into provocations nearby – or take provocations and extend them to the window.

I love writing poems, so to spark some curiosity about our window, I wrote the following poem. I copied it onto chart paper (to work on during our Shared Reading time) and placed this printout at the window (to help the children remember what it is I wanted them to do there):

IMG_1354

I originally started with blank paper at the window, to allow the children some free space to record their observations, drawings, questions, or theories. As I introduced the “See Think Wonder” thinking routine, I placed the recording sheets I had modeled during group time there as well.

IMG_1388

IMG_1390

At first, I only had one student eager to visit the Wonder Window. However, this student made an interesting discovery – nests! Once we shared her thinking with the class, many other students were keen to go to the wonder window to record their own observations and ideas.

IMG_1396

Here are a few samples of the children’s work from the Wonder Window (I added the sticky notes for the purpose of sharing with parents):

IMG_1443

“I see a nest. I think it’s made of leaves. I wonder if a bird is inside.”

IMG_1442

“I see a nest. I think a bird lives there. I wonder if there’s a baby.”

IMG_1441

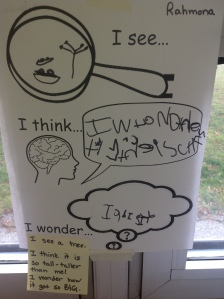
“I see a tree. I think it is so tall – taller than me! I wonder how it got so BIG.”

IMG_1440

“I see leaves in the tree. I think it’s a nest. I wonder when it will be Winter.”

Some children are totally independent about their work at the wonder window – visiting of their own accord, documenting their own thinking. Others seek me out when they want to visit the Wonder Window. Some simply want to look out the window and discuss what they see with me, some want to take pictures of what they notice, still others want to write or record their thinking on paper. There is something to learn from each of these learning moments and all are just as important and valuable as the other. I often get interesting ideas/questions to talk about with the class from these small group or individual conversations at the Wonder Window. It really has proven to be a source of awesome learning and inspiration!

tally

After spotting nests in the trees outside our window, the children were interested in seeing how many nests we could find in our neighbourhood. Here, one student keeps a tally of how many nests we spotted.

binoculars

Many students were inspired to make binoculars at the Art Studio for observing at the Wonder Window…


The Bird Feeder Project

DSC02317

Here in Toronto this year we have been having an exceptionally cold and snowy winter! Despite the weather, some of our feathered friends have remained in our outdoor classroom. One day when we were outside, some children began to wonder about the birds – weren’t they cold? How were they finding food under all this snow?

DSC02413

After reading Ricki’s Birdhouse by Monica Wellington, a book about a boy who constructs a birdhouse for the birds in his yard and proceeds to feed the birds throughout the year, the children were interested in making their own bird feeders for the birds in our outdoor classroom. We set up a provocation at the science table including planning sheets, our Ricki’s Birdhouse story, and iPads. Using the iPads, we googled “homemade bird feeder” images and the children looked for designs that appealed to them. Then they set about creating their plans. We encouraged the children to label their plans with the materials we would need to build them.

DSC02228

DSC02193

DSC02202

After giving the children ample time for the planning process, we gathered up the materials the children requested for their bird feeders. I sent a letter home asking the parents to send in any materials they may have at home to help us with our project. Then we set up our bird feeder making centre! For the most part, the children really stuck to their original designs when making their bird feeders. Other children who weren’t initially interested in making their own plans stopped by and got inspired by their classmates’ projects. The children were really in charge of this activity from start to finish, and were so proud of the feeders they made!

DSC02260

DSC02314

At the end of the week, we took our feeders outside to hang up in the courtyard. The children were beyond excited to share their creations with the birds. It felt like a bird feeder hanging party!

hanging

Update: After the weekend, we took the children outside to see if there were any clues that the birds had enjoyed the birdseed. We had had another dose of snow, so the children noticed that some of the materials we used did not hold up in the extreme winter conditions.

E.A.: The bird feeders made of Kleenex boxes and toilet rolls with honey stayed up.
F.S.: The snow covered the paper plates and they fell down.
A.C.: The tissue boxes and the buckets are good to make feeders because they stayed up.
J.M.: The apples stayed up too and some of the food was missing.

When talking about whether or not the birds enjoyed the feeders:

M.F.: The bird seed is gone!
B.L.: That’s because the snow is covering the seeds. I can see it if I dig down.
H.K.: I think the birds look fatter!

Beautiful Stuff

Image

Maintaining a variety of supplies at the Art Studio can be a challenge on a limited budget. I often have visitors to my classroom ask me where I get my materials. One simple way to stock your studio is to involve the children and their families in setting it up. This year we stocked our studio by embarking on a “Beautiful Stuff Project” – an idea I read about in Beautiful Stuff: Learning with Found Materials by Cathy Weisman Topal and Lella Gandini. Just like the book suggests, we wrote a letter to the parents with the children. Here is what the children said:

Image

Each student received a large paper bag with a clothespin on top. They were told their stuff must fit in the bag and should be clipped shut to ensure their materials stayed top secret until sharing day.

Along with stocking our Art Studio, I was also interested in creating an authentic opportunity for the children to sort. We have been working on sorting as one of our Math goals. One of the questions we have been asking is: “How does sorting the materials in the classroom help us with our learning?”

On sharing day, we asked each student to talk about one special item from their bag in our sharing circle. And then…we dumped our Beautiful Stuff out on the the carpet. After a few minutes of excited exploration, we got down to the business of figuring out what to do with our collections.

Some children thought we should put our stuff back in our bags and share as needed, but it was decided that it would be too hard to know what we had and besides, the idea was for everyone to put their stuff together. We decided the materials definitely needed to be sorted…but how? By colour? By size? When we thought about how we were going to use our stuff (at the Art Studio to make creations) the children decided it would be best to sort our stuff by type of material. After all, sometimes you might just need a straw or a button and you want to know exactly where to find it! We proceeded by making a list of categories on the SMART Board from the stuff that we could find: buttons, straws, paper, tissue, wooden things, metal things, caps, small boxes, beads, etc. We ended up with over 20 different kinds of materials! Finally, we sorted – adding materials to different containers that we had gathered at the carpet. Our Art Studio is now brimming with materials just waiting to be turned into beautiful creations!

Image

Image

Here is the first creation that came out of our newly stocked Art Studio:

E: “I made a ‘Beautiful Maker’. It’s a machine that makes things beautiful.” 🙂

Image

Fostering partnerships between home and school…

One of the things that most inspires me about schools in Reggio Emilia is the connectivity they have to the families and the communities they serve. Something I am striving for this year is a stronger link between home and school. Some of the questions I have been pondering are: How do I make my students and their parents feel welcome in our learning space? How do I develop a learning partnership with my students’ families? How can I tap into the rich knowledge, skills, and experiences each family possesses?

Image

This is a picture of our classroom family wall – a dedicated spot in the room that holds photographs of the children and their families (and pictures of my family and our ECE’s family too!). As the photos have been brought in we have taken time each day during our sharing circle for the children to introduce and talk about their families. We’ve learned about brothers and sisters, moms and dads, grandmas, papas, opas, and bubbis (and even a few family pets!). Throughout our discussions, we’ve encouraged the children to think about what makes their families special. After sharing, I also photocopy each photo and use it for an interactive writing activity with each student which gets posted on our author’s wall. The children have been so excited to take turns sharing their families with us and can often be found gazing at the family photographs on our family wall during centre time.

Image

Another way I am trying to connect with parents this year is by sending out a weekly email which highlights some of the ideas/concepts/discussions that occurred in our class during the week. The email includes photographs which demonstrate the children’s thinking and learning. The hope is that some of the discussions we are having at school will be carried on at home.

Image

What are some ways you celebrate your students’ families and involve parents in your program?