Kindergarten in the Time of Covid-19

Here we are at the start of another school year, but this one feels like no other. When I blog, it’s usually because I have an idea I want to share, or an experience I want to reflect on. But at the moment, I don’t really feel like I know what I’m doing. Due to many parents selecting online learning for their children, my school is redeploying several teachers. I happen to be one of those teachers – but only part time. Half-time redeployed. Yikes! Lucky for me, I will be doing the other half of my day at school in my most favourite role: Kindergarten.

Like many of you, our team has been working hard getting our room set up for our new students this week. We didn’t get a lot of guidance on exactly how Kindergarten should look during a pandemic. I’ll be honest – I have struggled with advice like “keep the children socially distanced but also make sure they play together.” What does that even mean? What does that look like in a practical sense?

Instead of getting myself overwhelmed with everything that will be new and different, I am centering myself on what things I think will be the same. As soon as I started thinking about our program in this way – what we do that is of high value that does not need a lot of tweaking to meet covid-19 safety regulations – I immediately calmed down. Here is a list of things I envision continuing mostly as they did before. You can click on the links for each one to visit past posts where I explain how these work in our class. Remember, those posts were written pre-covid and our processes will change slightly to address additional safety protocols this year.

Reflection Time: Our daily time to meet and reflect on what we’ve learned and discovered throughout the discovery block will continue. We won’t be sitting cozily together on the carpet as we did before (all carpets have been removed from the classroom), but we still have space to meet together and share our thinking. You can read more about how reflection time works here and why it’s such an important part of our day: https://thecuriouskindergarten.blog/2016/04/09/noticing-and-naming-our-learning-the-reflective-process-in-fdk/

Writer’s Workshop: The main difference this year is that each student will sit at their table spot for the mini lesson and will have their own kit of writing and drawing materials to use instead of sharing. We already have our writing notebooks prepped for our new students and I can’t wait to see them filled with the children’s stories. If you want to read more about how we run Writer’s Workshop in our class, you can click here: https://thecuriouskindergarten.blog/2016/12/30/writers-workshop/ (A pdf for the notebook cover is also available in that post).

Math and Science Investigations (M.S.I./S.T.E.M.): The great thing about M.S.I is that the children already work from an individual bin, at their own spot. This is a perfectly covid-appropriate activity that can continue essentially as it normally would. Right now, our M.S.I. shelf (a large rolling cart with bins of building materials) is covered in a tablecloth. When it is time for M.S.I, we will open the shelf for children to choose a personal bin to build with for the lesson. Afterwards, bins will be returned to the shelf and covered until our lesson the following week. Because the materials will be sitting covered and unused for 7 days (“quarantined”), we do not have to disinfect each bin after the M.S.I. block is over. For more information on what we do during our building block, click here: https://thecuriouskindergarten.blog/2014/03/29/math-and-science-investigations-m-s-i/

Art and Fine Motor Instruction: Like Writer’s Workshop and M.S.I, this is another program that already operates with students using personal materials. For each lesson, students receive a whiteboard, white board marker, and piece of cloth for erasing. Each of these items has already been assigned to our students as part of their individual school supply kits. Rather than sit together on the carpet for the drawing lesson, children will sit at their personal spots at our classroom tables. Otherwise, the lessons will carry on as they did before. To read more about what we do during Art and Fine Motor Instruction, click here: https://thecuriouskindergarten.blog/2014/01/16/art-and-fine-motor-instruction-snowflakes/

Outdoor Learning: Outdoor learning will continue to be a big part of what we do at school this year. Our morning and afternoon meetings will be continuing out of doors in our special meeting spot (this year, arranged to accommodate some social distancing). This is where we will sing, read, and have discussions. We will also continue to use the outdoors to drive our inquiry process. There are so many things to discover in the garden, on a walk, or in the sand box. For a list of books you can use to spark inquiry outside, click here: https://thecuriouskindergarten.blog/2016/10/20/read-alouds-for-outdoor-learning/

To read more about how we’ve used the outdoor classroom in the past, click here: https://thecuriouskindergarten.blog/2013/09/22/learning-in-the-outdoor-classroom/

This is what I have to get myself started. As the week goes on, our team will be reflecting on what is working and what isn’t and making changes accordingly. As things become more clear, I hope I can share some of what we find to be successful. This is a time when as educators, we need to work together to share our best practices and our successes. We are all in this together!

Playdough Provocations: Treasure Maps!

IMG_8683

Treasure Maps!  The book in the background is My Map Book by Sara Fanelli.

This provocation combines three of my favourite things: play dough, loose parts, and maps! Children often have a natural interest in map making – and why not? Maps are often associated with fantasy and appear frequently in children’s books. They also appear in many electronic games, are used in many vehicles (I had a student lecture me on the benefits and uses of GPS recently), and can help children make sense of their environment. Map making is also an accessible way to engage beginning writers as they can include any combination of pictures, symbols, and words.

For this provocation we were aiming for “treasure maps” as these were the kind of maps appearing in the children’s play at the small building centre and sand table, but the materials were open ended enough that the children could really create whatever they wanted with them. It is important to me that although we have an idea of what we think the children might do with the materials we set out, there is always room for the children to use the materials creatively.

First, the children rolled out their sandy play dough. Then, they used the loose parts to create a map on the dough – blue gems for rivers, stone walkways, flower gardens, forests, stick bridges, etc. The children were encouraged to draw their maps and landmarks on a treasure map recording sheet (you can download a copy here: My Treasure Map). We had gold coins that the children hid under their playdough maps. We talked about marking the location of the treasure on their maps with an “X” and had great fun trying to figure out where the coins were hidden by reading the maps the children had created.


We continue to be impressed with the children’s ability to record their creations on paper. The children put a lot of detail into their maps – looking carefully at the shape and location of their landmarks and choosing coloured markers to match their loose parts exactly. Here are some pictures of the children’s work:

IMG_8699

S.E.: My island has a fire, a tent, a garden, a forest, a river with a bridge going over it, and a house. Can you tell where the treasure is hidden? I marked it with an ‘X’!

IMG_8711

B.B.: I made a treasure island. The guy is guarding the treasure. I put an ‘X’ to show where the treasure is.

IMG_8697

C.G.: I hid two coins! I made a river with a bridge, a house, a forest, and a garden. There’s a jungle too!

IMG_8678

F. M.: I’m making people on the sticks so they can look for the treasure.

IMG_8695

IMG_8702

IMG_8720

IMG_8685

Have your students shown an interest in map making? What are some of the ways you’ve responded to this interest in your class?

The Snowman Poetry Project

d825a1fb3739

Previously, I blogged about our Snowman Poetry Project using playdough snowman creations as the basis for our creative writing. You can read about it here: https://thecuriouskindergarten.wordpress.com/2014/11/21/playdough-snowmen-inspiring-young-poets/

Well, last year we took this project to a whole new level by using the Chatterpix App to present our written works. The children absolutely LOVED recording their poems using the app and making their playdough snowmen come to life!

As before, we started by having each student make their own snowman out of playdough and loose parts. Each creation was photographed for the project. I saved them digitally and also printed a hard copy of each picture for the children to use when writing their snowman poems.

8f2952c9e8e1

Prior to writing our own poems, we spent some time examining poetry together. Since the children were going to be writing about snowmen, I chose a poem about making a snowman called “Snowballs.” This is a rebus rhyme, which I like because it shows the children how a picture can be used in place of a word (something many children did when they wrote their own poems – e.g., drawing a scarf instead of writing “scarf”). It also uses a counting pattern which many children were inspired by. The poem ends with the word “Snowballs!” which we emphasized is a nice way to finish a poem in an exciting way.

DSC06918

Poem by Vera Trembach from Rebus Chants Volume 1: For All Seasons 

After writing their poems, the children uploaded the pictures of their snowman creations into Chatterpix and then read their poems aloud. You can see from the videos below that the results were pretty fantastic! The children were extremely proud!


One of the things I like about the Chatterpix app is that it motivates even the shyest students to share their work. It is a “low risk” way of sharing, because the children can record their work until they get it the way they want (we usually go to a quiet place to record) and we share the video on the whiteboard so the children don’t have to stand in front of the class if they don’t want to.

Have you been using Chatterpix with your class? What other apps do you find useful and engaging?


Inspiring young authors: Secret Surprise Eggs!

Riddle writing is always a popular activity in my class from year to year. I first introduce riddles to my students through a “secret in a bag” show and tell project (I try and provide different ideas for “sharing/show and tell” throughout the year, and “secret in a bag” is one of them). Each day, one student takes home our “secret in a bag” bag, selects a special object from their home to put inside, and writes three clues about it to share with the class. The next day, the student brings the bag to school, reads their clues, and our class tries to guess what the secret item is. My students LOVE this learning opportunity.


Since “secret in a bag” is so popular, I thought the children would be interested in another opportunity to write riddles. Last week at the playdough table, one of my students, B.B., kept making eggs with his playdough and burying objects inside. He would bring his “egg” to me and gleefully laugh as I broke it open to reveal his “surprise.” On one occasion, I asked him to give me a clue about what I might find inside and that’s when I had my “aha” moment about what our next riddle-writing provocation would be!

On the weekend, I picked up some large plastic eggs from the craft store. I wanted the jumbo sized eggs so that the children would be able to choose different sized items from the class (my eggs could easily hold an object as large as a marker or pair of scissors). I could only find jumbo eggs that were clear on one side, so I painted them with acrylic paint to make them opaque and keep the secret items hidden from view. I purchased 5 eggs, each with a different colour so that we would be able to know which egg belonged to which student.


When I introduced the centre to the children, I called it “secret in an egg” so that they would immediately know exactly what they were supposed to do (“I know! It’s just like secret in a bag!”). I also credited B.B.’s playdough egg surprises as the “inspiration” for this new idea. We often talk of being inspired by each other’s learning or creations in our class, and it always makes the children so proud to know their “good thinking” is helping their classmates.


I created a recording sheet for the children to write their clues on with the title “What’s in my egg?” and an egg outline for them to draw their answer in. I stapled the clue sheet on top of the egg drawing so that after we emptied the plastic egg, we could still put up the riddles with the answer sheet underneath. You can download a copy of the recording sheet here: Secret Surprise Egg

E.L.: “It is pink. It comes from a bird. You can find it in a nest.” Answer: an egg!

We share our secret surprise eggs every day during reflection time (in the morning and again in the afternoon). I hope you’ll give it a try! It’s been a wonderful motivator for even my most reluctant writers/speakers.

Writer’s Workshop

img_3905

Writer’s Workshop. I’ve been meaning to get to this post for some time. I often have visitors in my classroom, and when I do, Writer’s Workshop is by far the aspect of our program that gets the most interest and generates the most questions. There are MANY ways to run a writing program and mine is but one way to go about incorporating explicit writing instruction into the day. I have modeled my approach after the one created by Lucy Caulkins and modified it over the years to suit my own style and the needs of my students, as well as to include new learning I have gathered from current research and new publications.

So to start, here are the resources I recommend for learning about how to begin a Writer’s Workshop in your classroom: What’s Next for This Beginning Writer? by Janine Reid, Betty Shcultze, and Ursula Peterson:

whats-next-for-this-beginning-writer

And, Launching the Writer’s Workshop (from: Units of Study for a Yearlong Curriculum) by Lucy Caulkins (*all of the books in the Units of Study collection are wonderful). When I first began implementing Writer’s Workshop many years ago, Lucy’s book “Launching the Writer’s Workshop” would sit perched on my lap during every lesson. In the beginning, I read her mini lessons out loud verbatim until I was able to find my own voice and comfort level for teaching. They were wonderful models, easy to implement, and engaging for my students. If you aren’t sure where to begin, I recommend starting with this book.

launching

Preparations for Writer’s Workshop begin even before the first day of school. I start by finding the special place in our schedule where Writer’s Workshop will take place. Although it doesn’t have to be at the same time each day, I find that having it occur as a regular and predictable part of our routine is helpful to my students. We do Writer’s Workshop after lunch about 3 or 4 days per week. The children are used to this routine, and are prepared and excited for writing each afternoon as they return from lunch. Many children are prepared as soon as they arrive in the morning, telling me exactly what they plan on writing about later in the day!

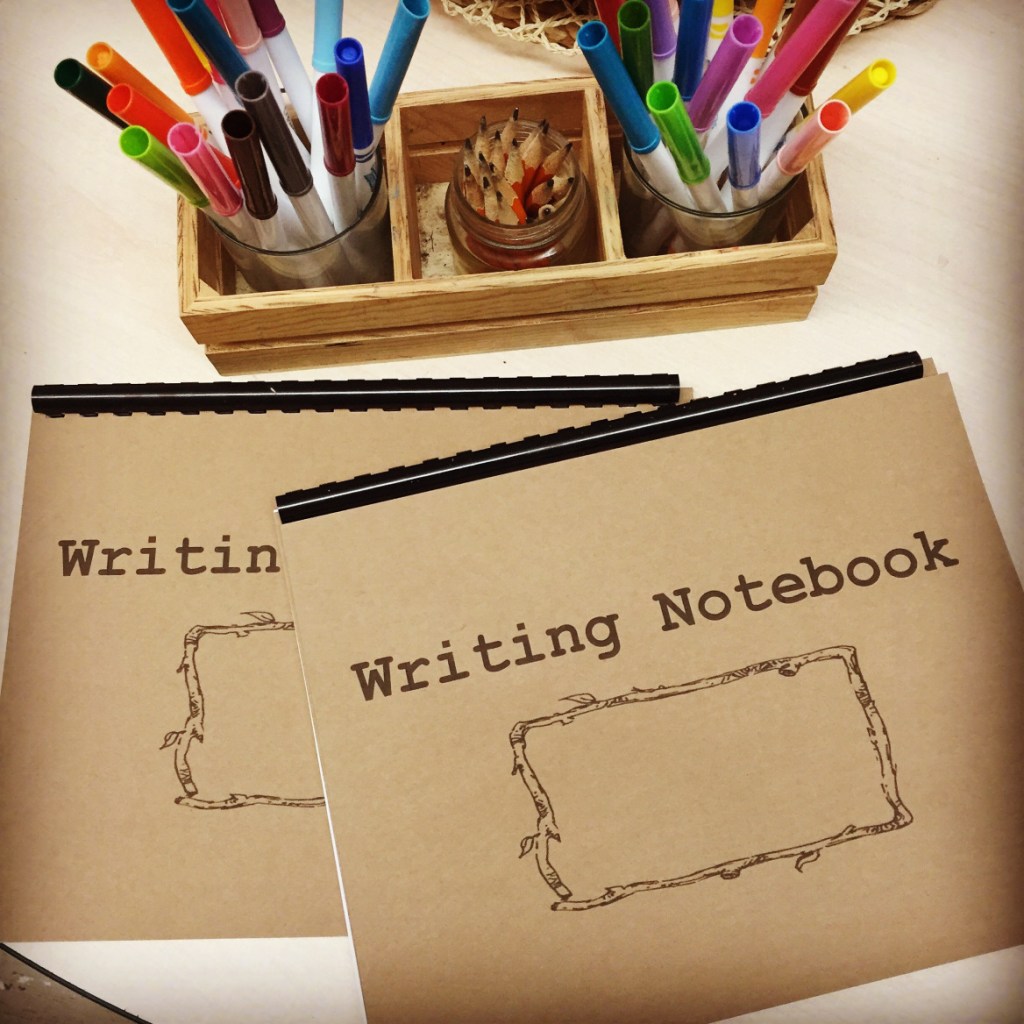
The other way I prepare for our writing time is by constructing our writing notebooks. You can purchase books from your school supplier, but I have found the quality of what is offered to be sorely lacking. The books are often too small, the paper too thin, and the number of pages fixed. I make my books using 8 x 11.5 inch paper with a cardstock cover and backing which I bind together using our school’s binding machine. I calculate how many pages I will need from September – December (we will use another system after the holidays – more about that later!) and voila! Our special notebooks are ready for the children’s wonderful ideas! You can download a pdf copy of the cover page I have created here: writing-notebook

img_3905

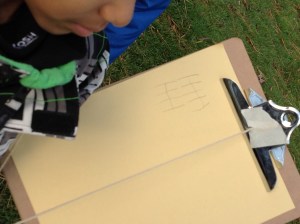
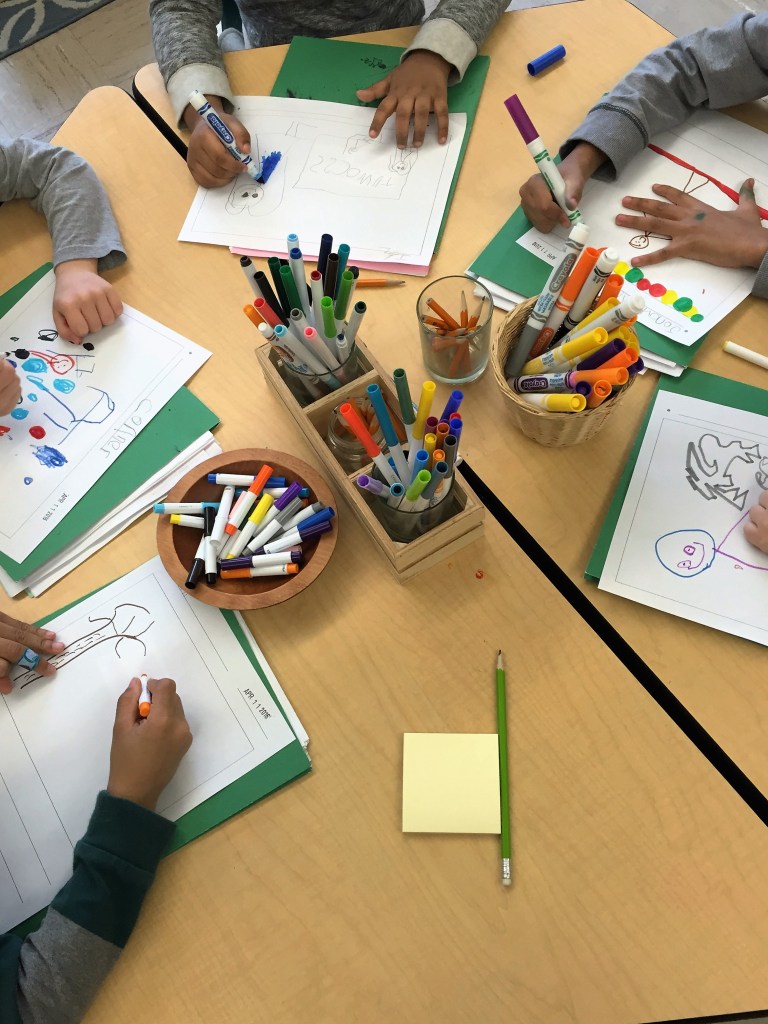
At the beginning of the school year, the goal for our Writer’s Workshop lessons is for the children to learn what is expected during writing time: what they are expected to do, what materials they are expected to use, what they do when they’re finished, where to put their materials, etc. Every Writer’s Workshop involves a mini lesson, writing time, and reflection. In our class, the reflection or sharing time always happens at the end of the day. I save a few pieces of work to share later so that the children can get on with discovery time as soon as they are finished their work. This is how we set it up: The classroom tables are cleared of their provocations (which are put aside on adjacent shelves) and the children’s notebooks are placed on the table along with the writing materials they will need to create with (pencils, markers, crayons, etc.). Pro tip: I date stamp each child’s page for the day and add a picture stamp (a smiley face, a heart, a sun, etc.) on the page the children will be writing on. This helps the children flip to the correct page for writing and focuses them on just that one page for the day (so the children don’t flip through and write or scribble on every page…which some children will do, out of pure excitement of course!). As the children finish their work, they bring it to a teacher to share what they have done and then put it away in the bin on the writing shelf and immediately choose a centre for discovery time. As the tables empty of writers, we re-set up the provocations for discovery time. I find that doing it this way allows for greater flexibility and flow in the classroom, i.e., the children don’t have to wait for the whole class to finish their work before getting on with their other learning centres, and those that finish early are able to get themselves engaged in other learning without the assistance of a teacher.

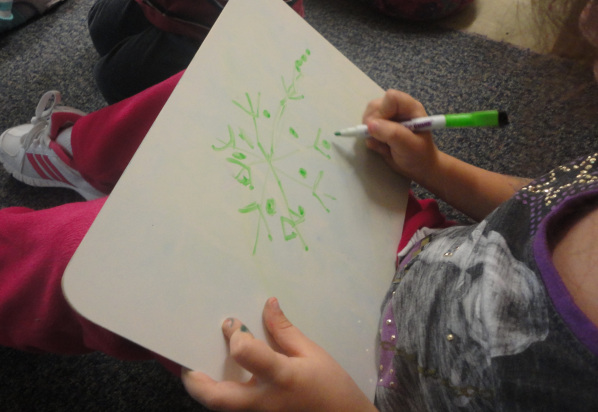
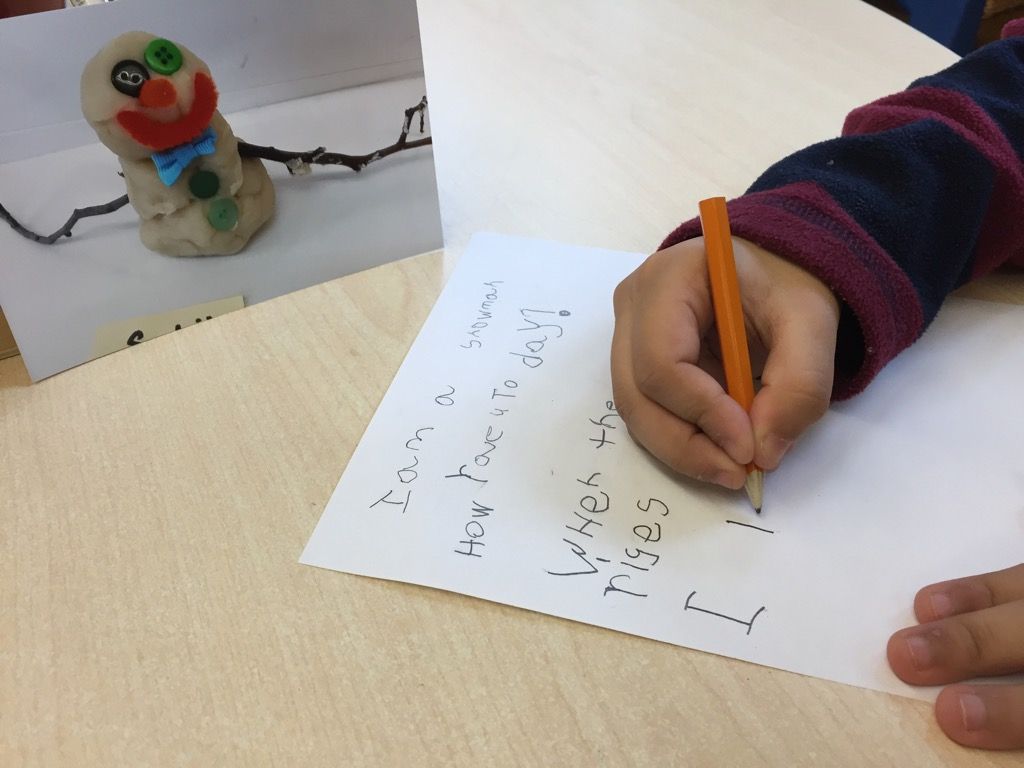
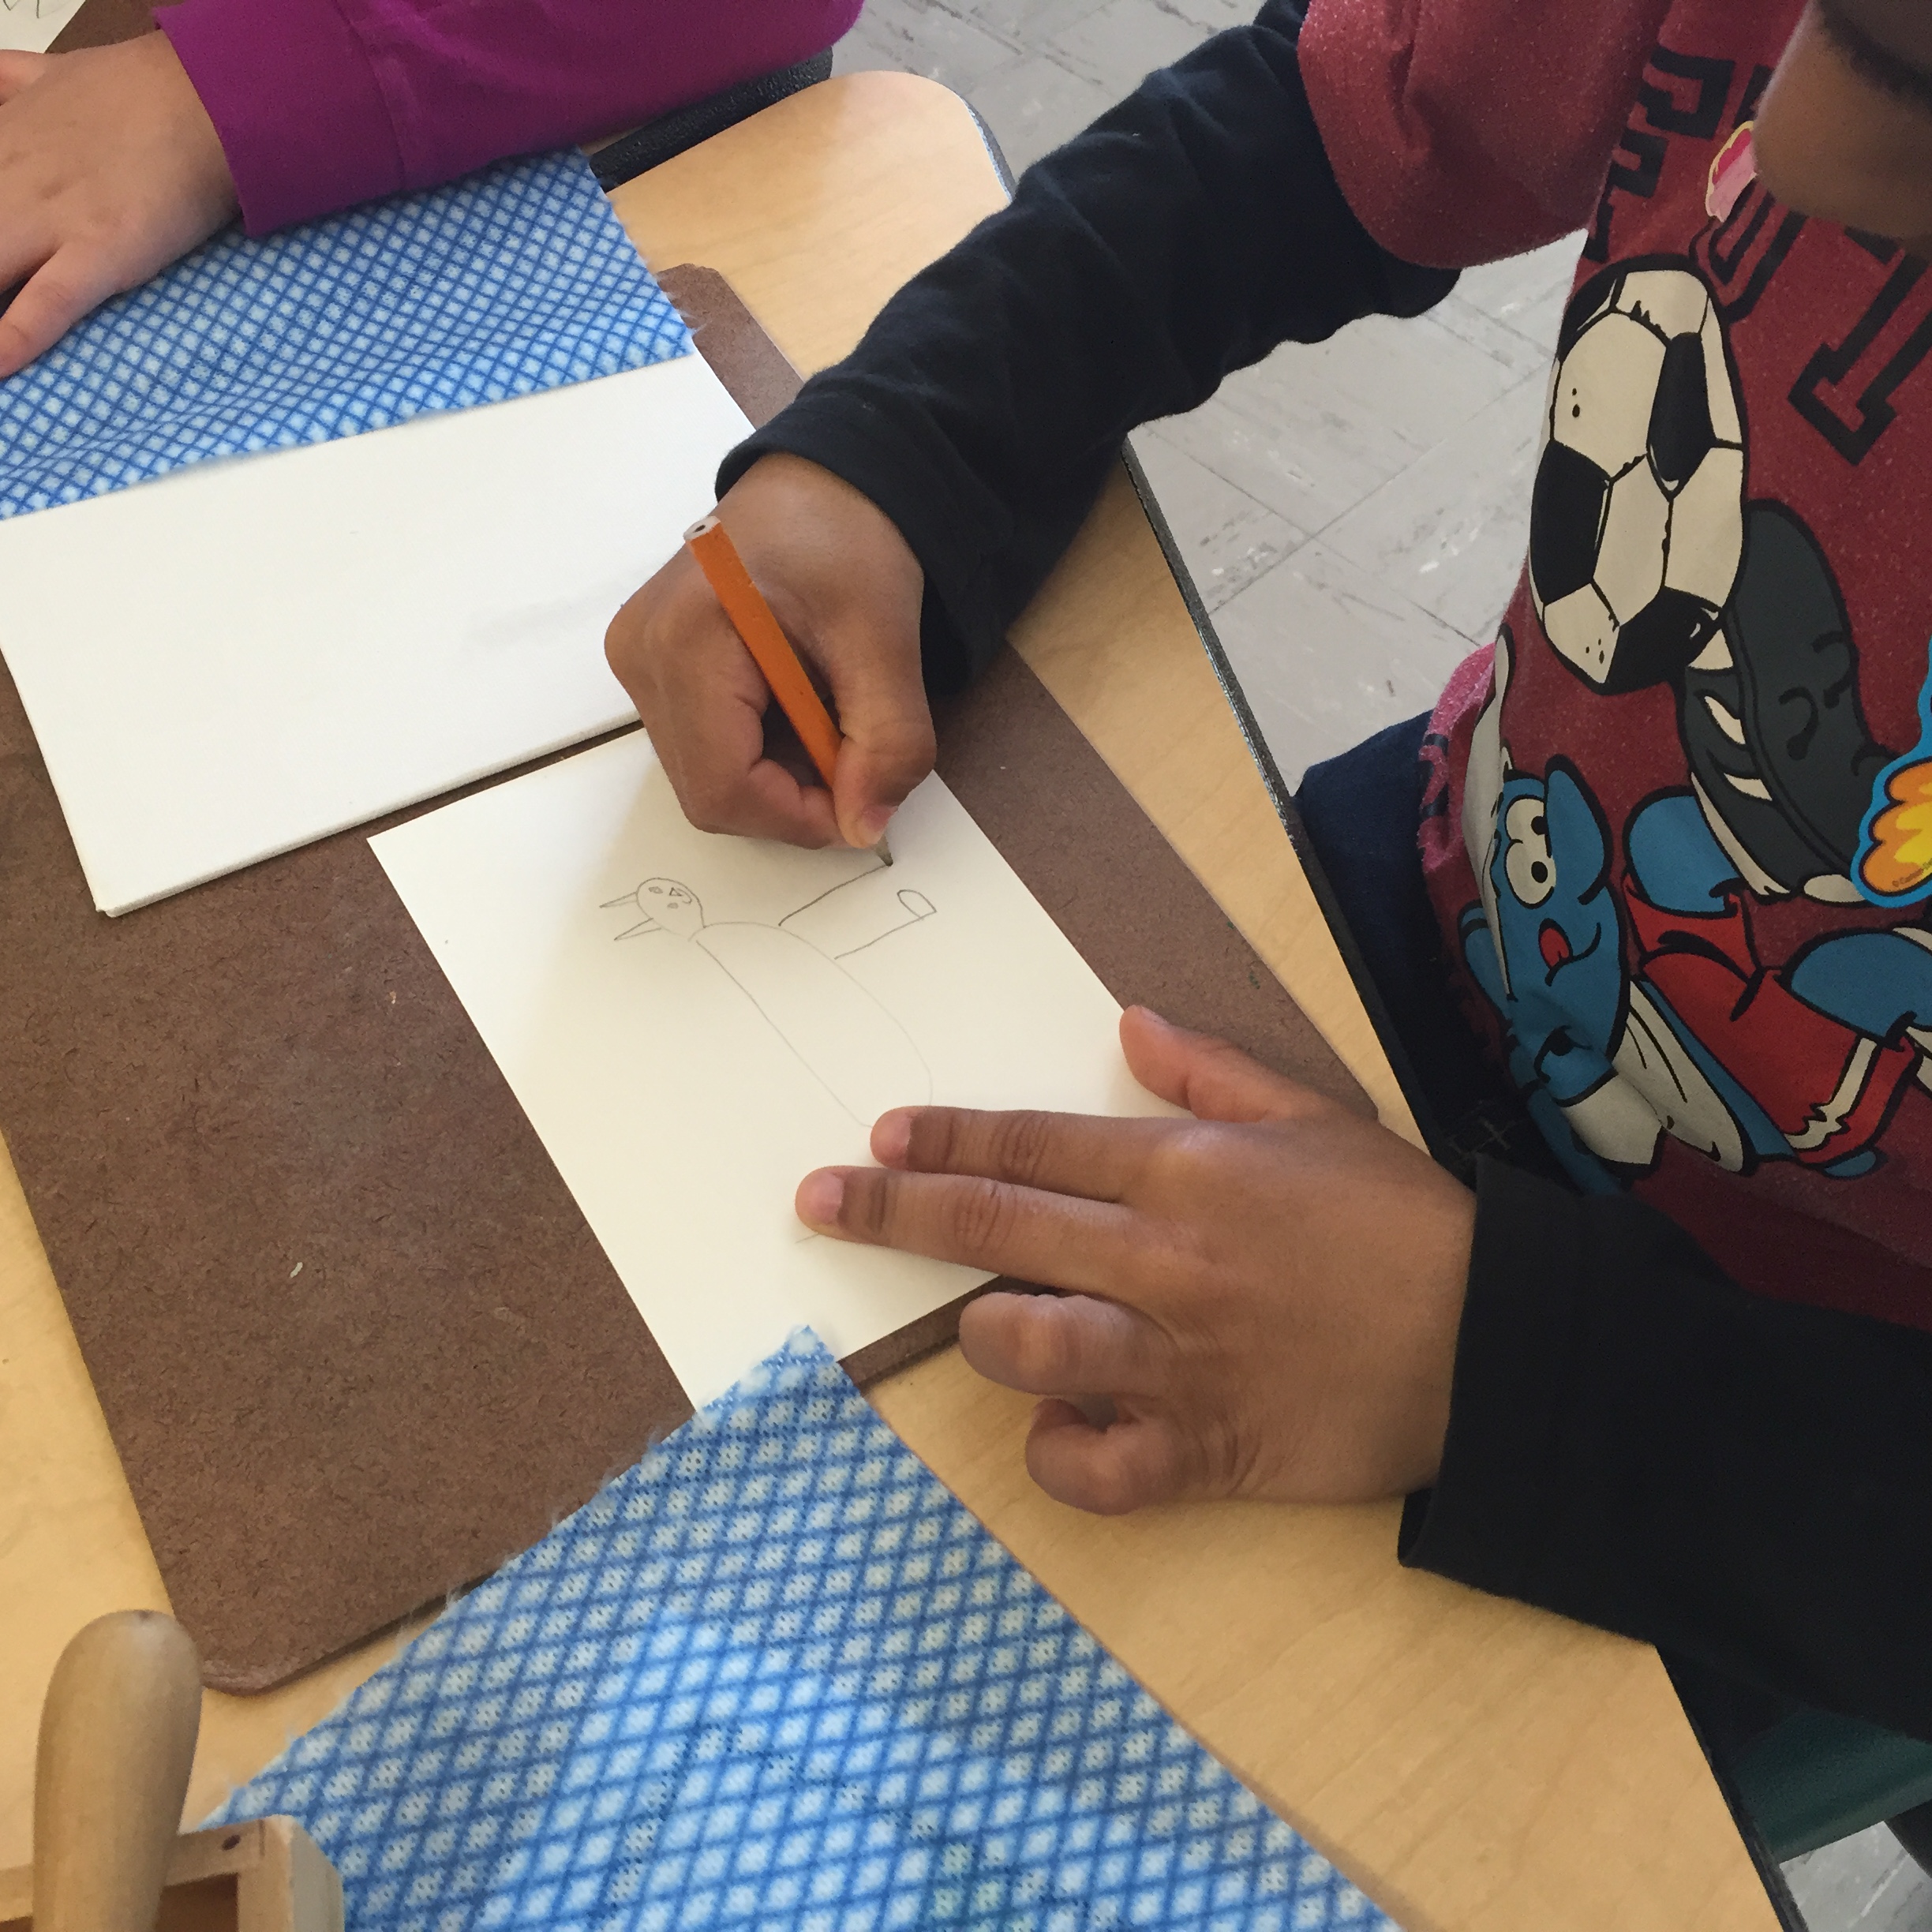
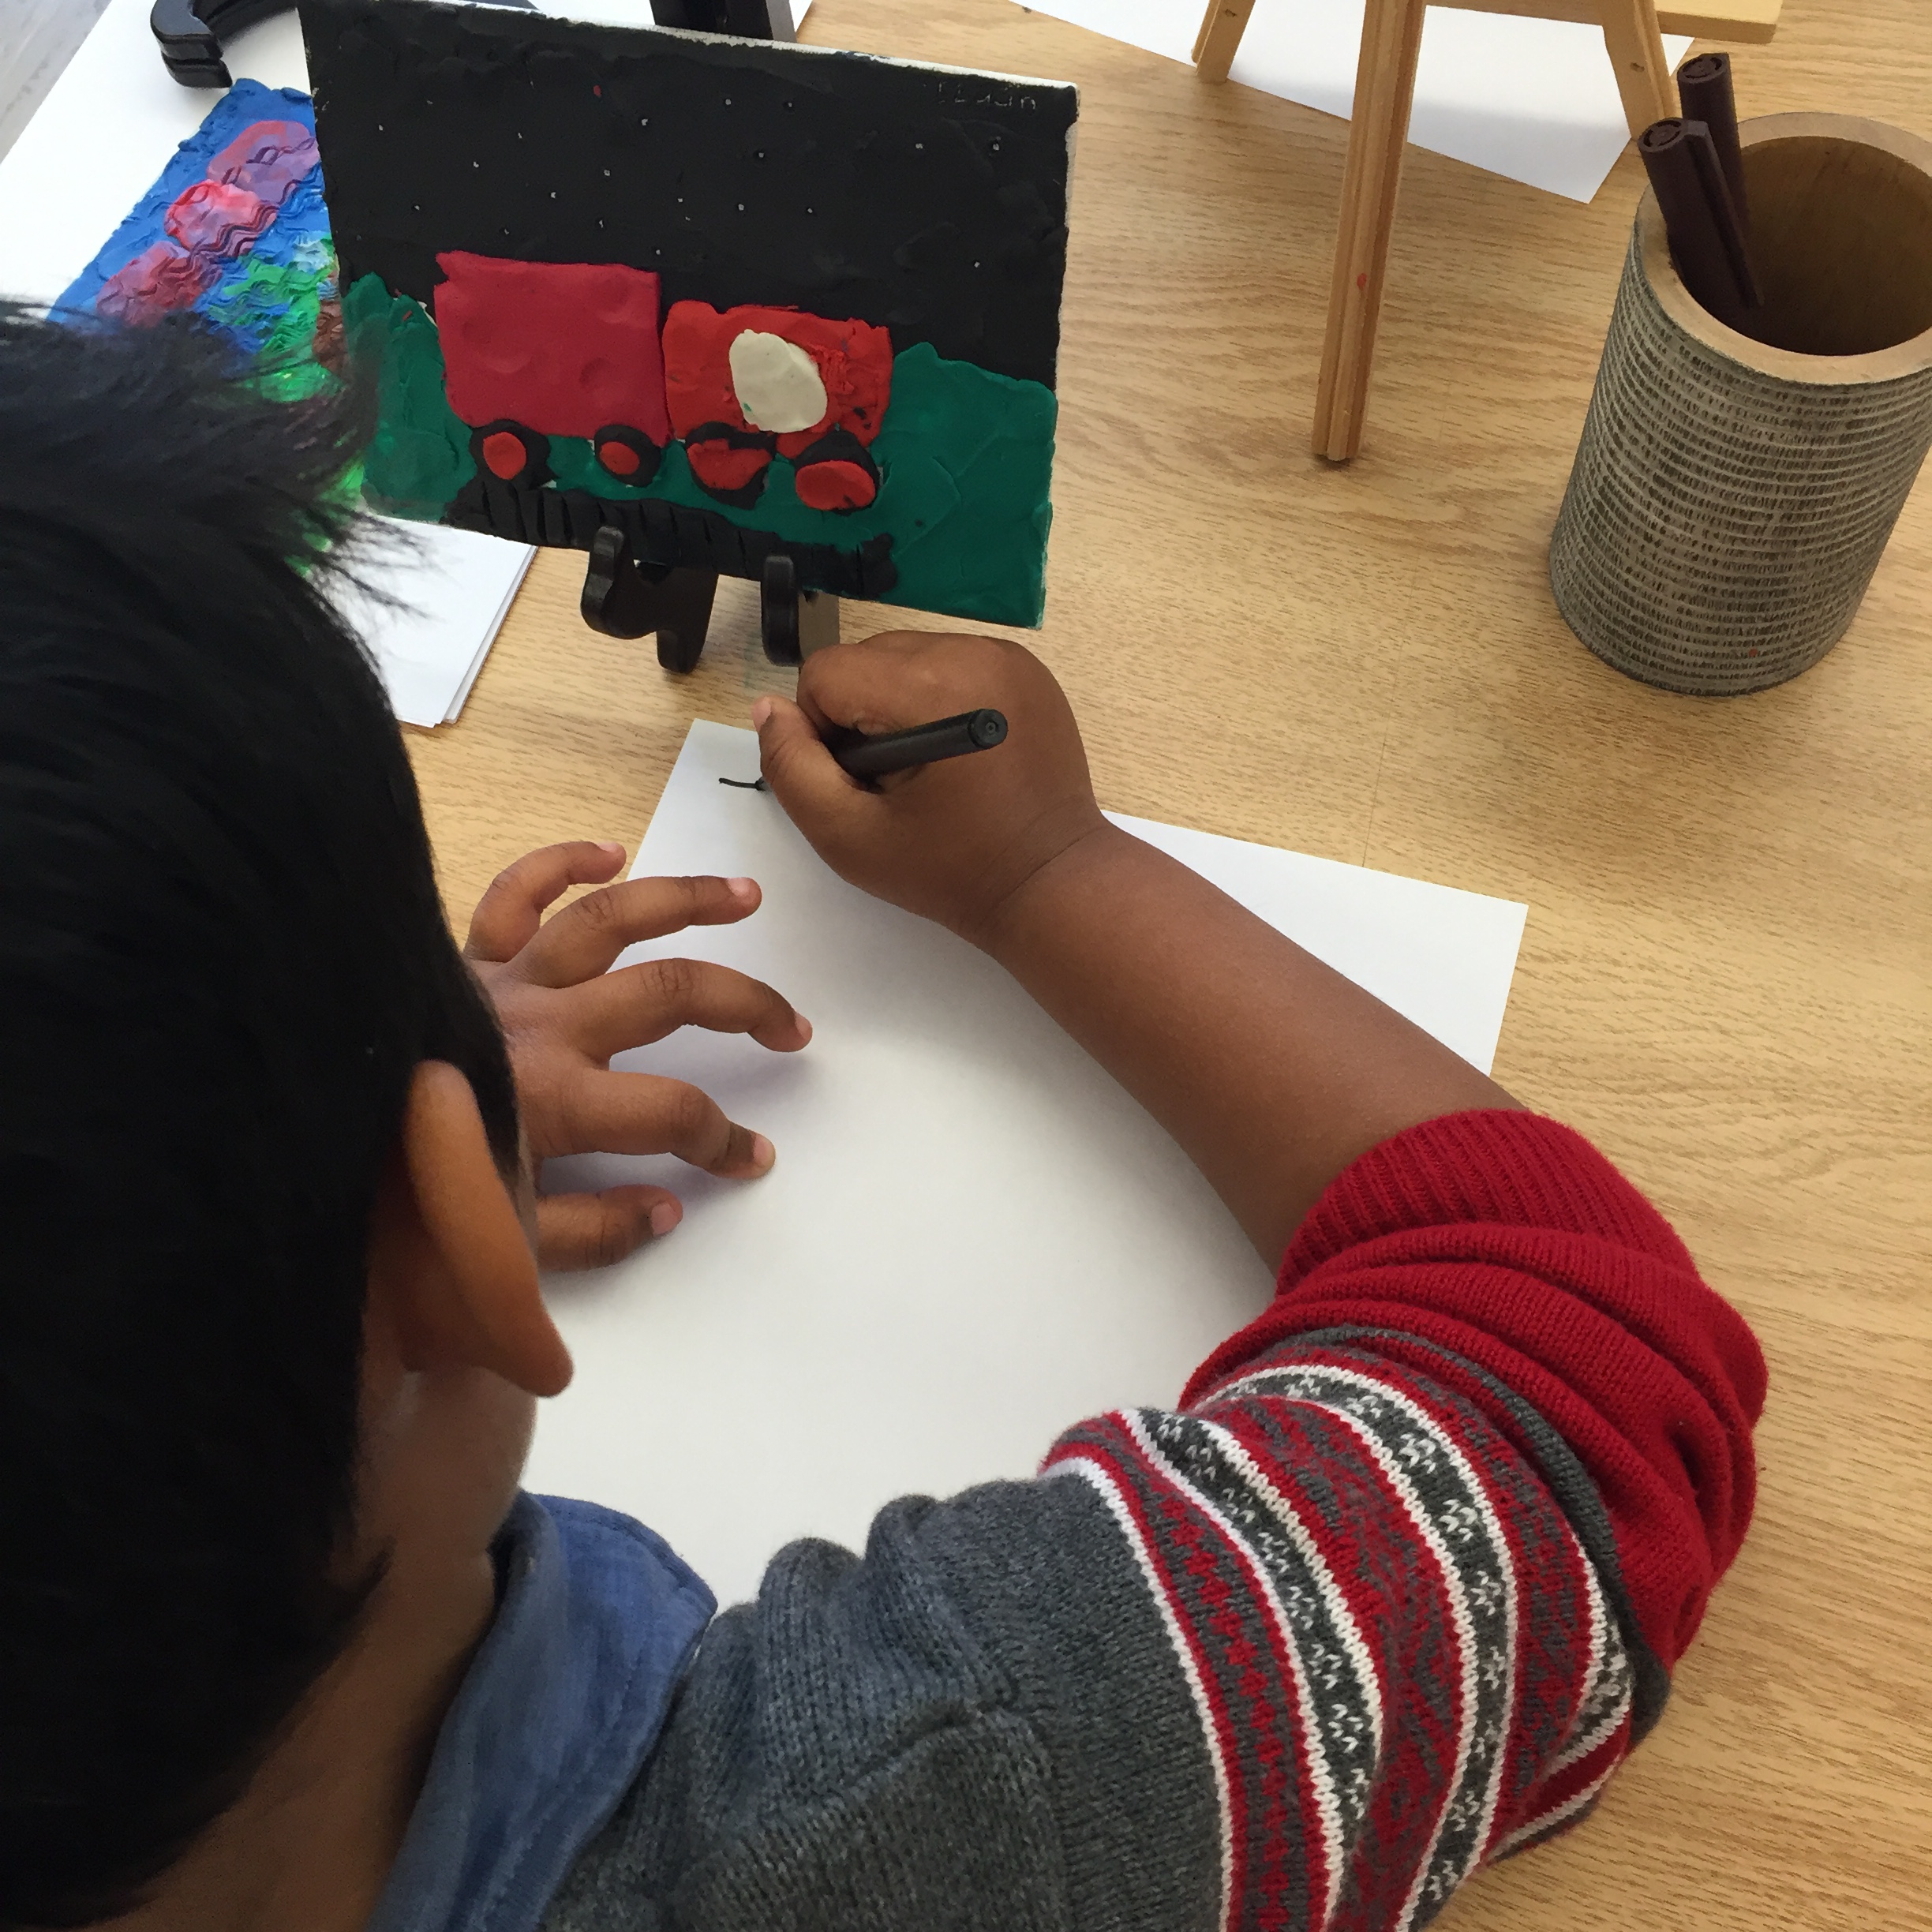
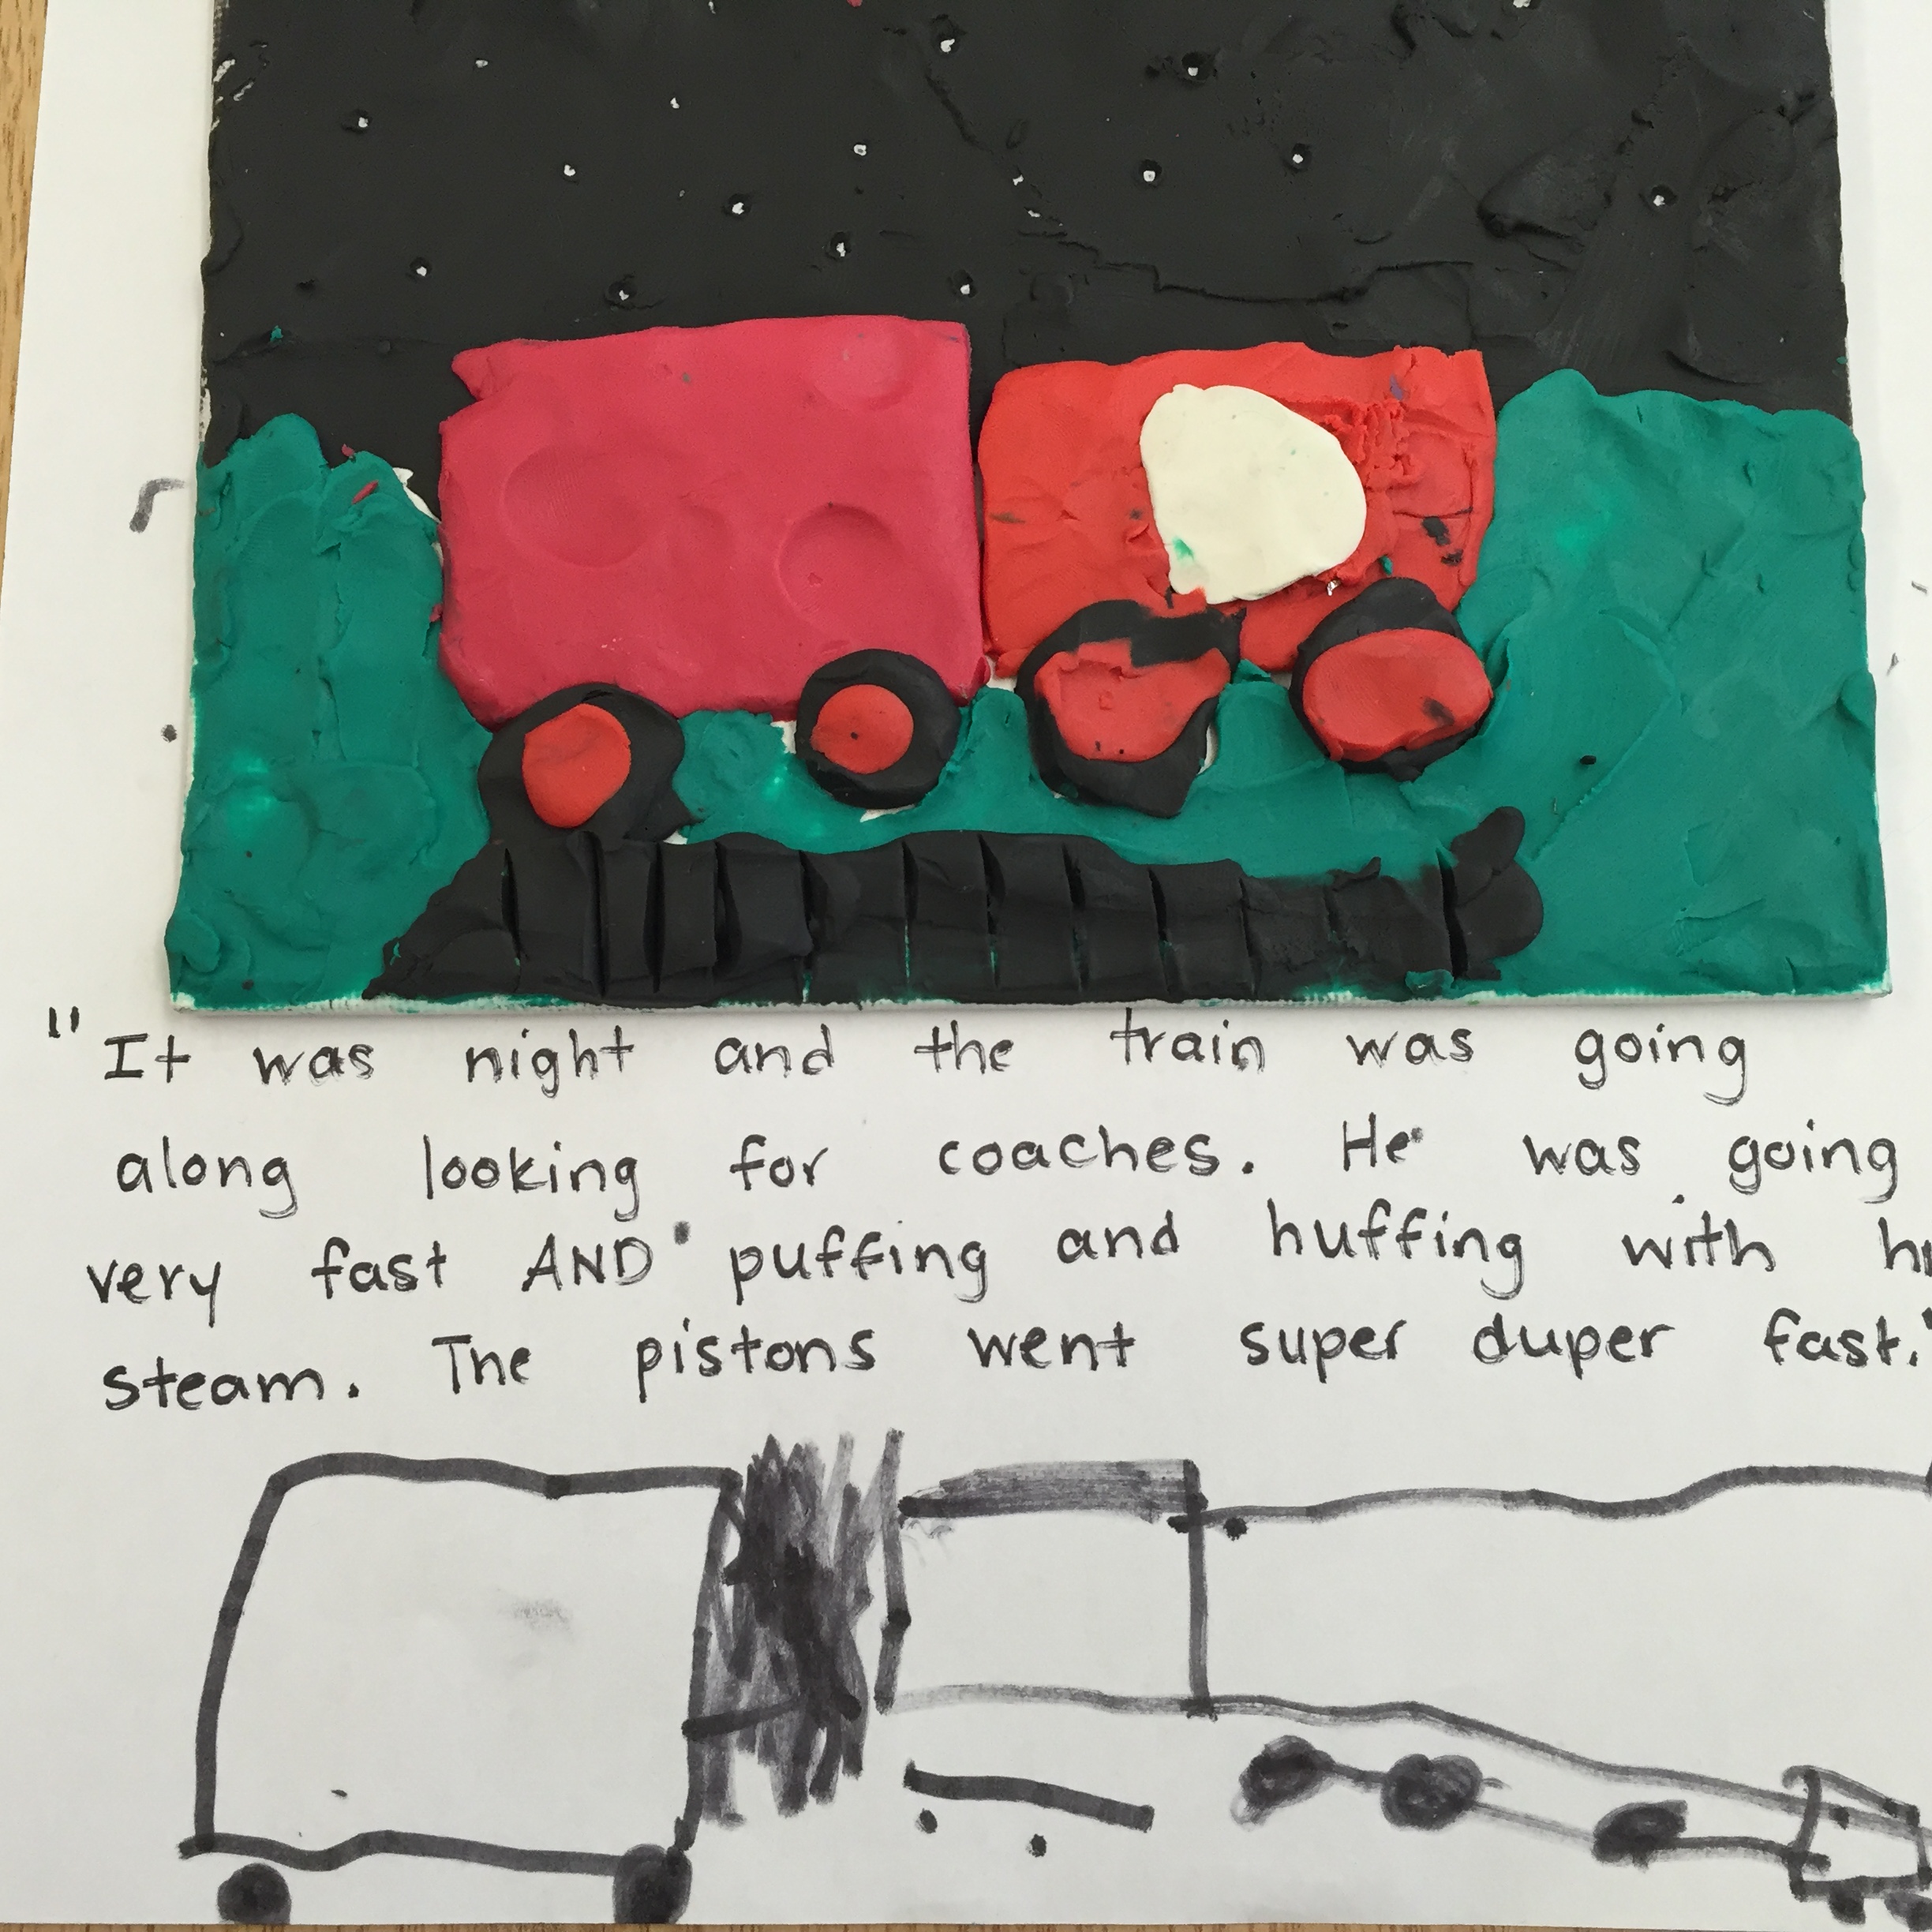
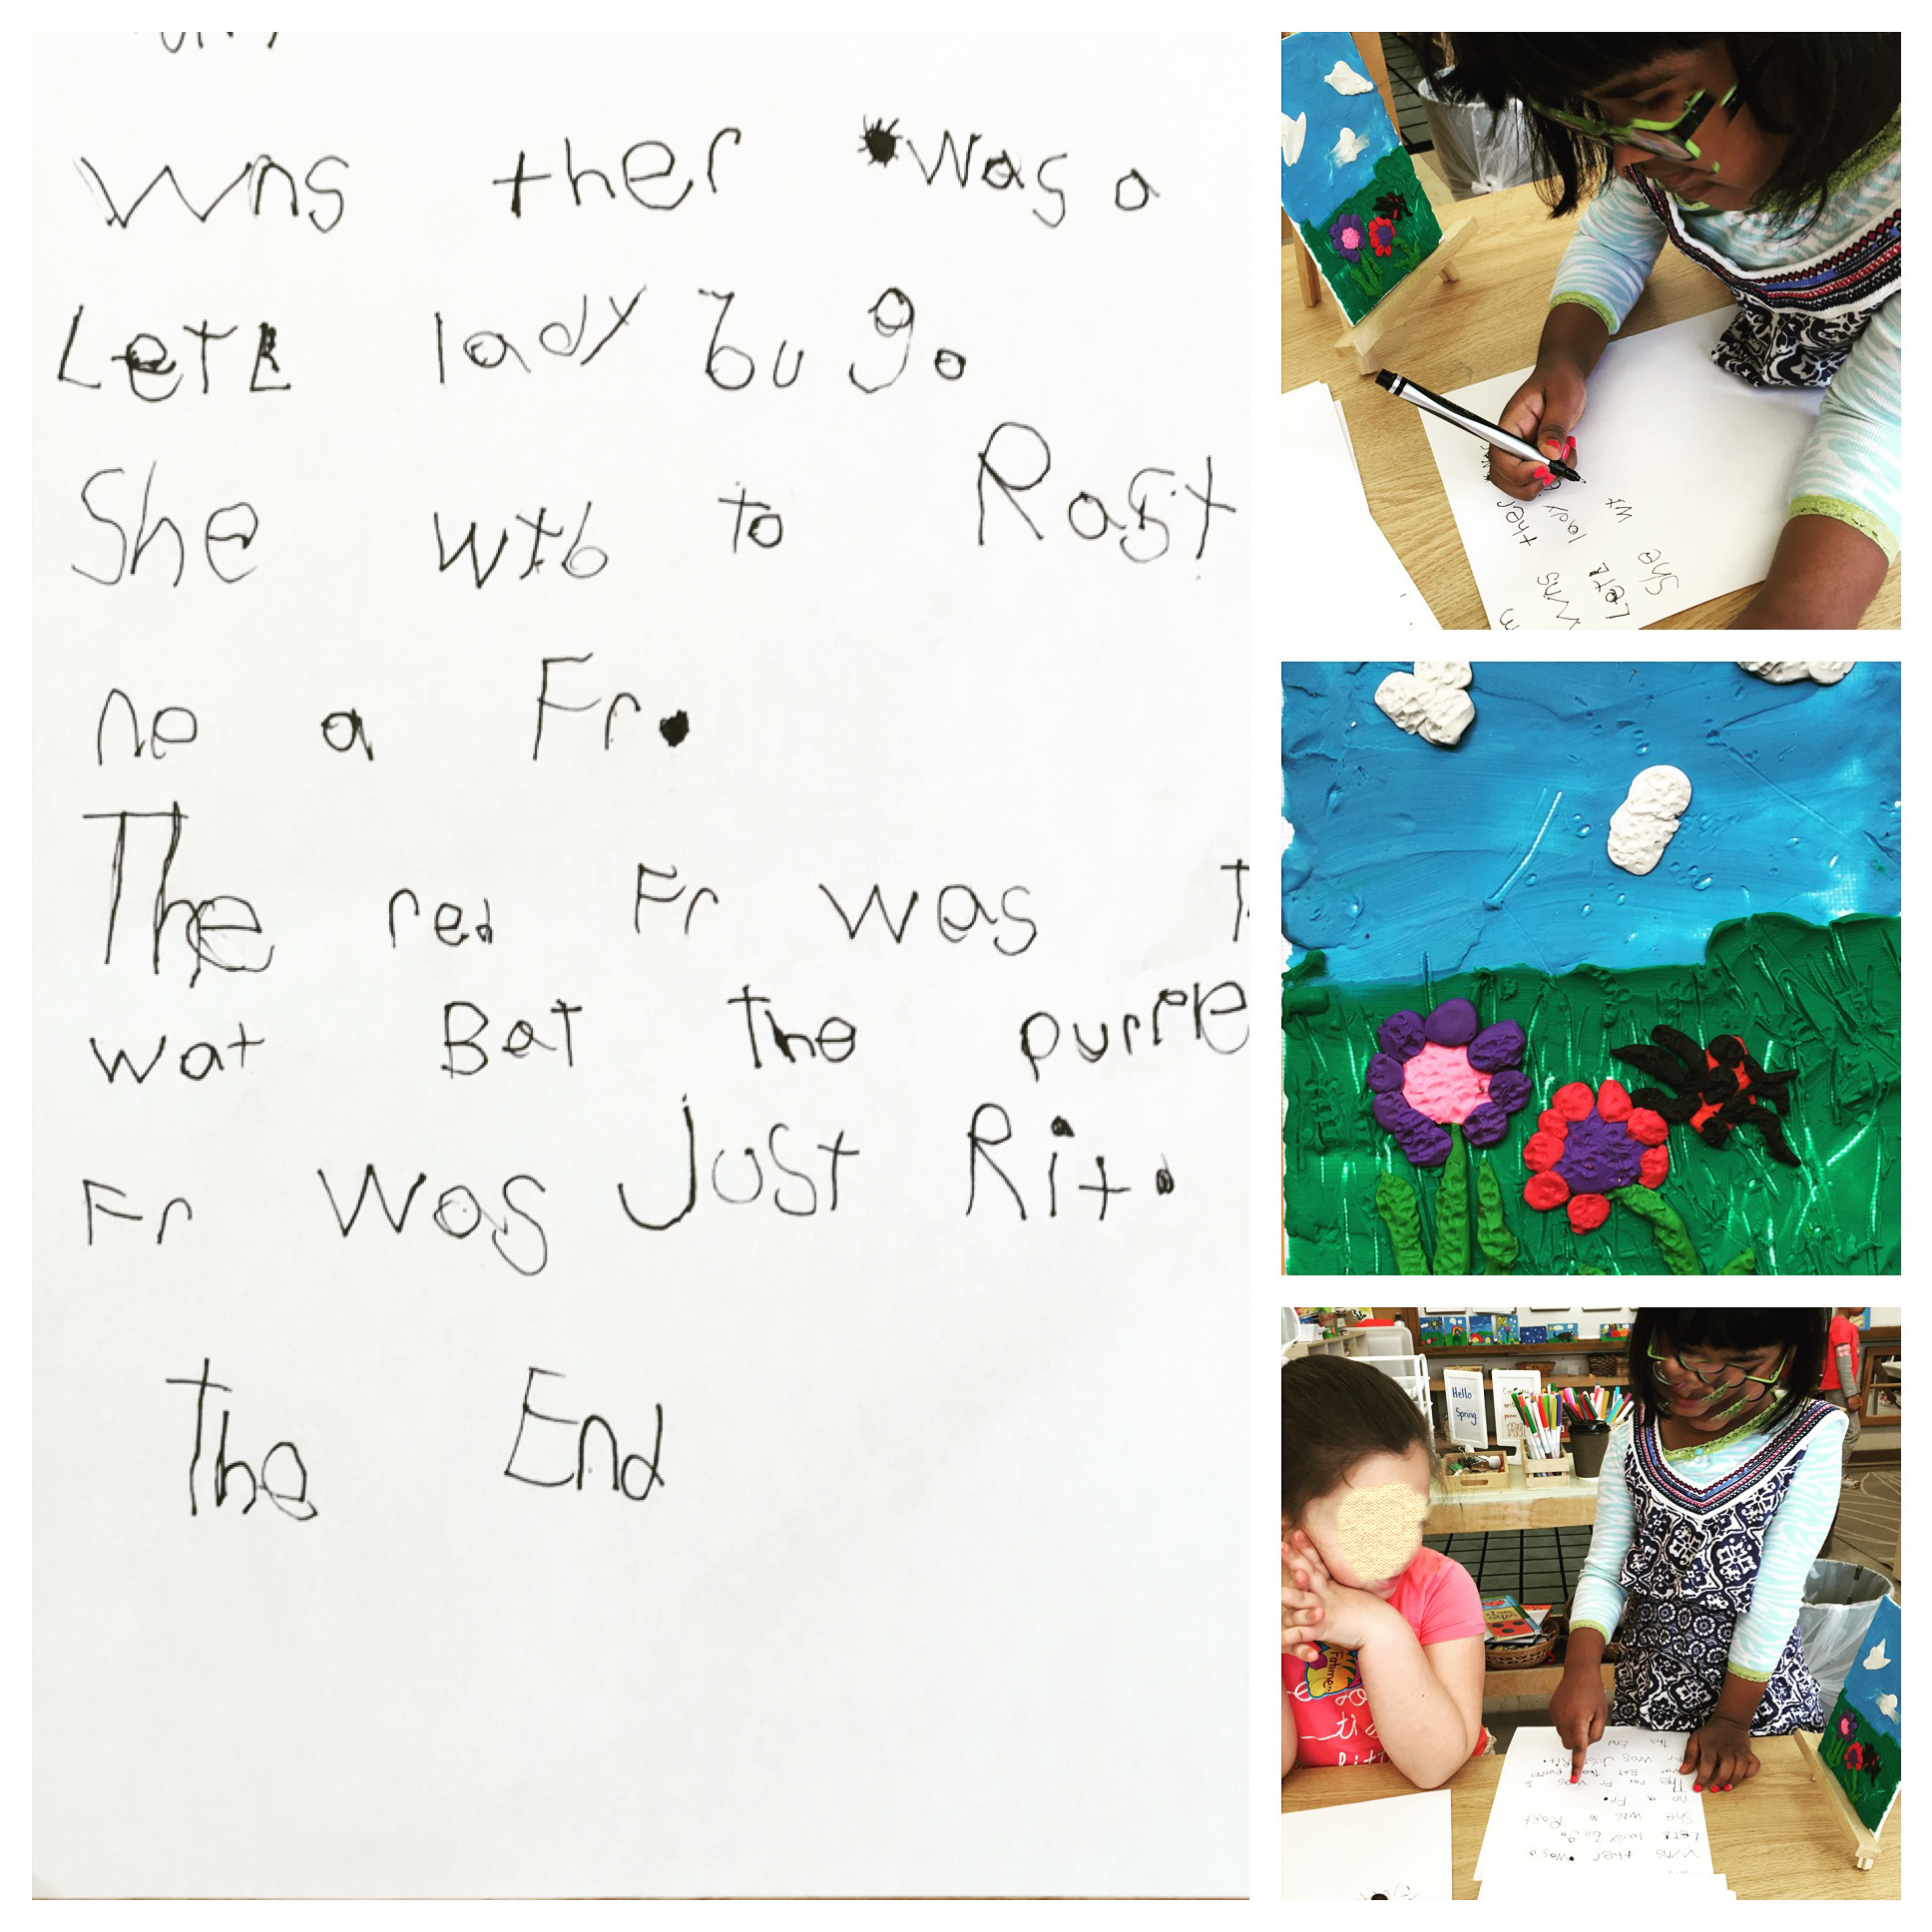
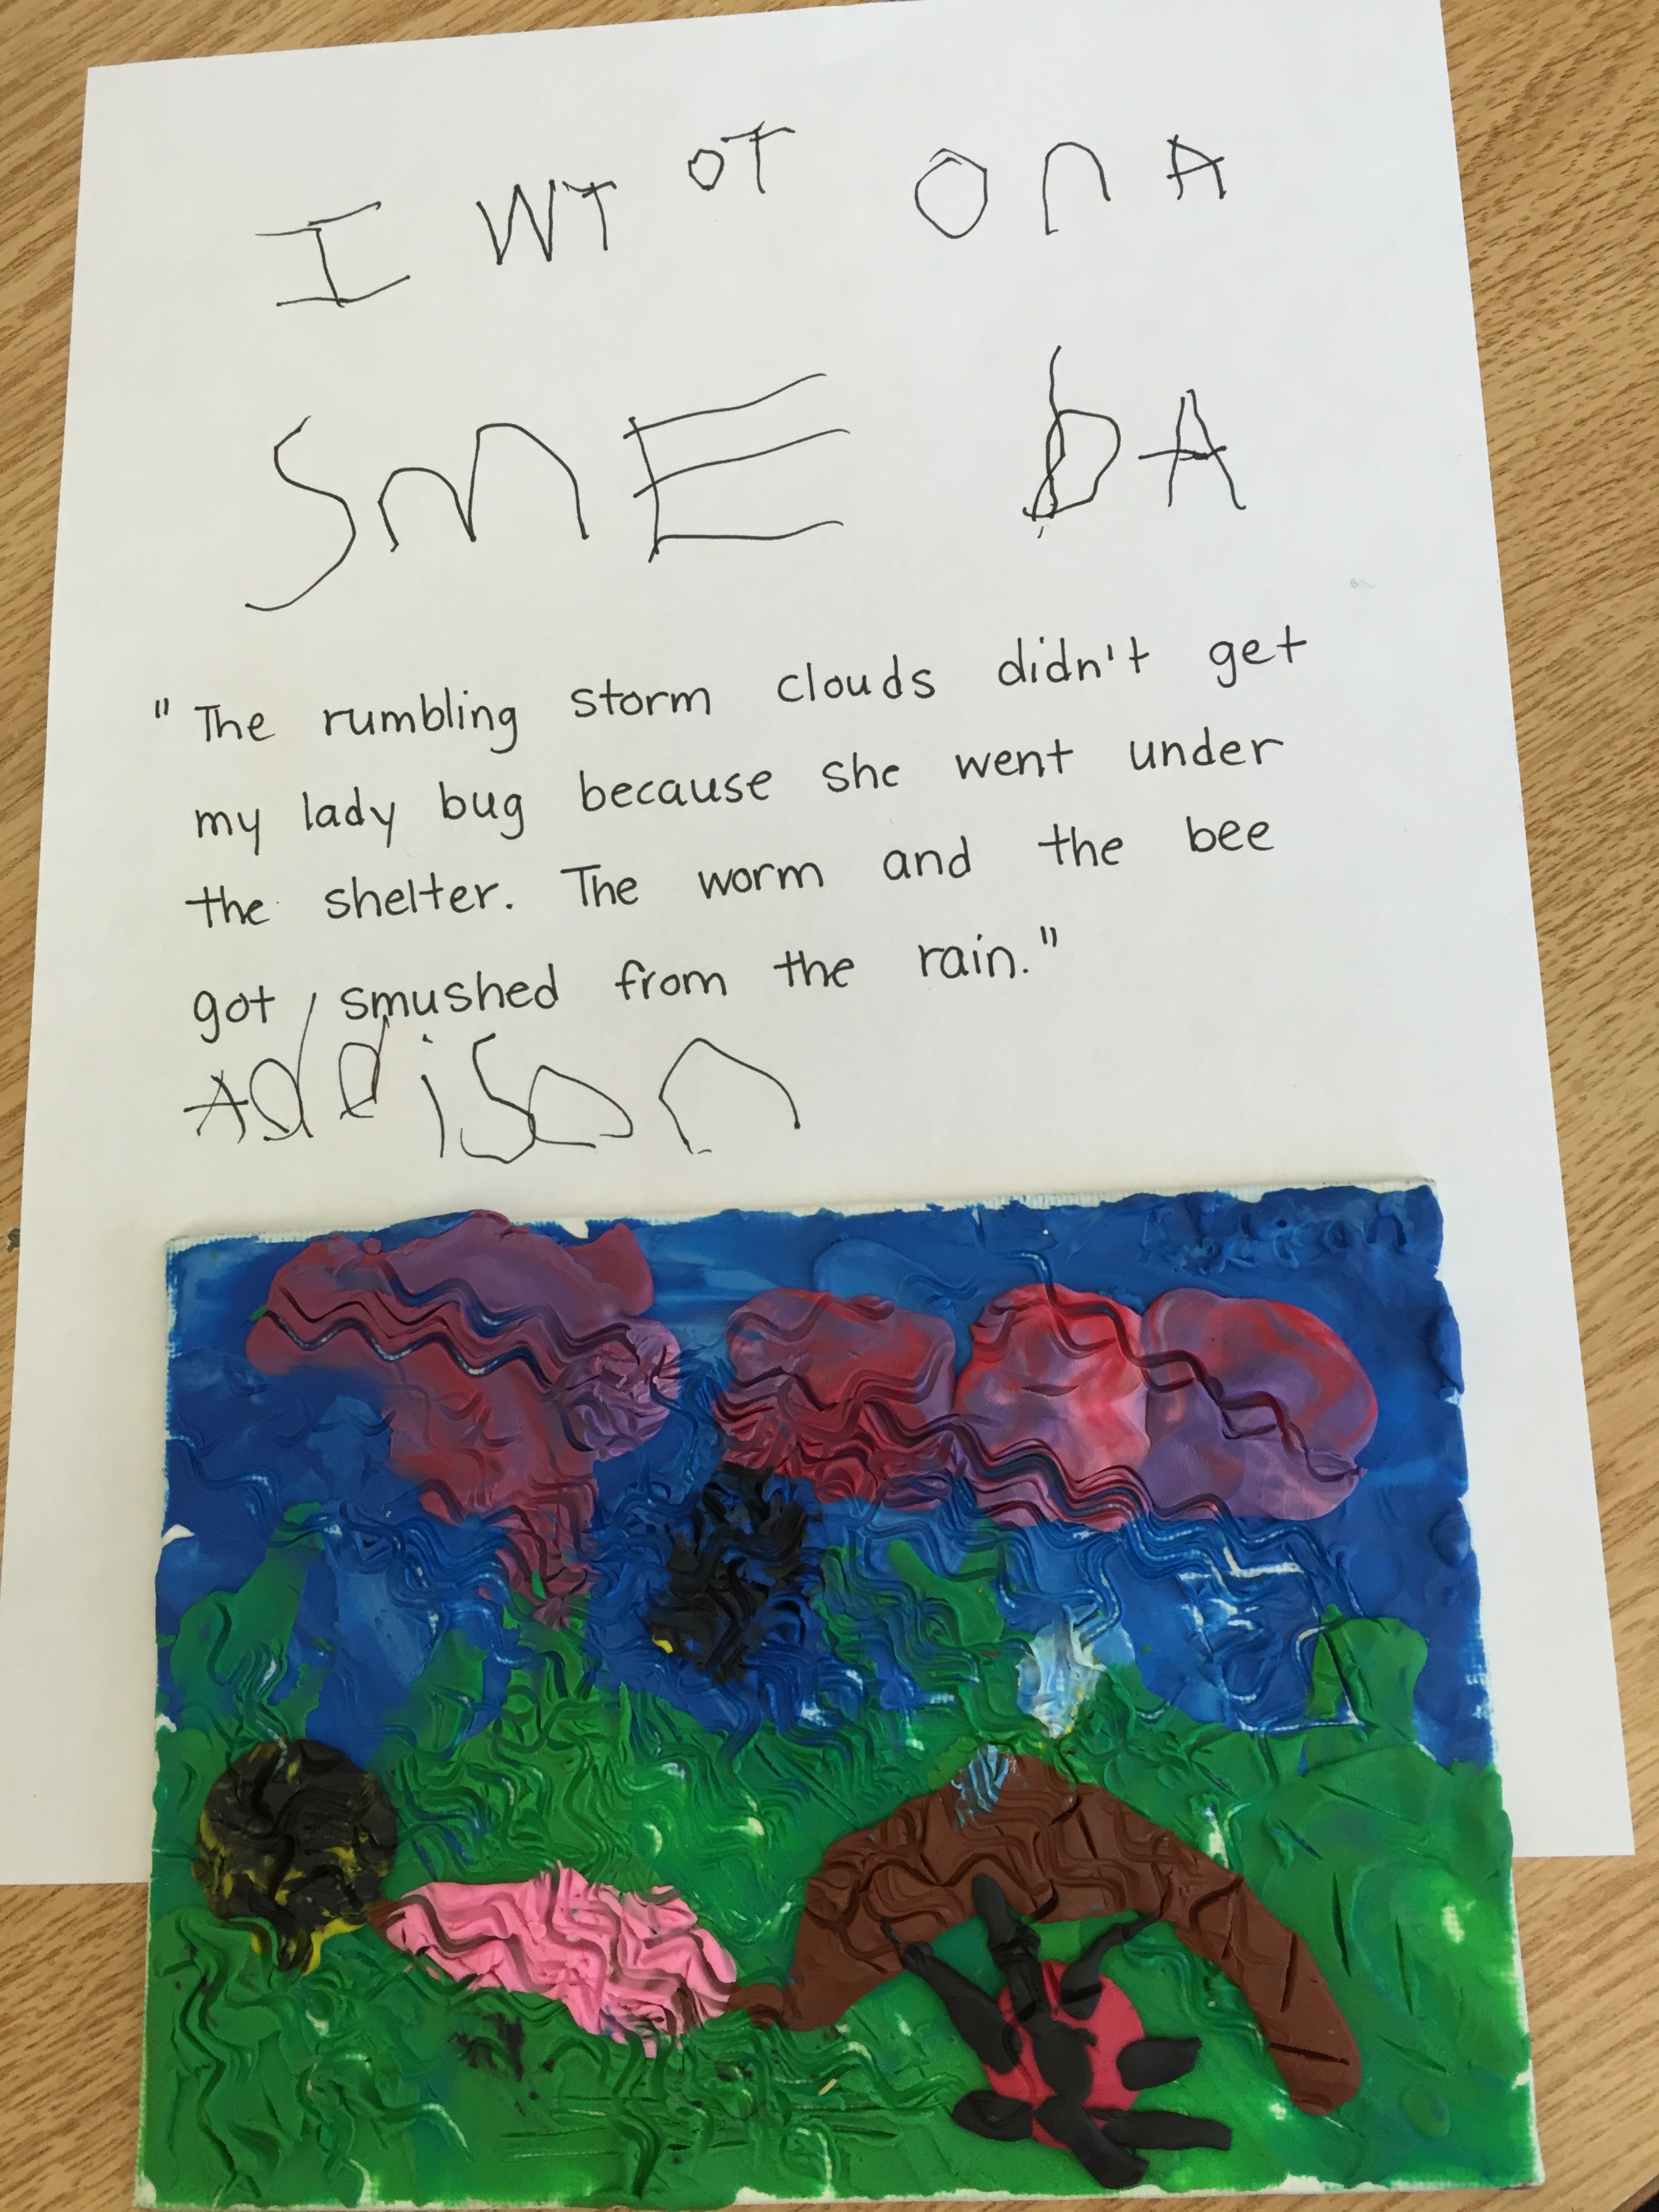
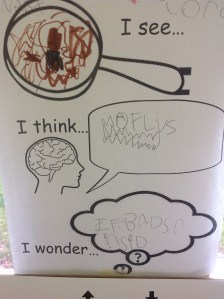
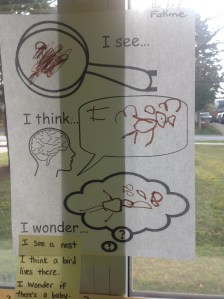
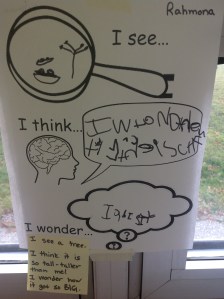
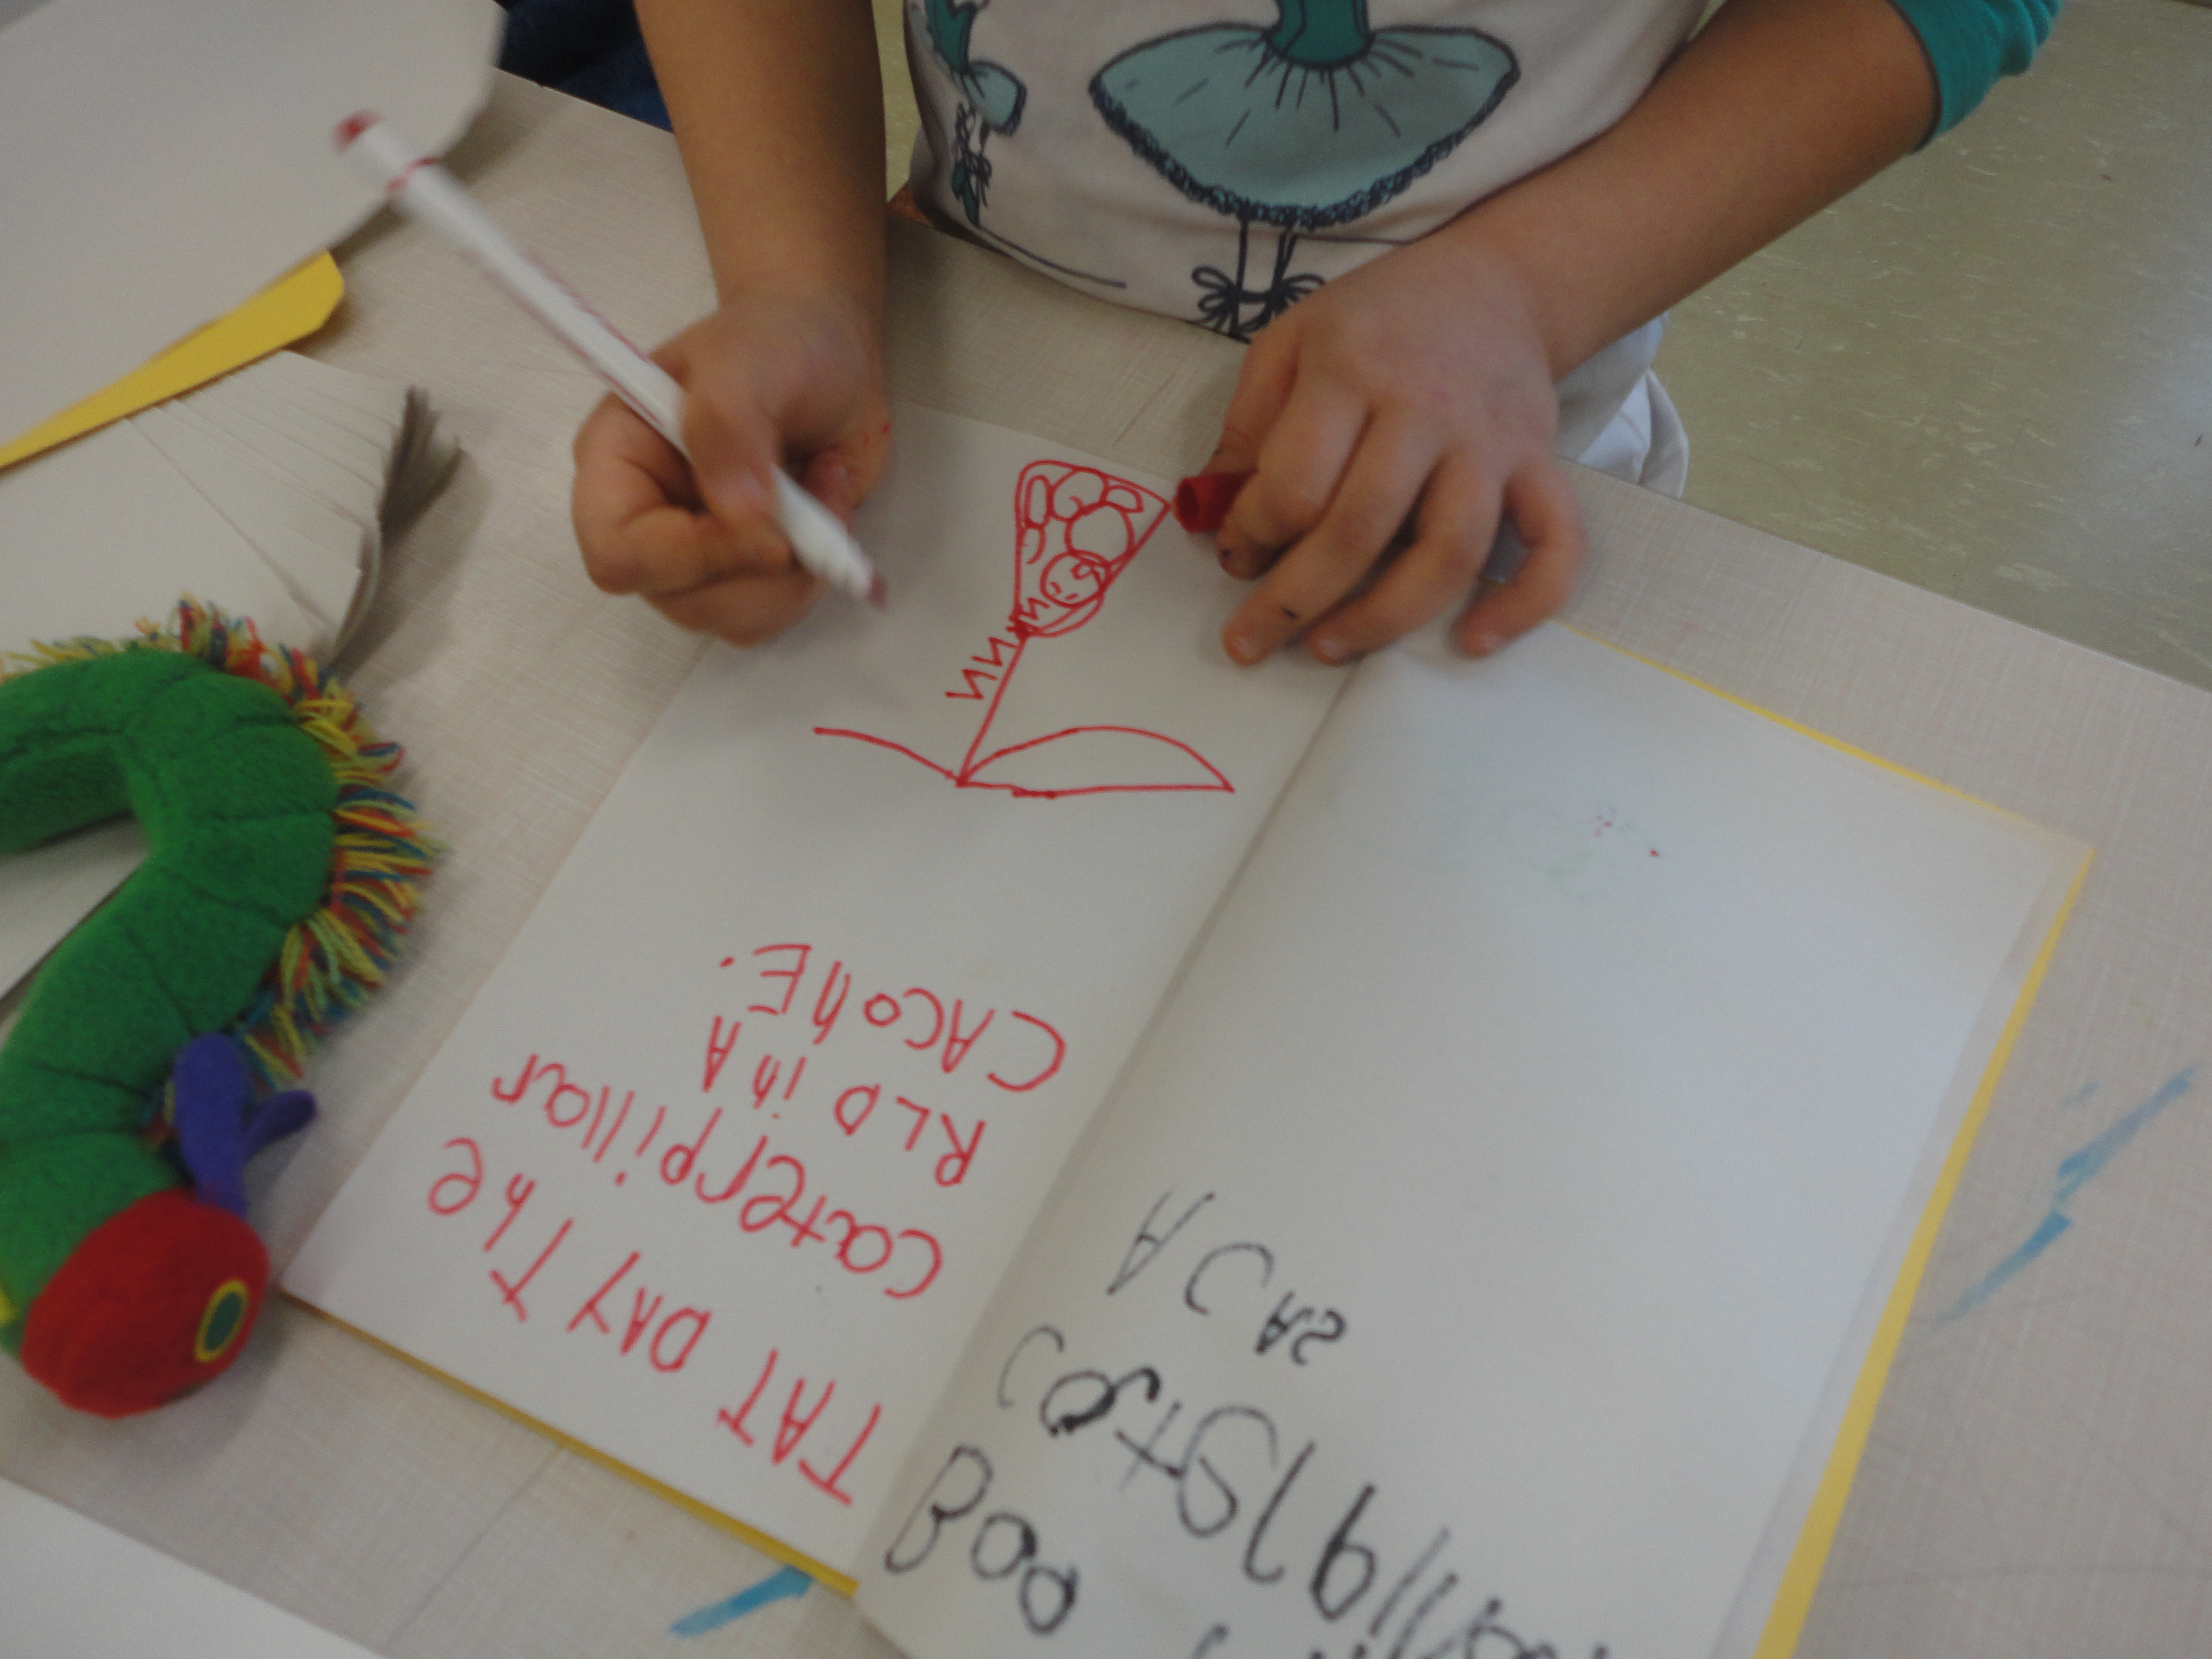
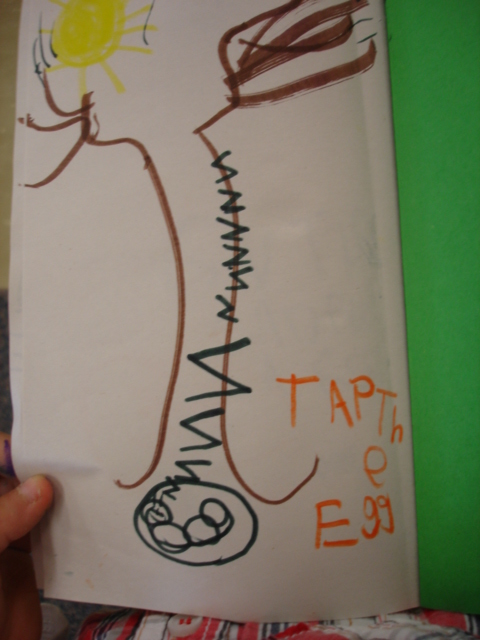
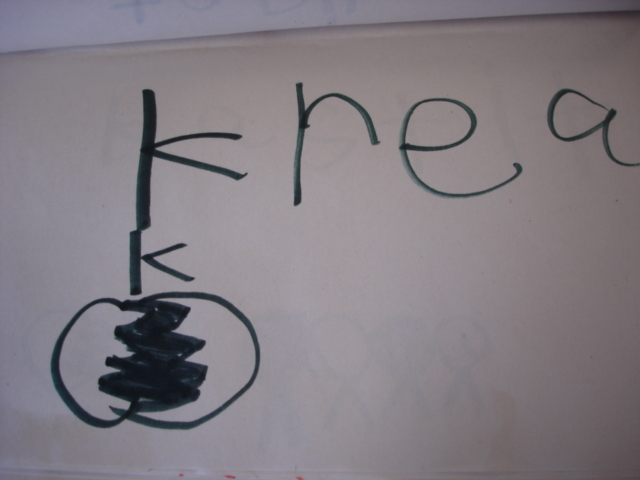
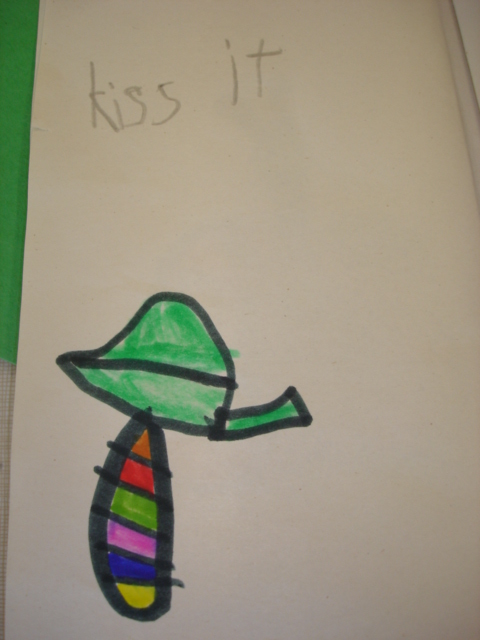
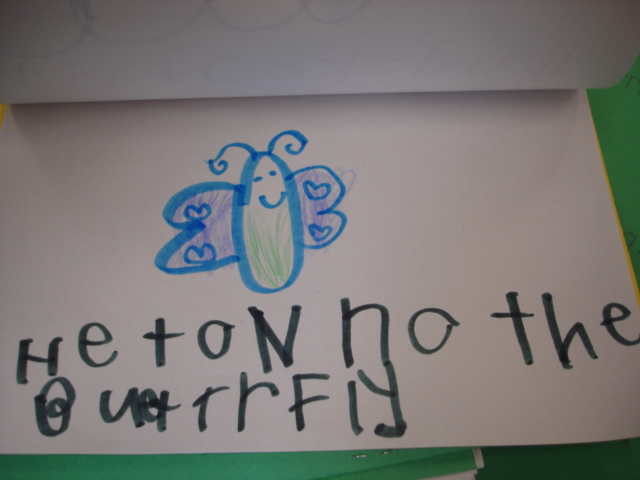
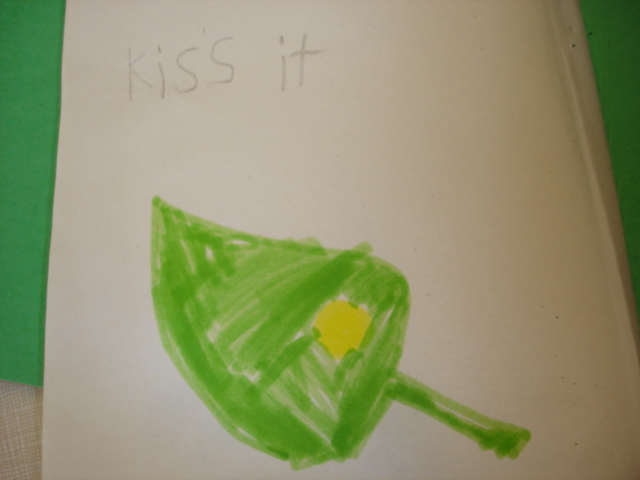
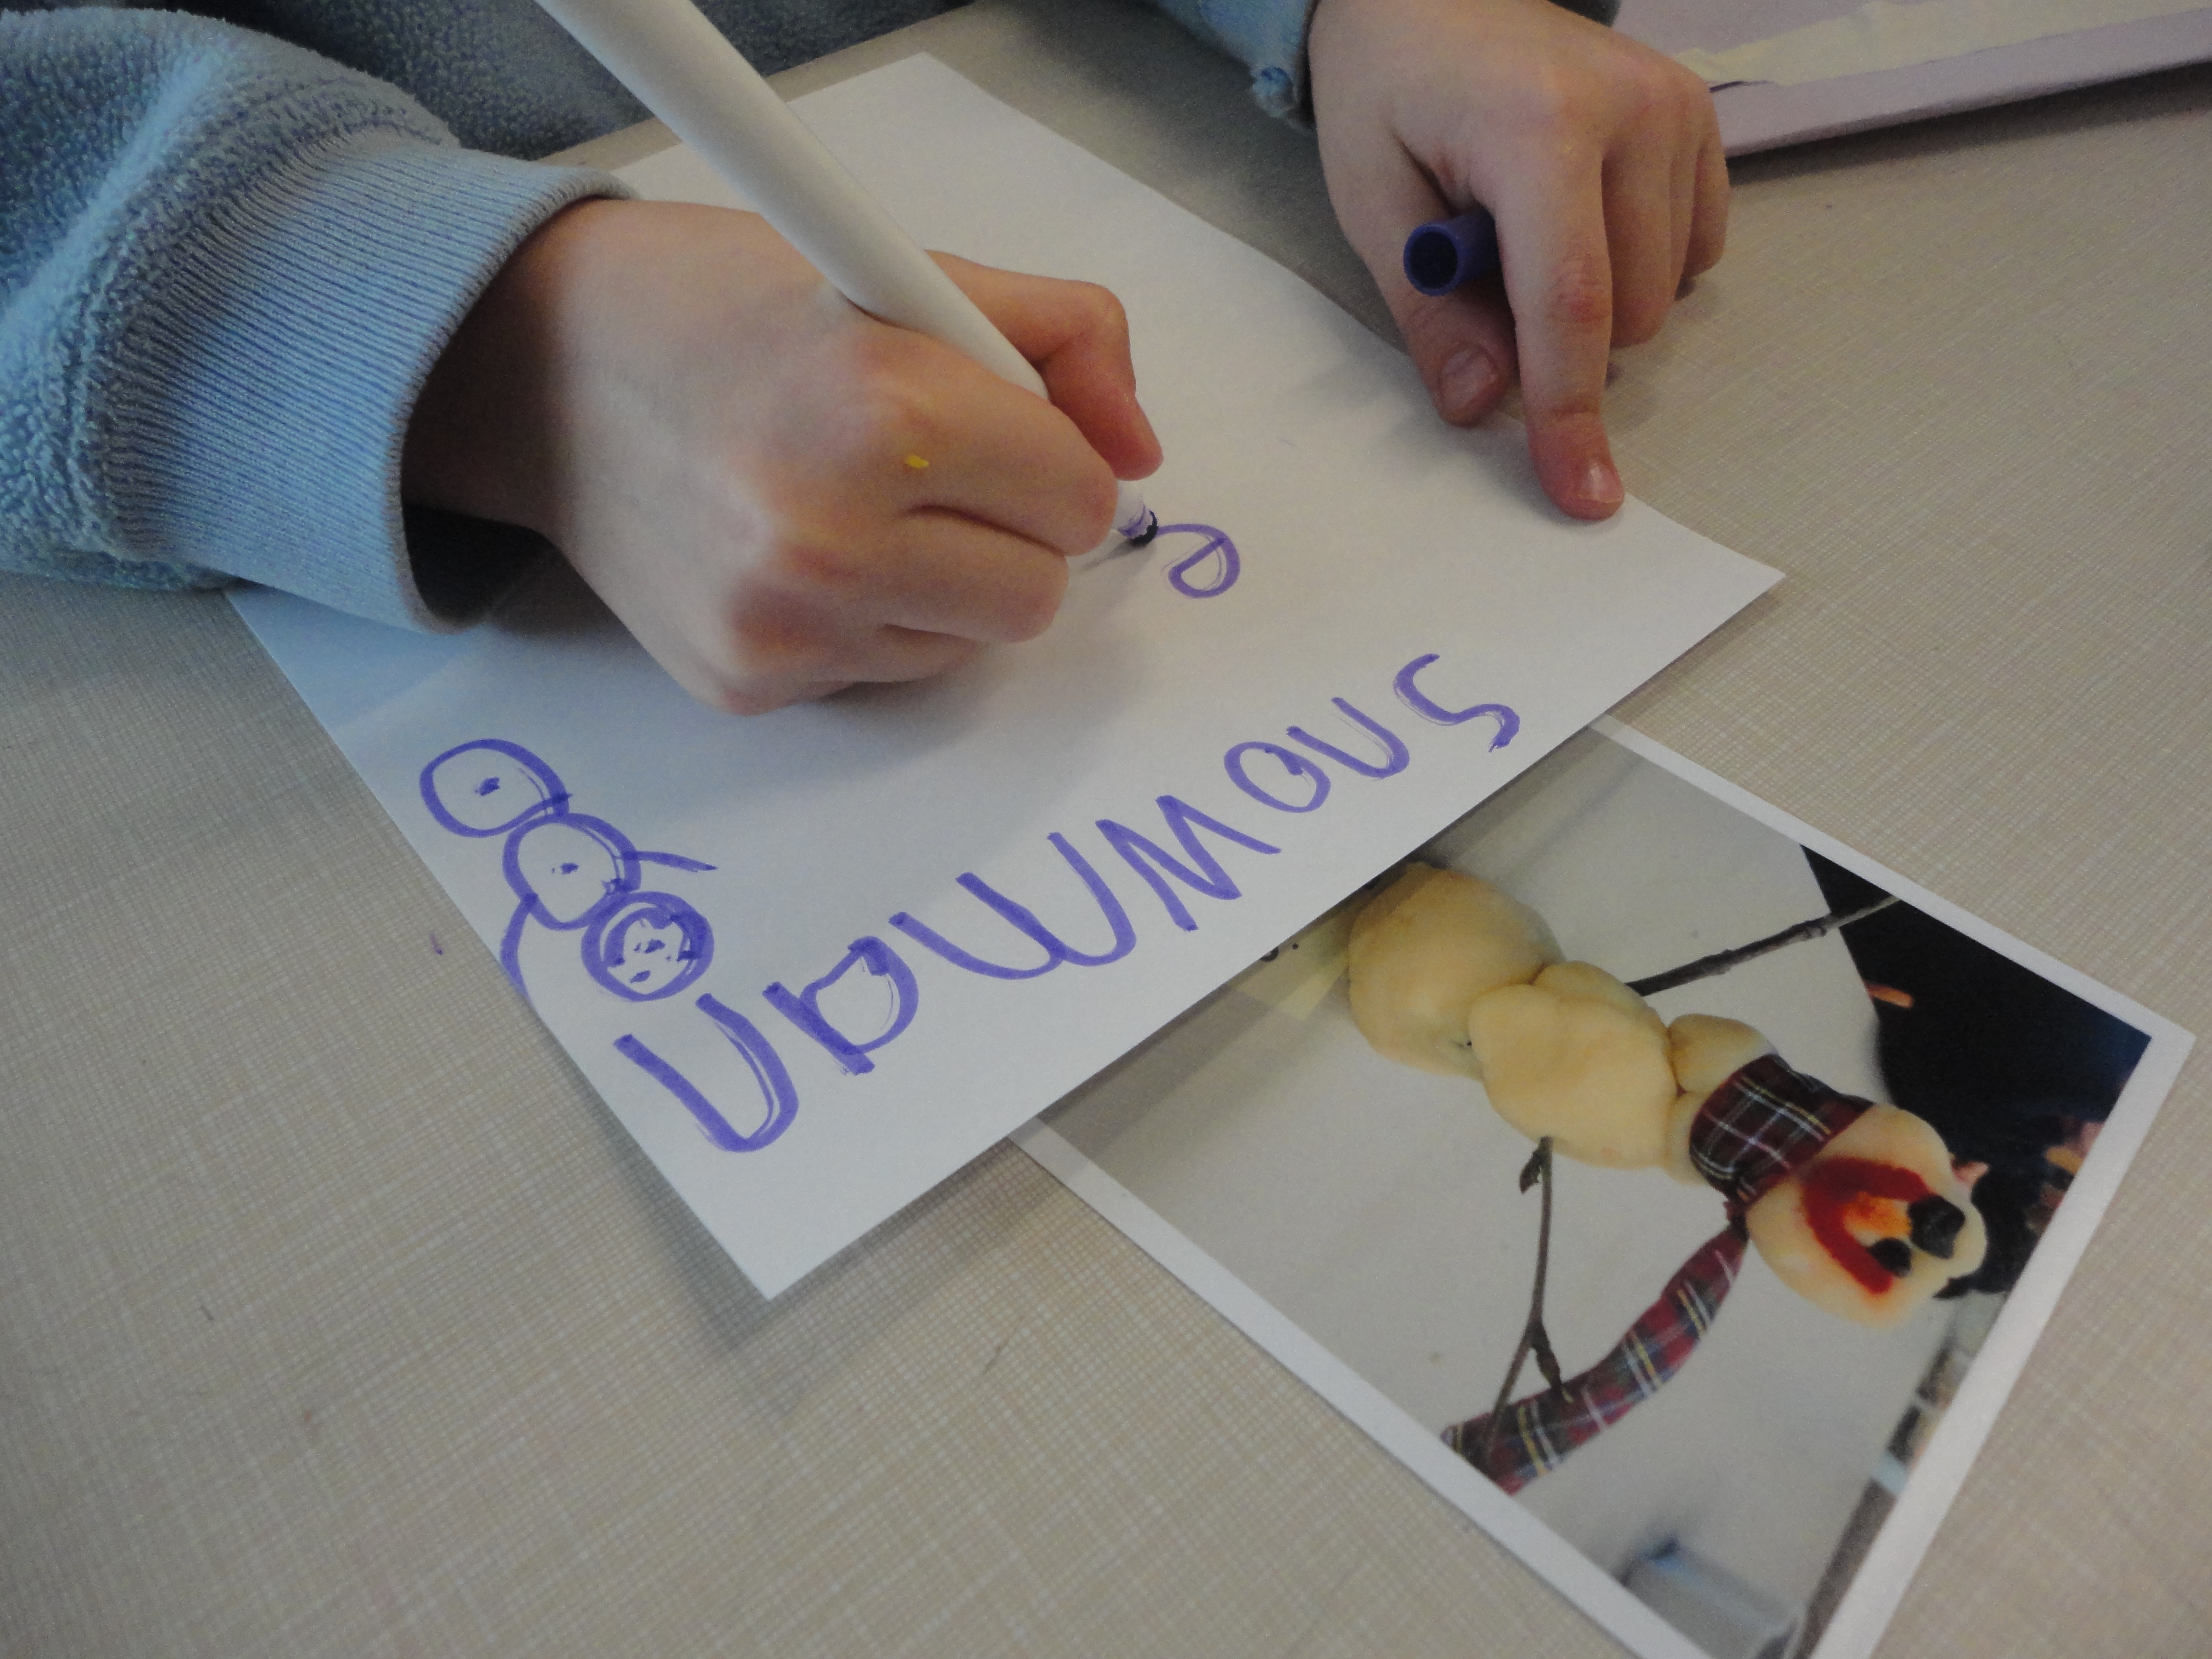
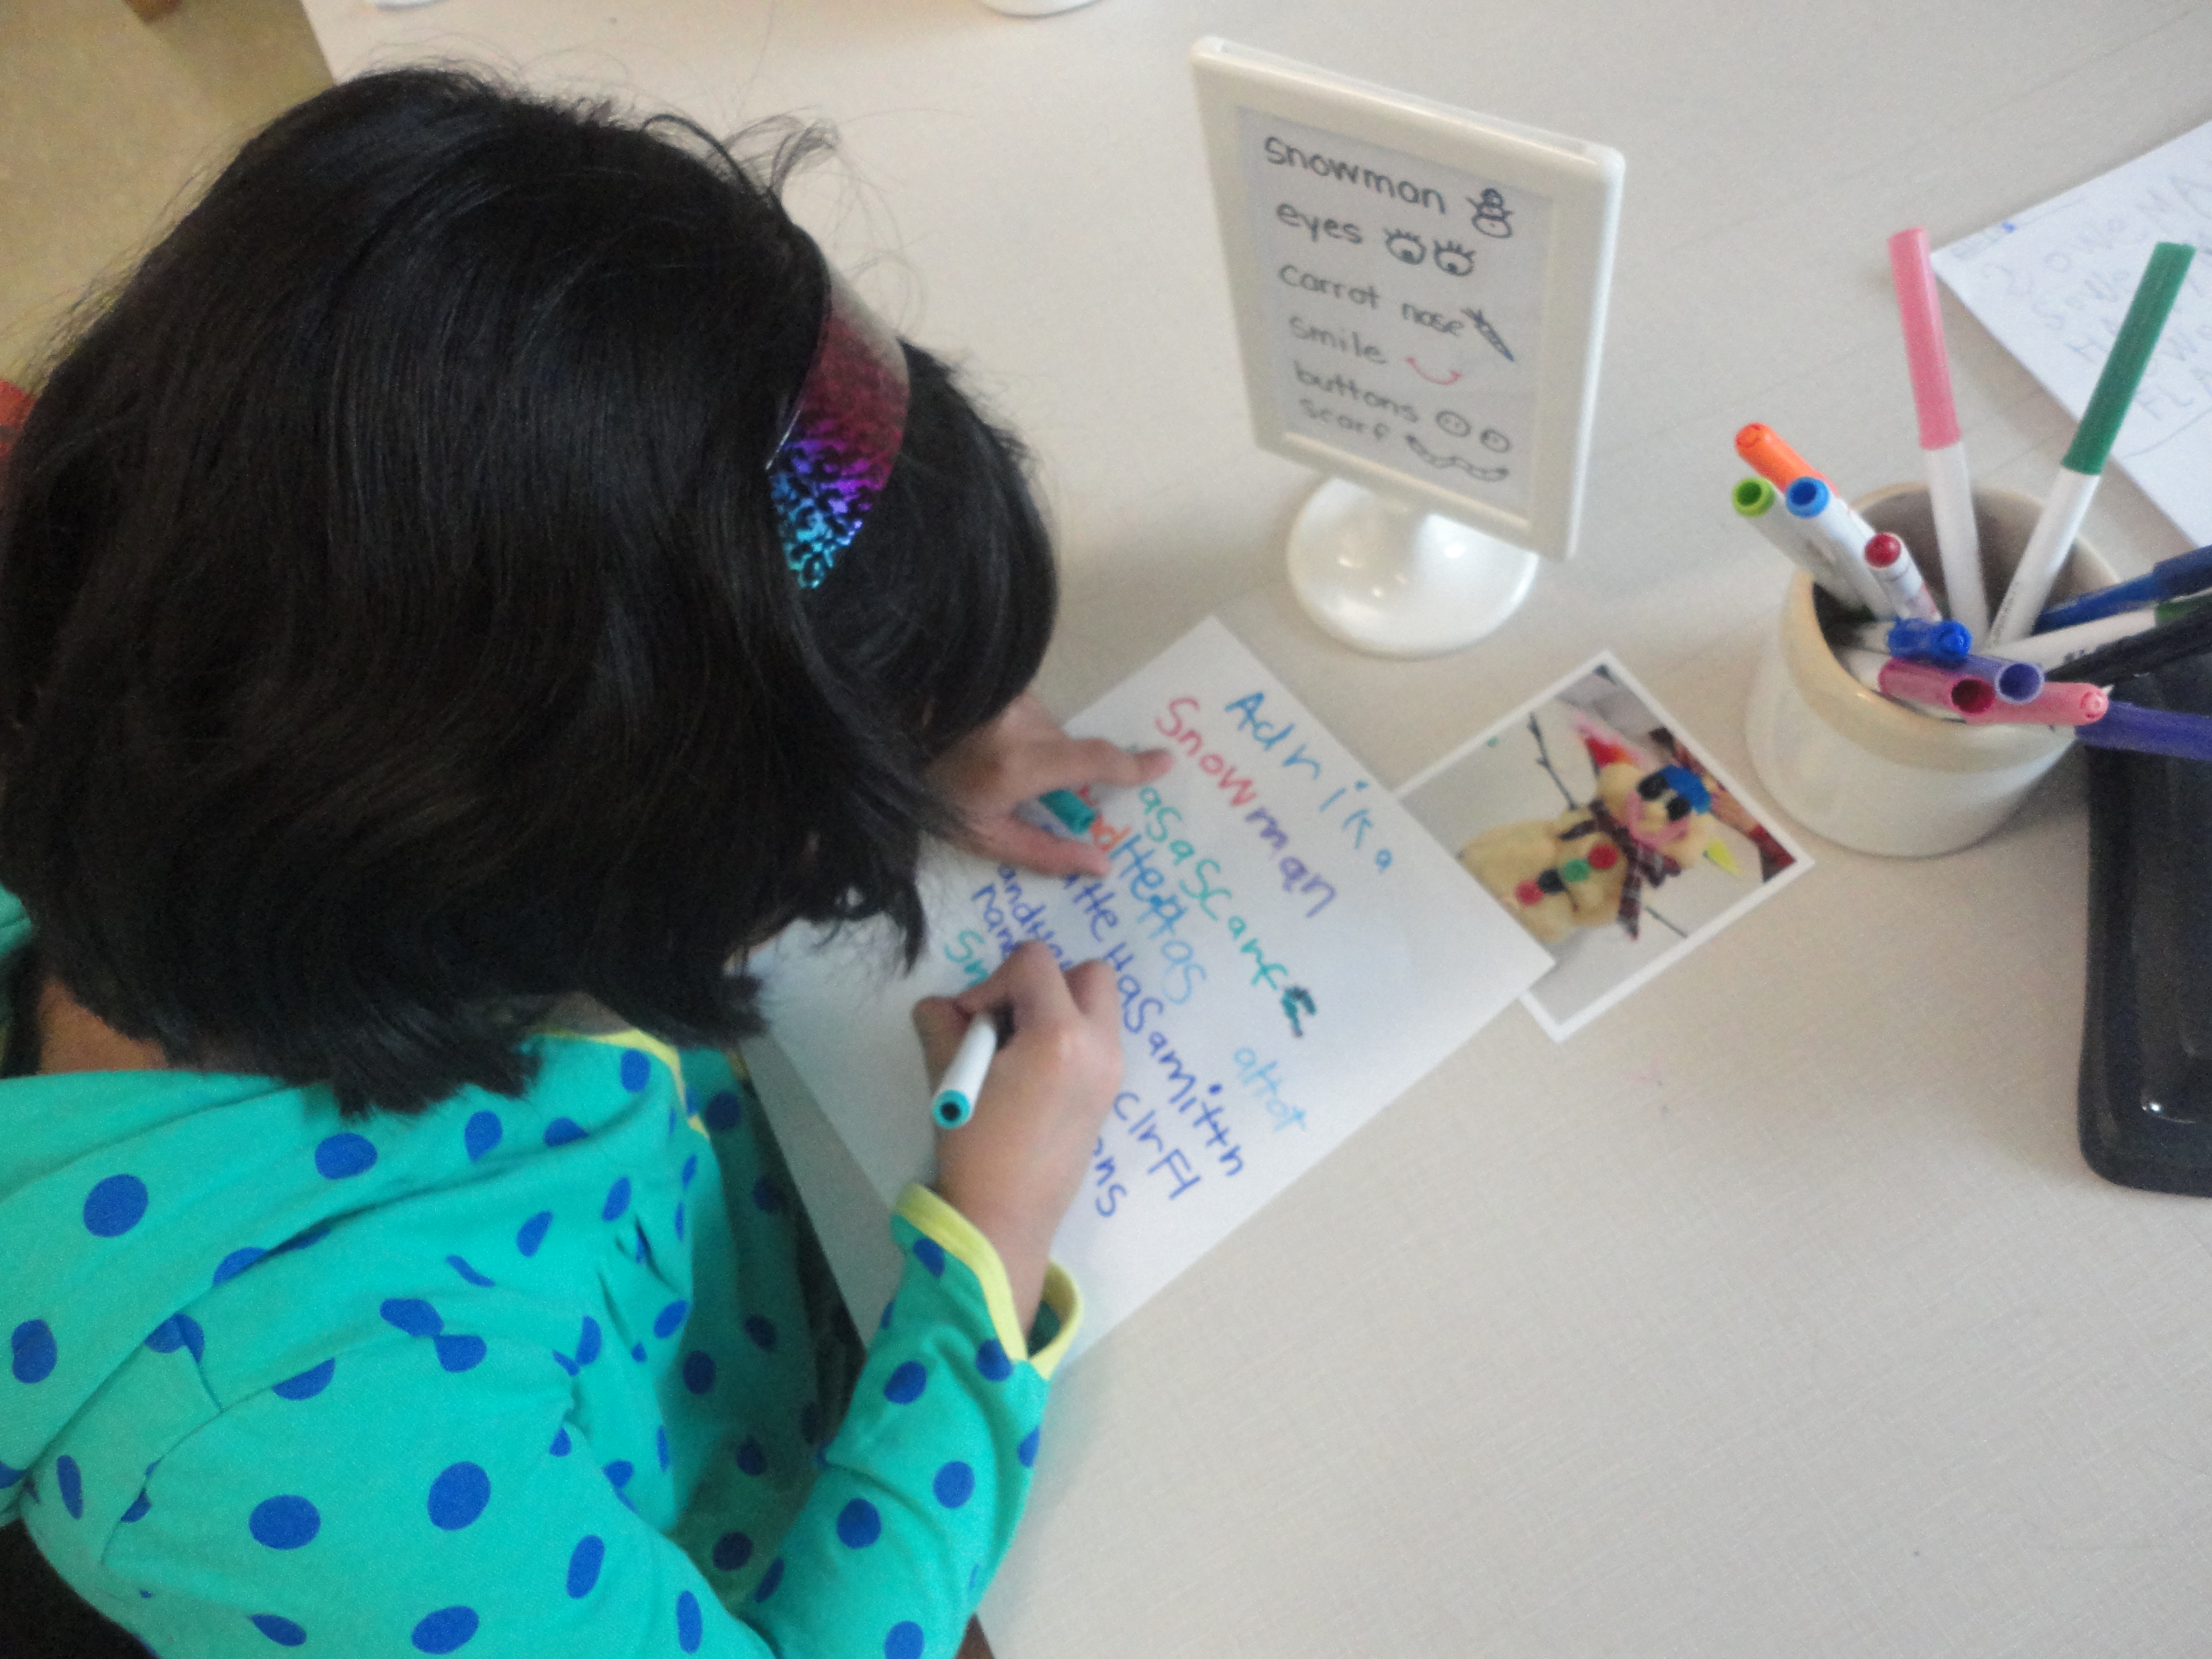
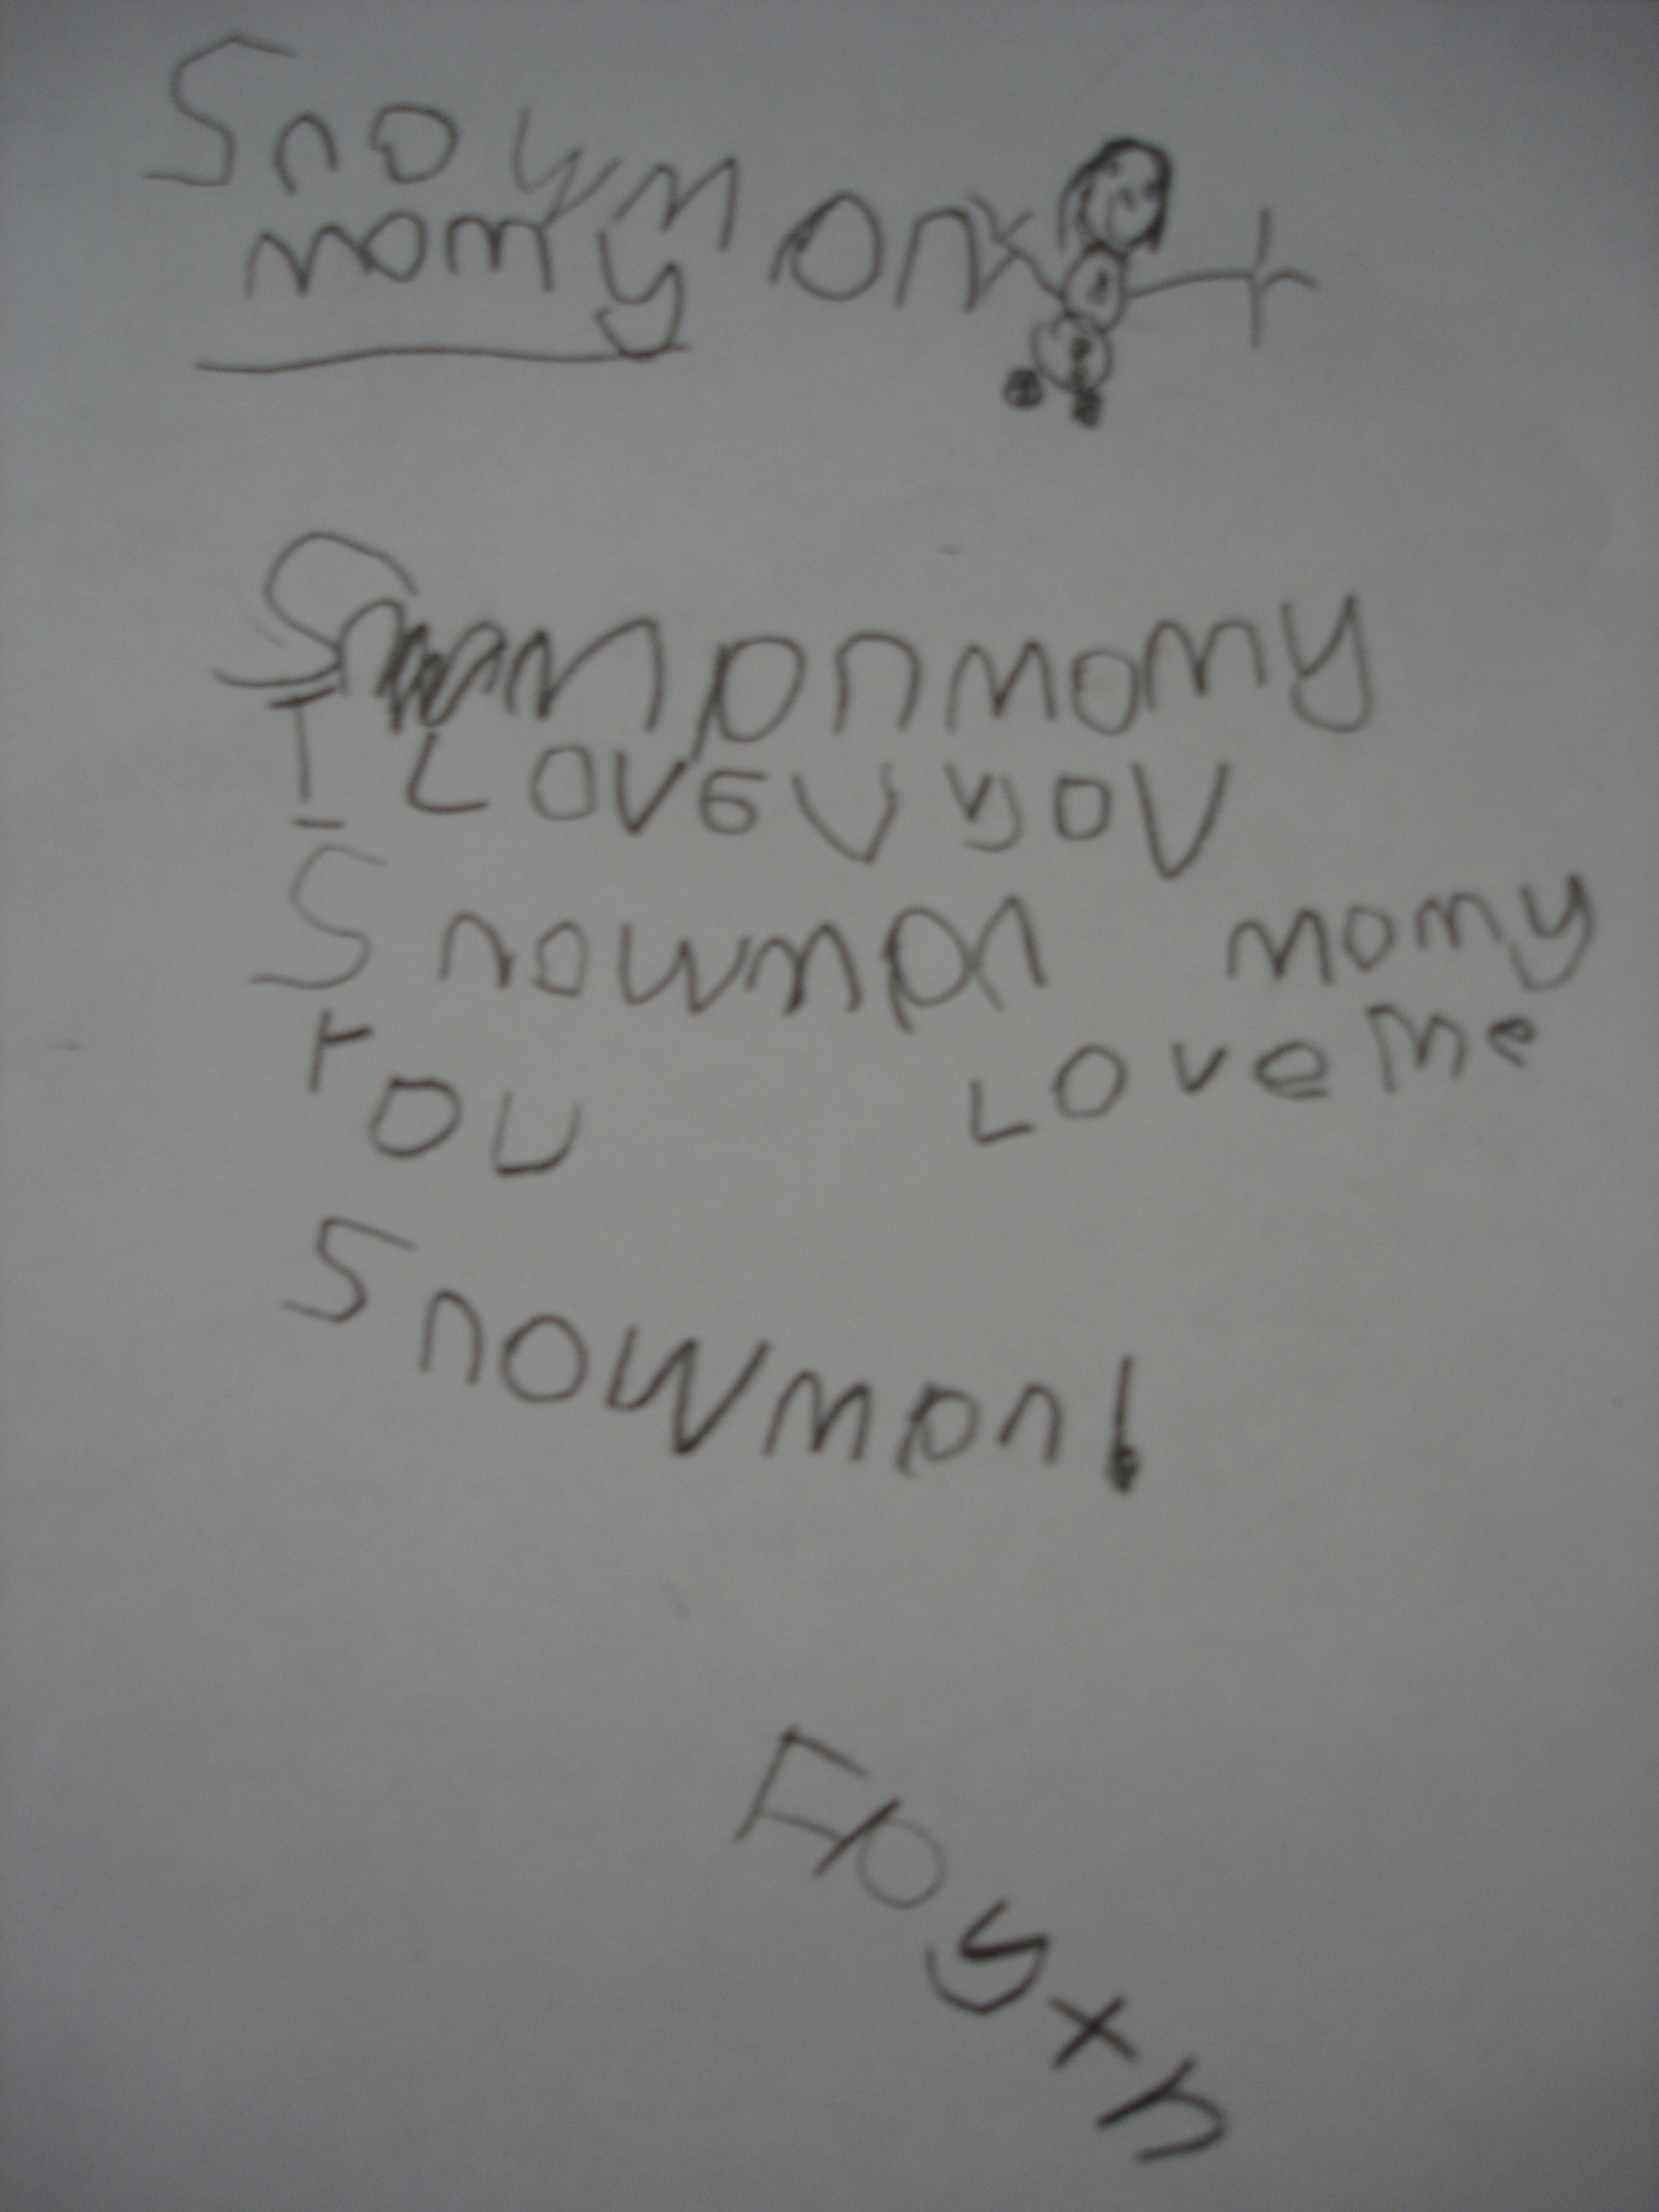
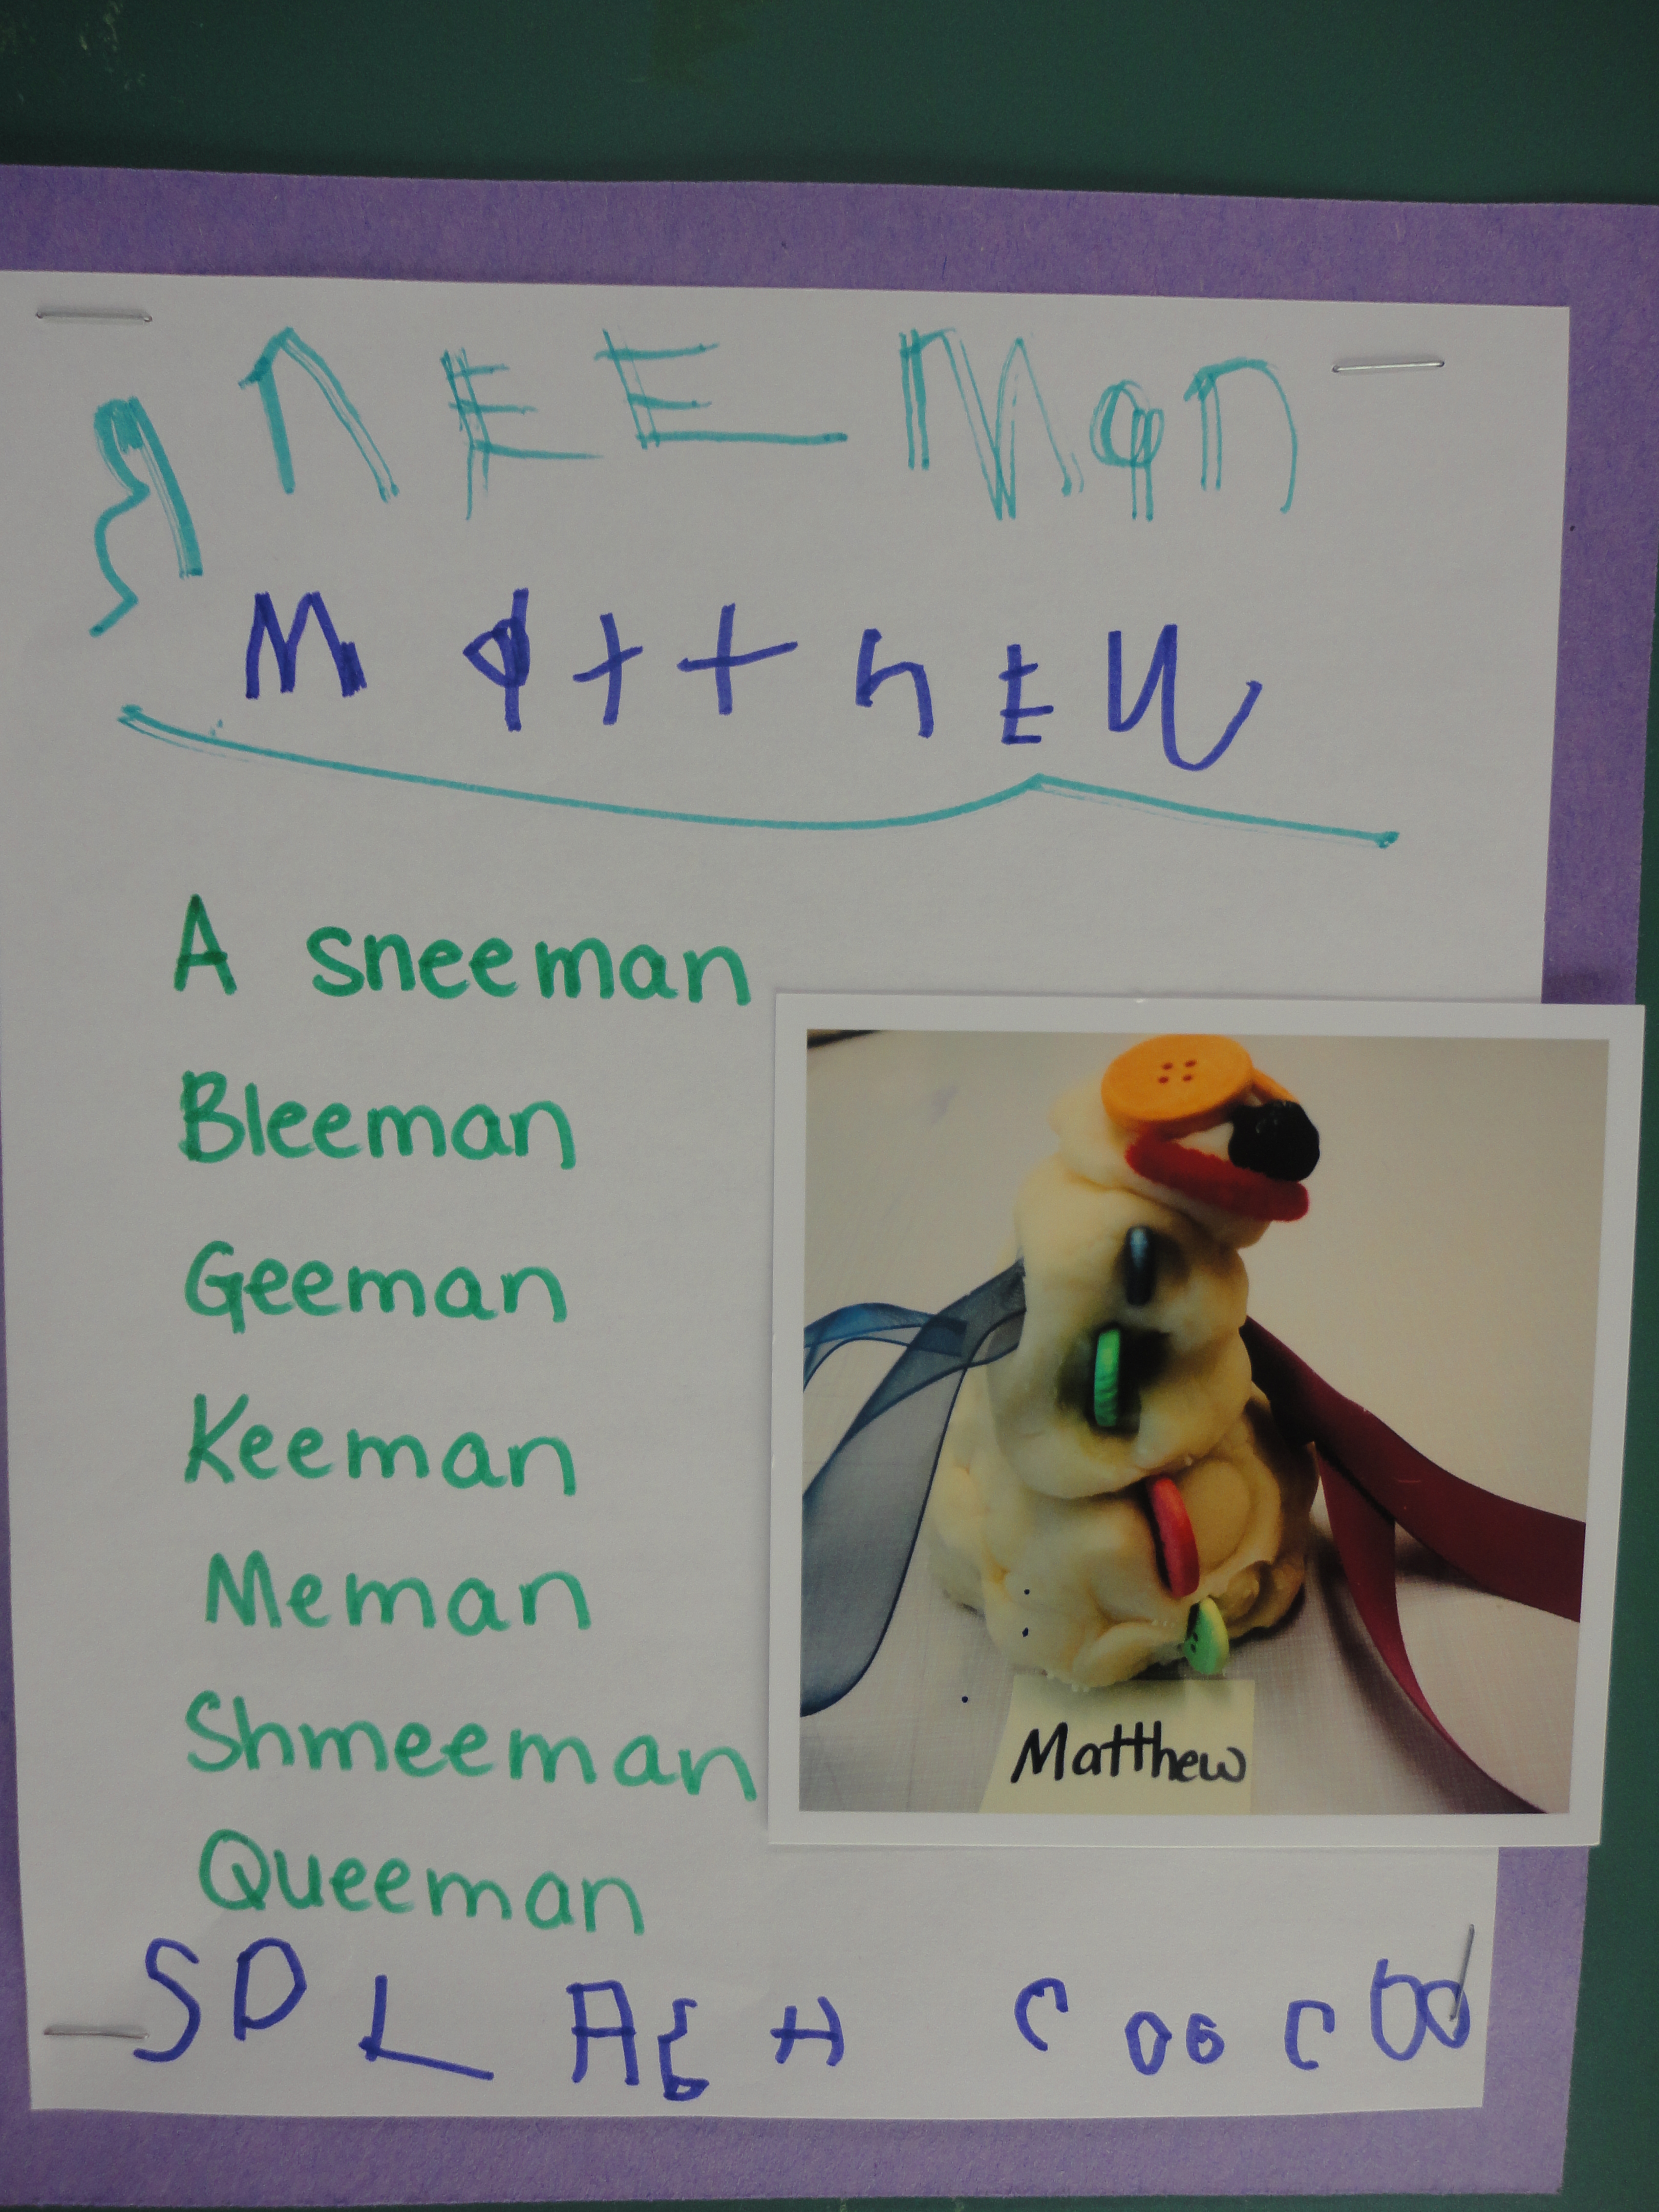
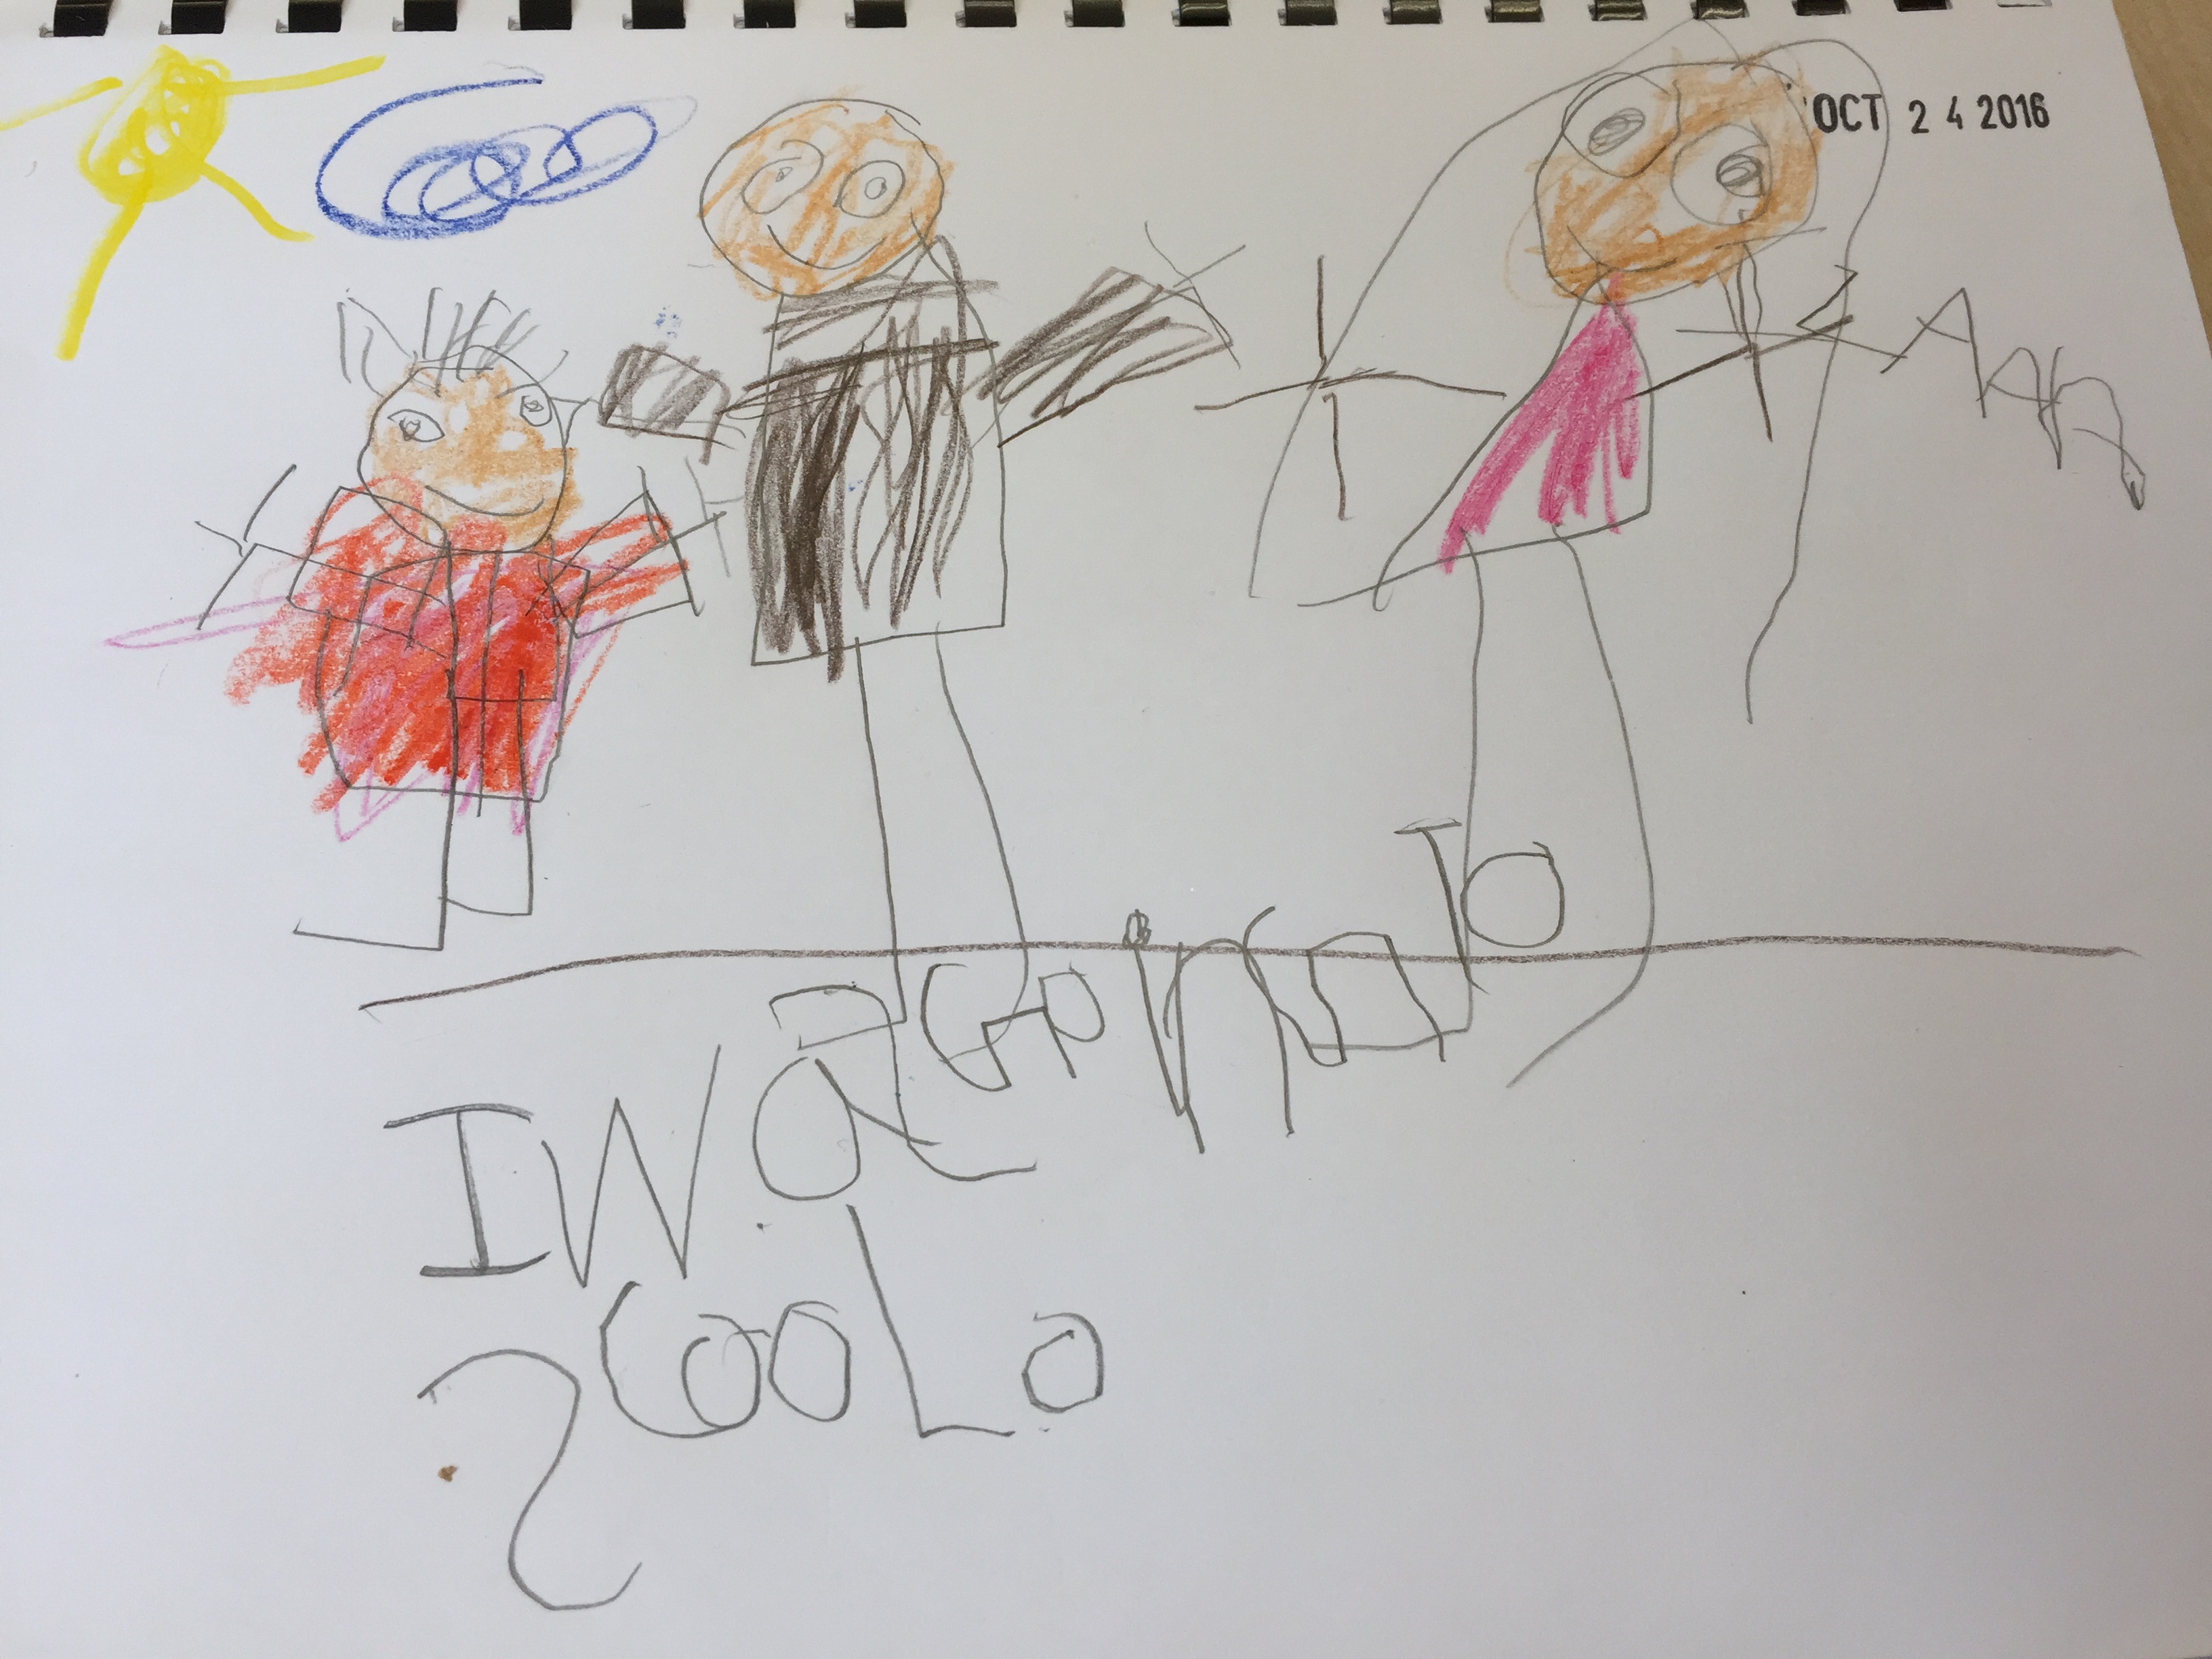
The mini lesson is extremely important. When I do a mini lesson I am explicitly modelling the writing behaviours I want to see my students exhibit. I draw my own picture each time, modelling with a think-aloud everything I think about and consider while writing. Where was I? What was I doing? Who was with me? What was the weather like? etc. I model how I choose colours. I model how I add details. I model how I draw myself. After I draw, I model how I can label the details in my picture. Over time, this is something I ask the children explicitly: “Can anyone tell me something in my picture I can label? ‘Me’? Great! How do I spell ‘me’? M-E. Wonderful!” We usually label using initial consonants at first, or names like “mom” and “dad.” Then I will write my sentence. At the beginning of the year I do this quickly. Over time, the children help me with this as well. We share the pen in an interactive-writing way. The children sometimes help me generate a sentence based on the picture I’ve drawn. This is where I teach the children about sounding out words, using finger spaces, directionality and punctuation. It all happens rather quickly, given that the mini lesson is only 10 minutes or so. But the practice we get doing this almost daily sinks in and I will see my students begin to use these strategies on their own during writing time.

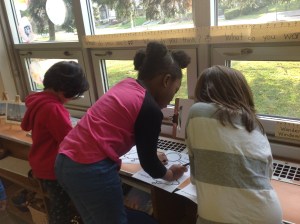
Writing time immediately follows the mini lesson. All the children find their writing notebooks and get to work on their pictures. The teachers circulate and talk to the children about what they are writing about. Sometimes children need help thinking of a topic, but after a few weeks of Writer’s Workshop most children do this independently.  I should make clear that writing time is not a quiet working time. It is loud. It is lively. The children are engrossed in their work and love telling the classmates at their table what they’re writing about. They help each other spell things. They share markers. They give advice or feedback to each other.

img_0400

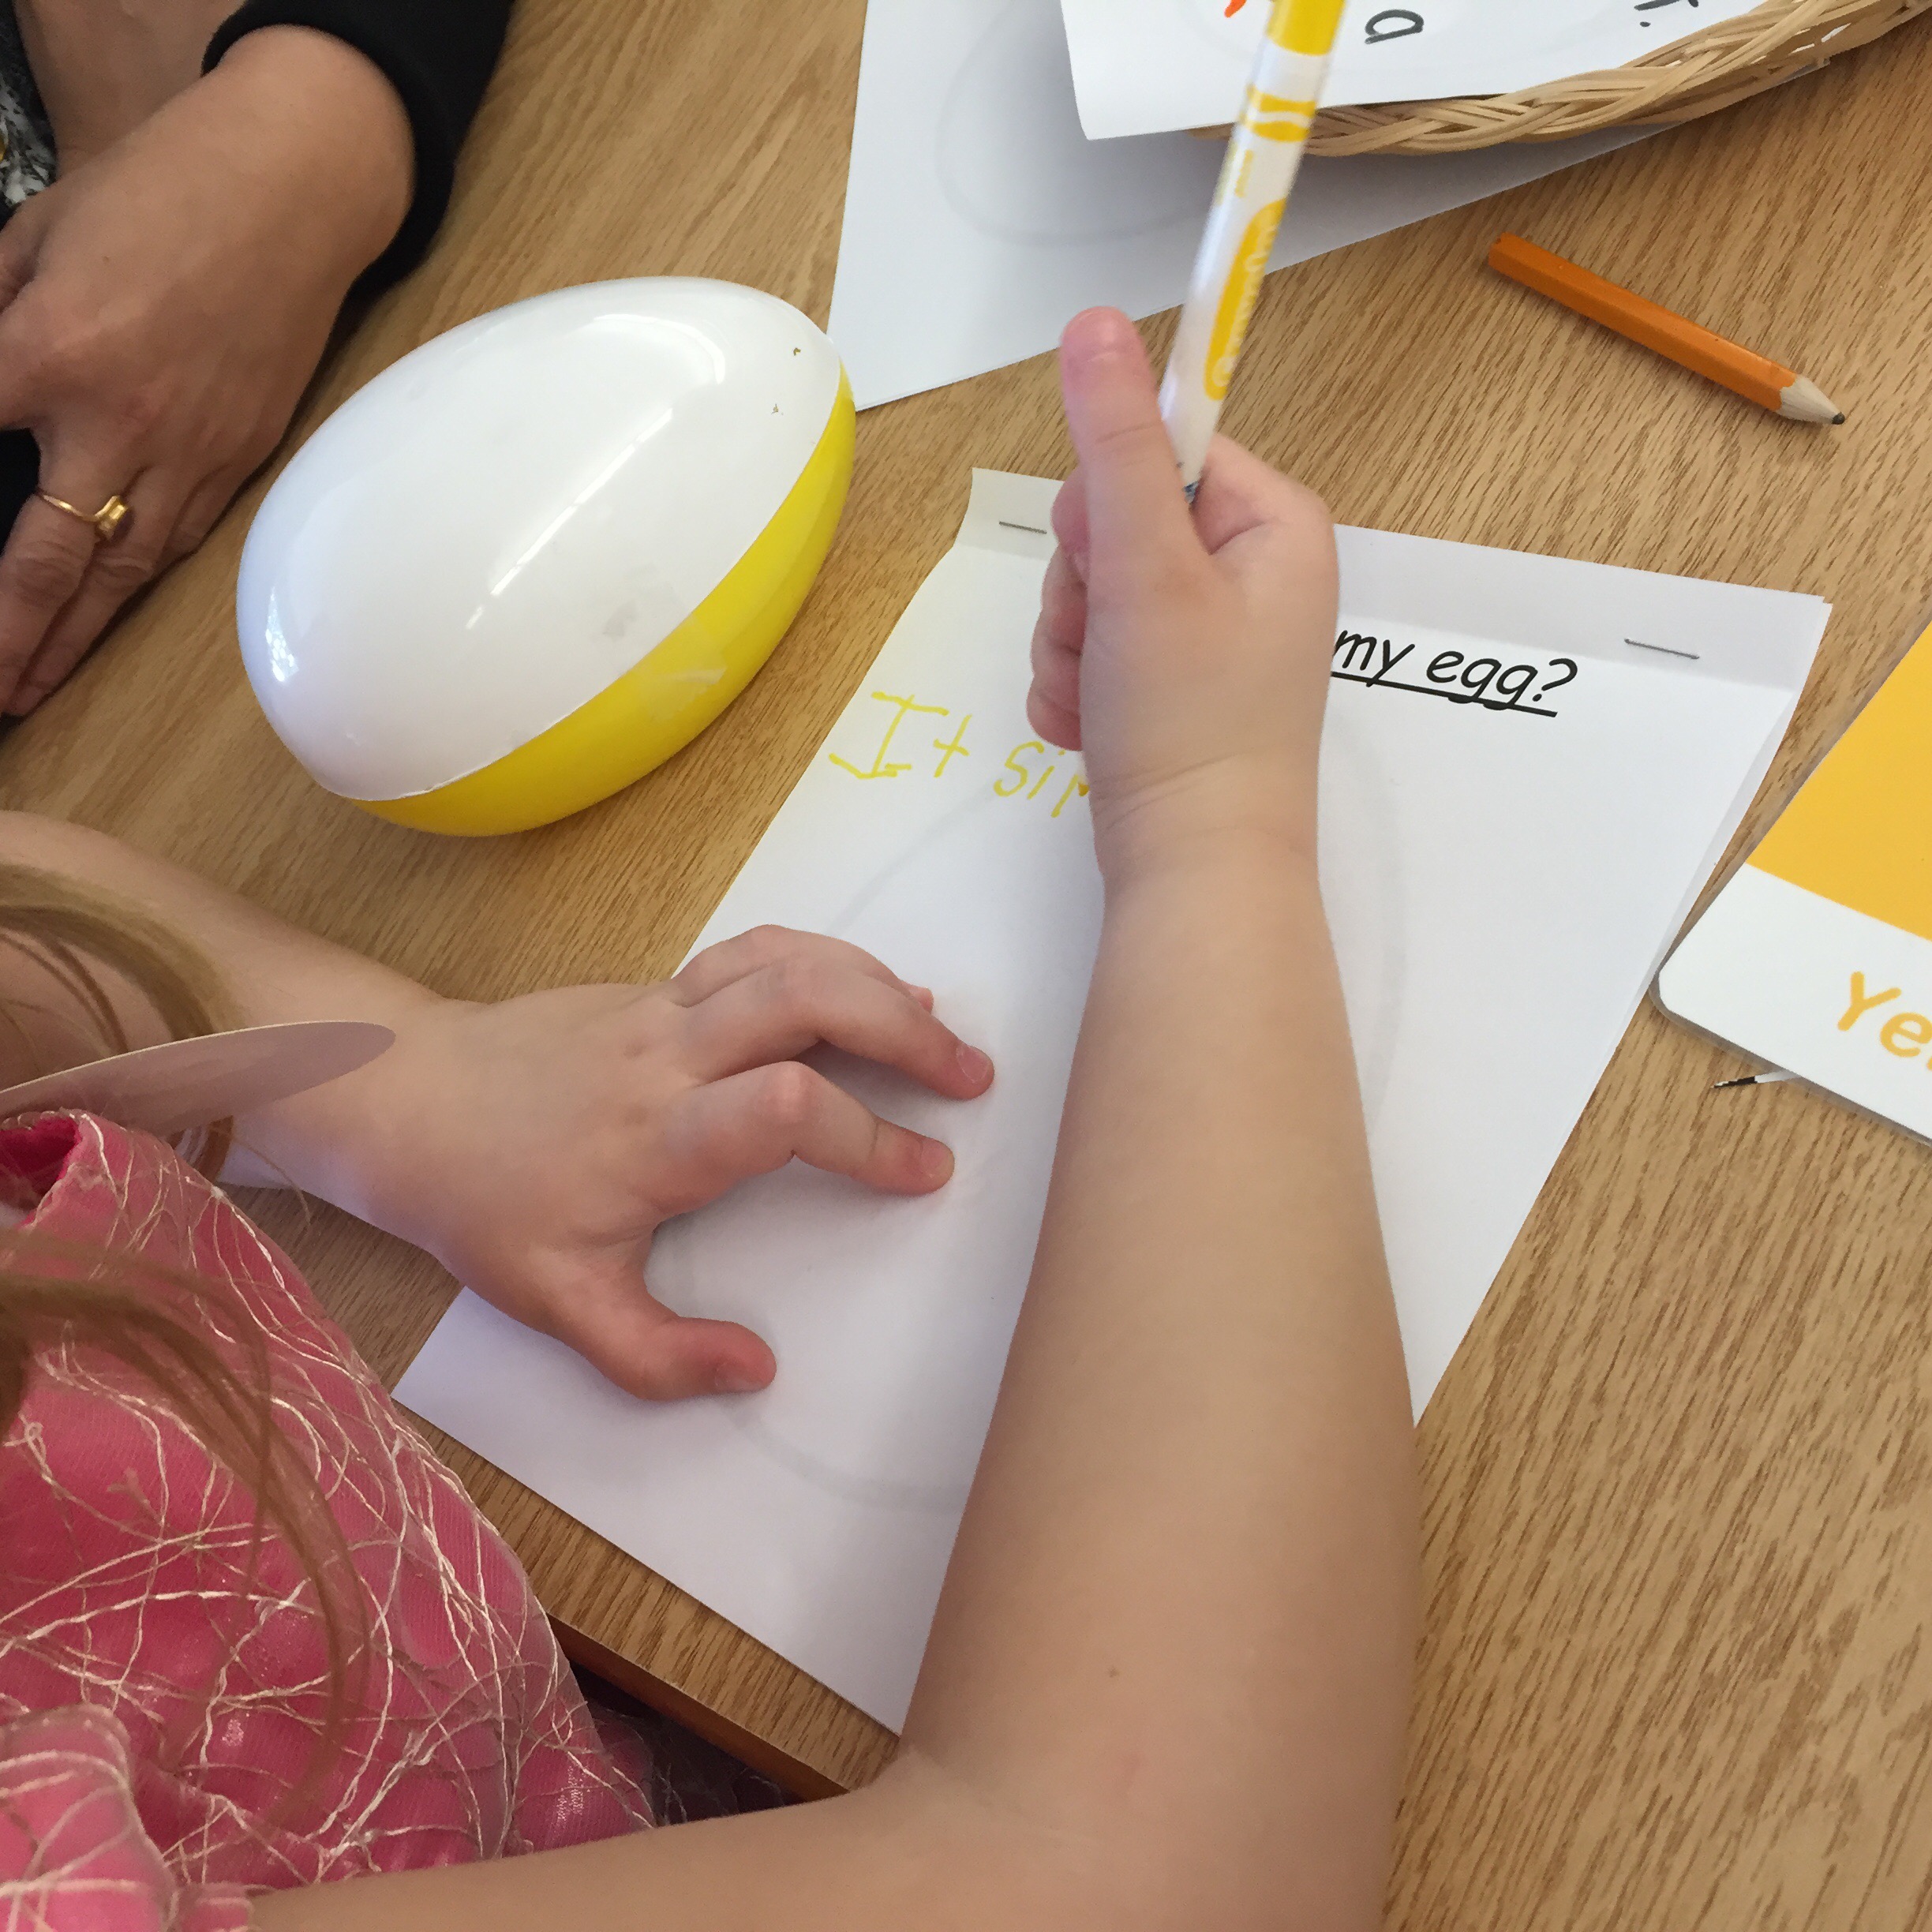
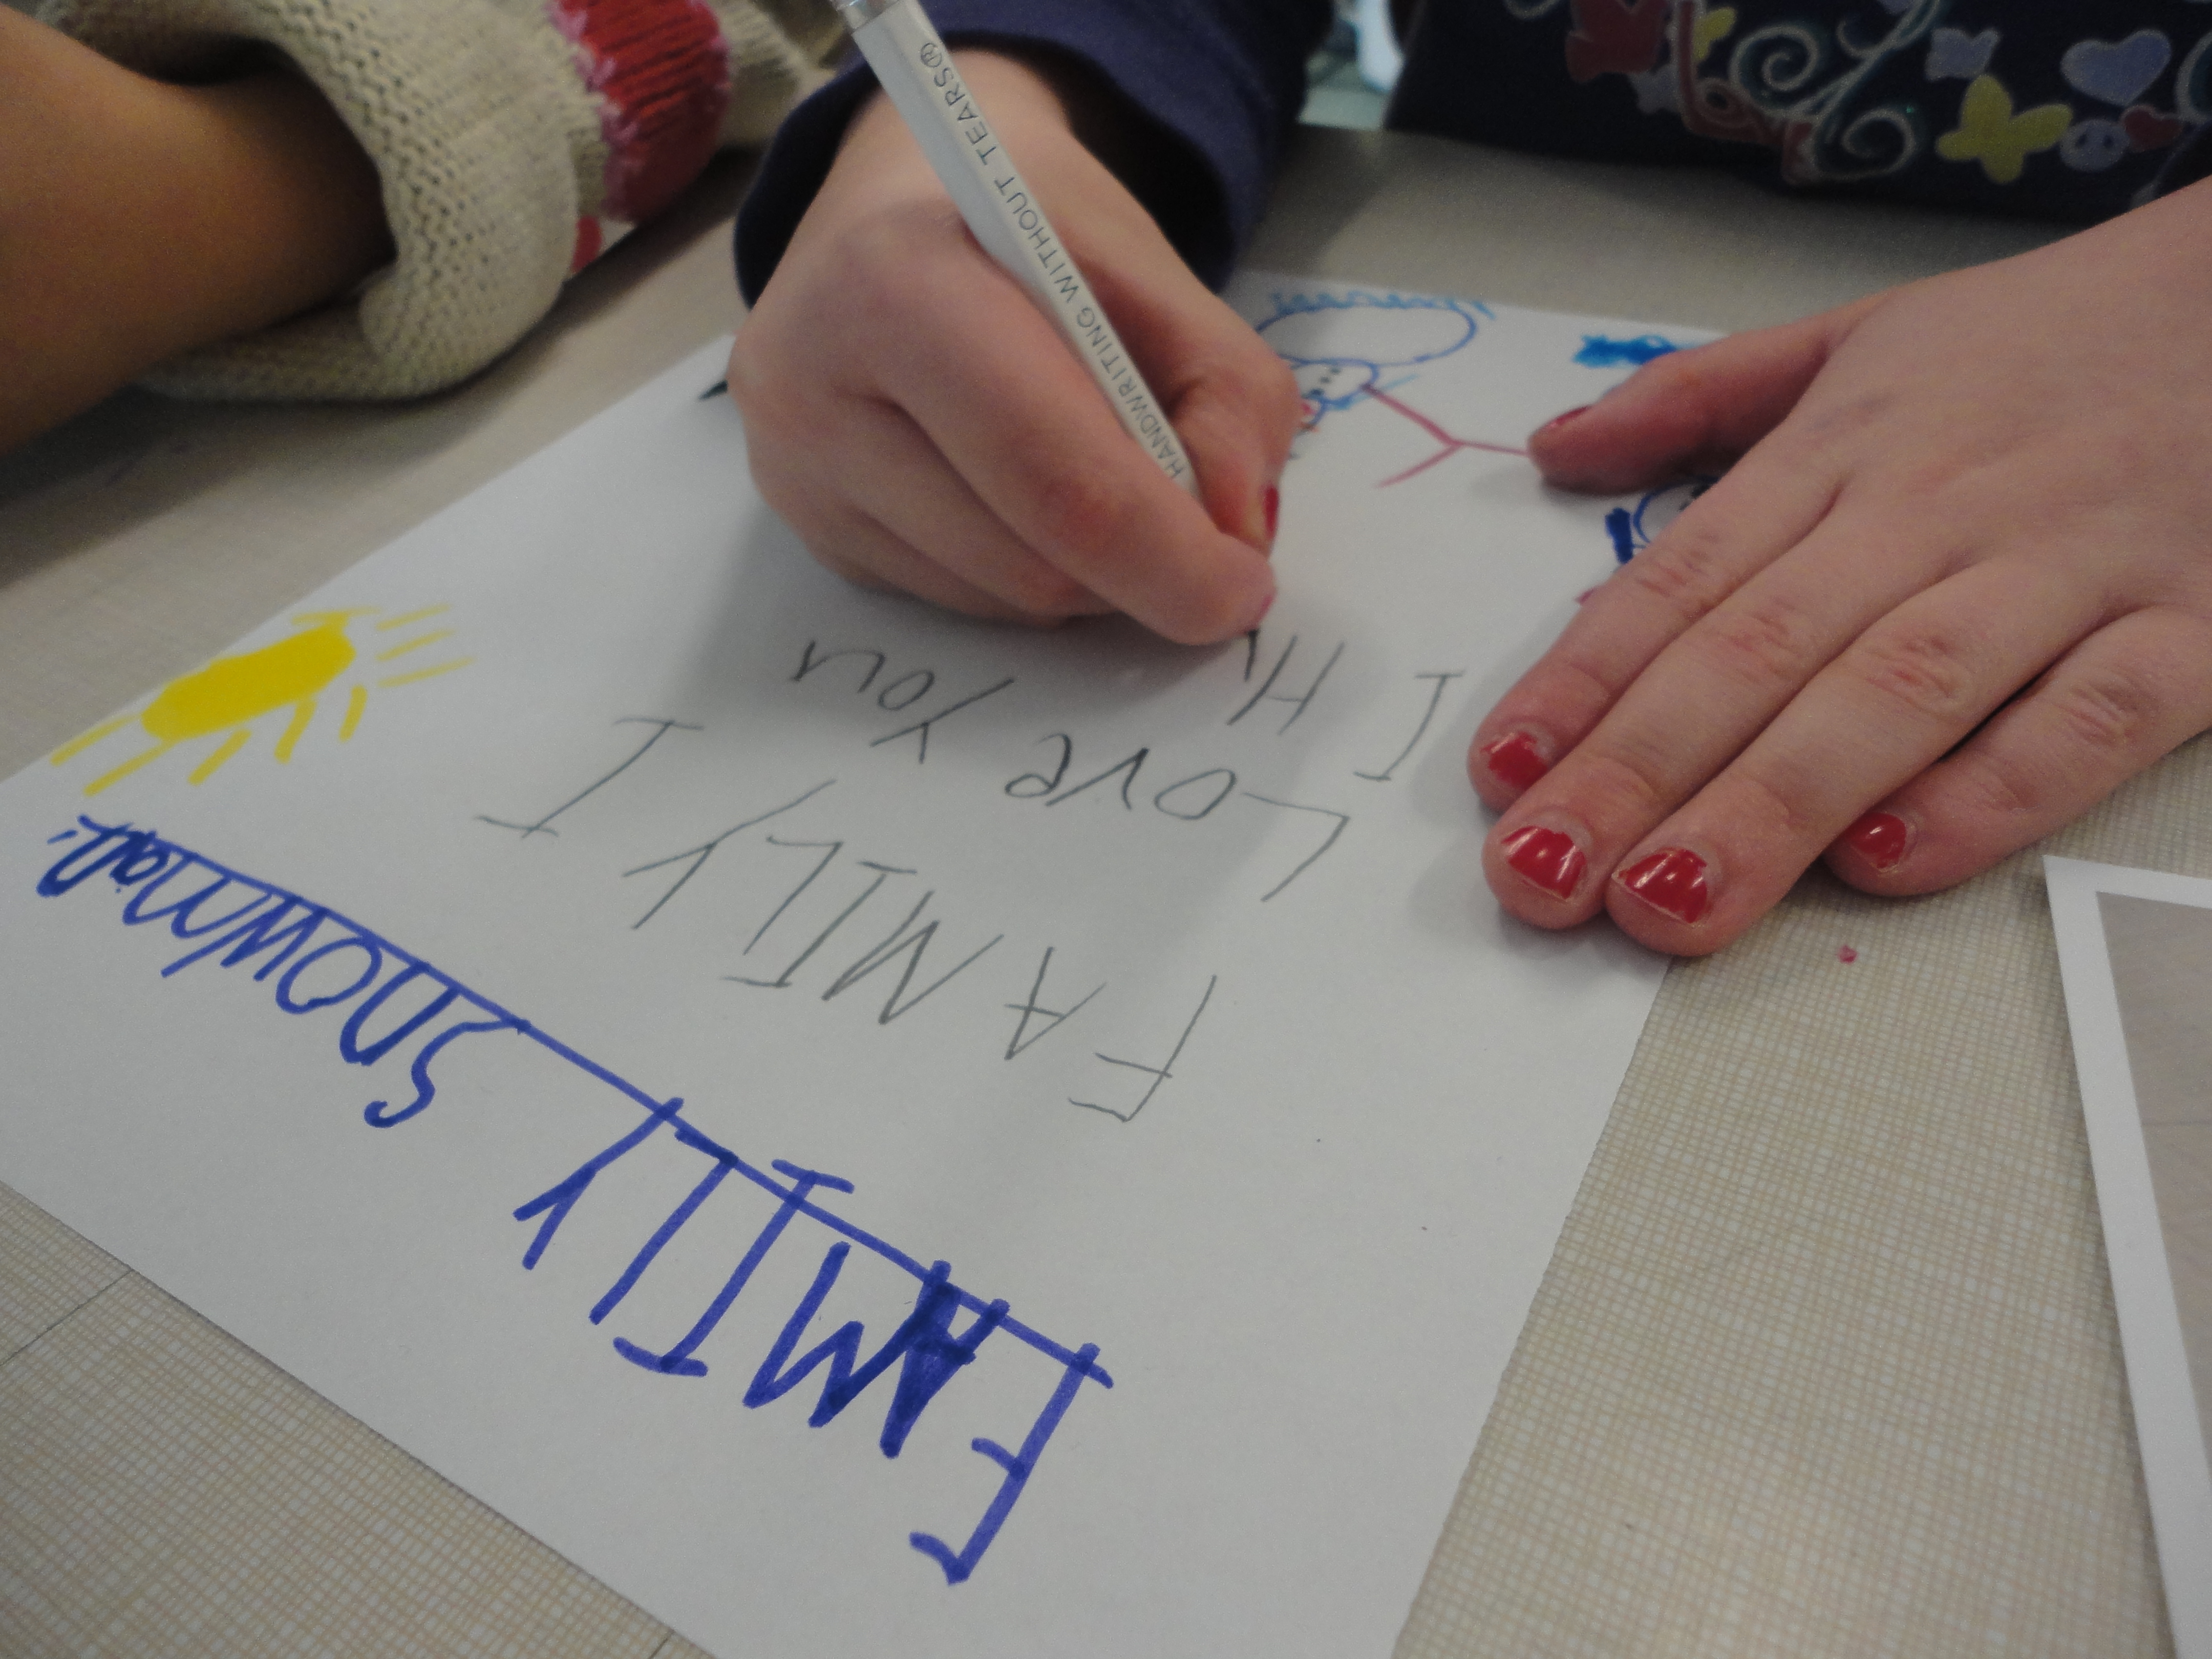
When the children finish their work they bring it to a teacher. This is when our mini “conferences” happen. I ask the children to tell me about what they have written and take note of the story they are telling. I do not scribe the child’s sentence on their work, but rather on a sticky note which I stick to the back of their work  (for my own reference later). I learned this from What’s Next for This Beginning Writer. The thinking is that the children lose ownership over their work once the teacher takes control of writing their thinking for them. Although skeptical at first,  I found the children were more likely to begin to write their stories themselves once I stopped scribing for them.

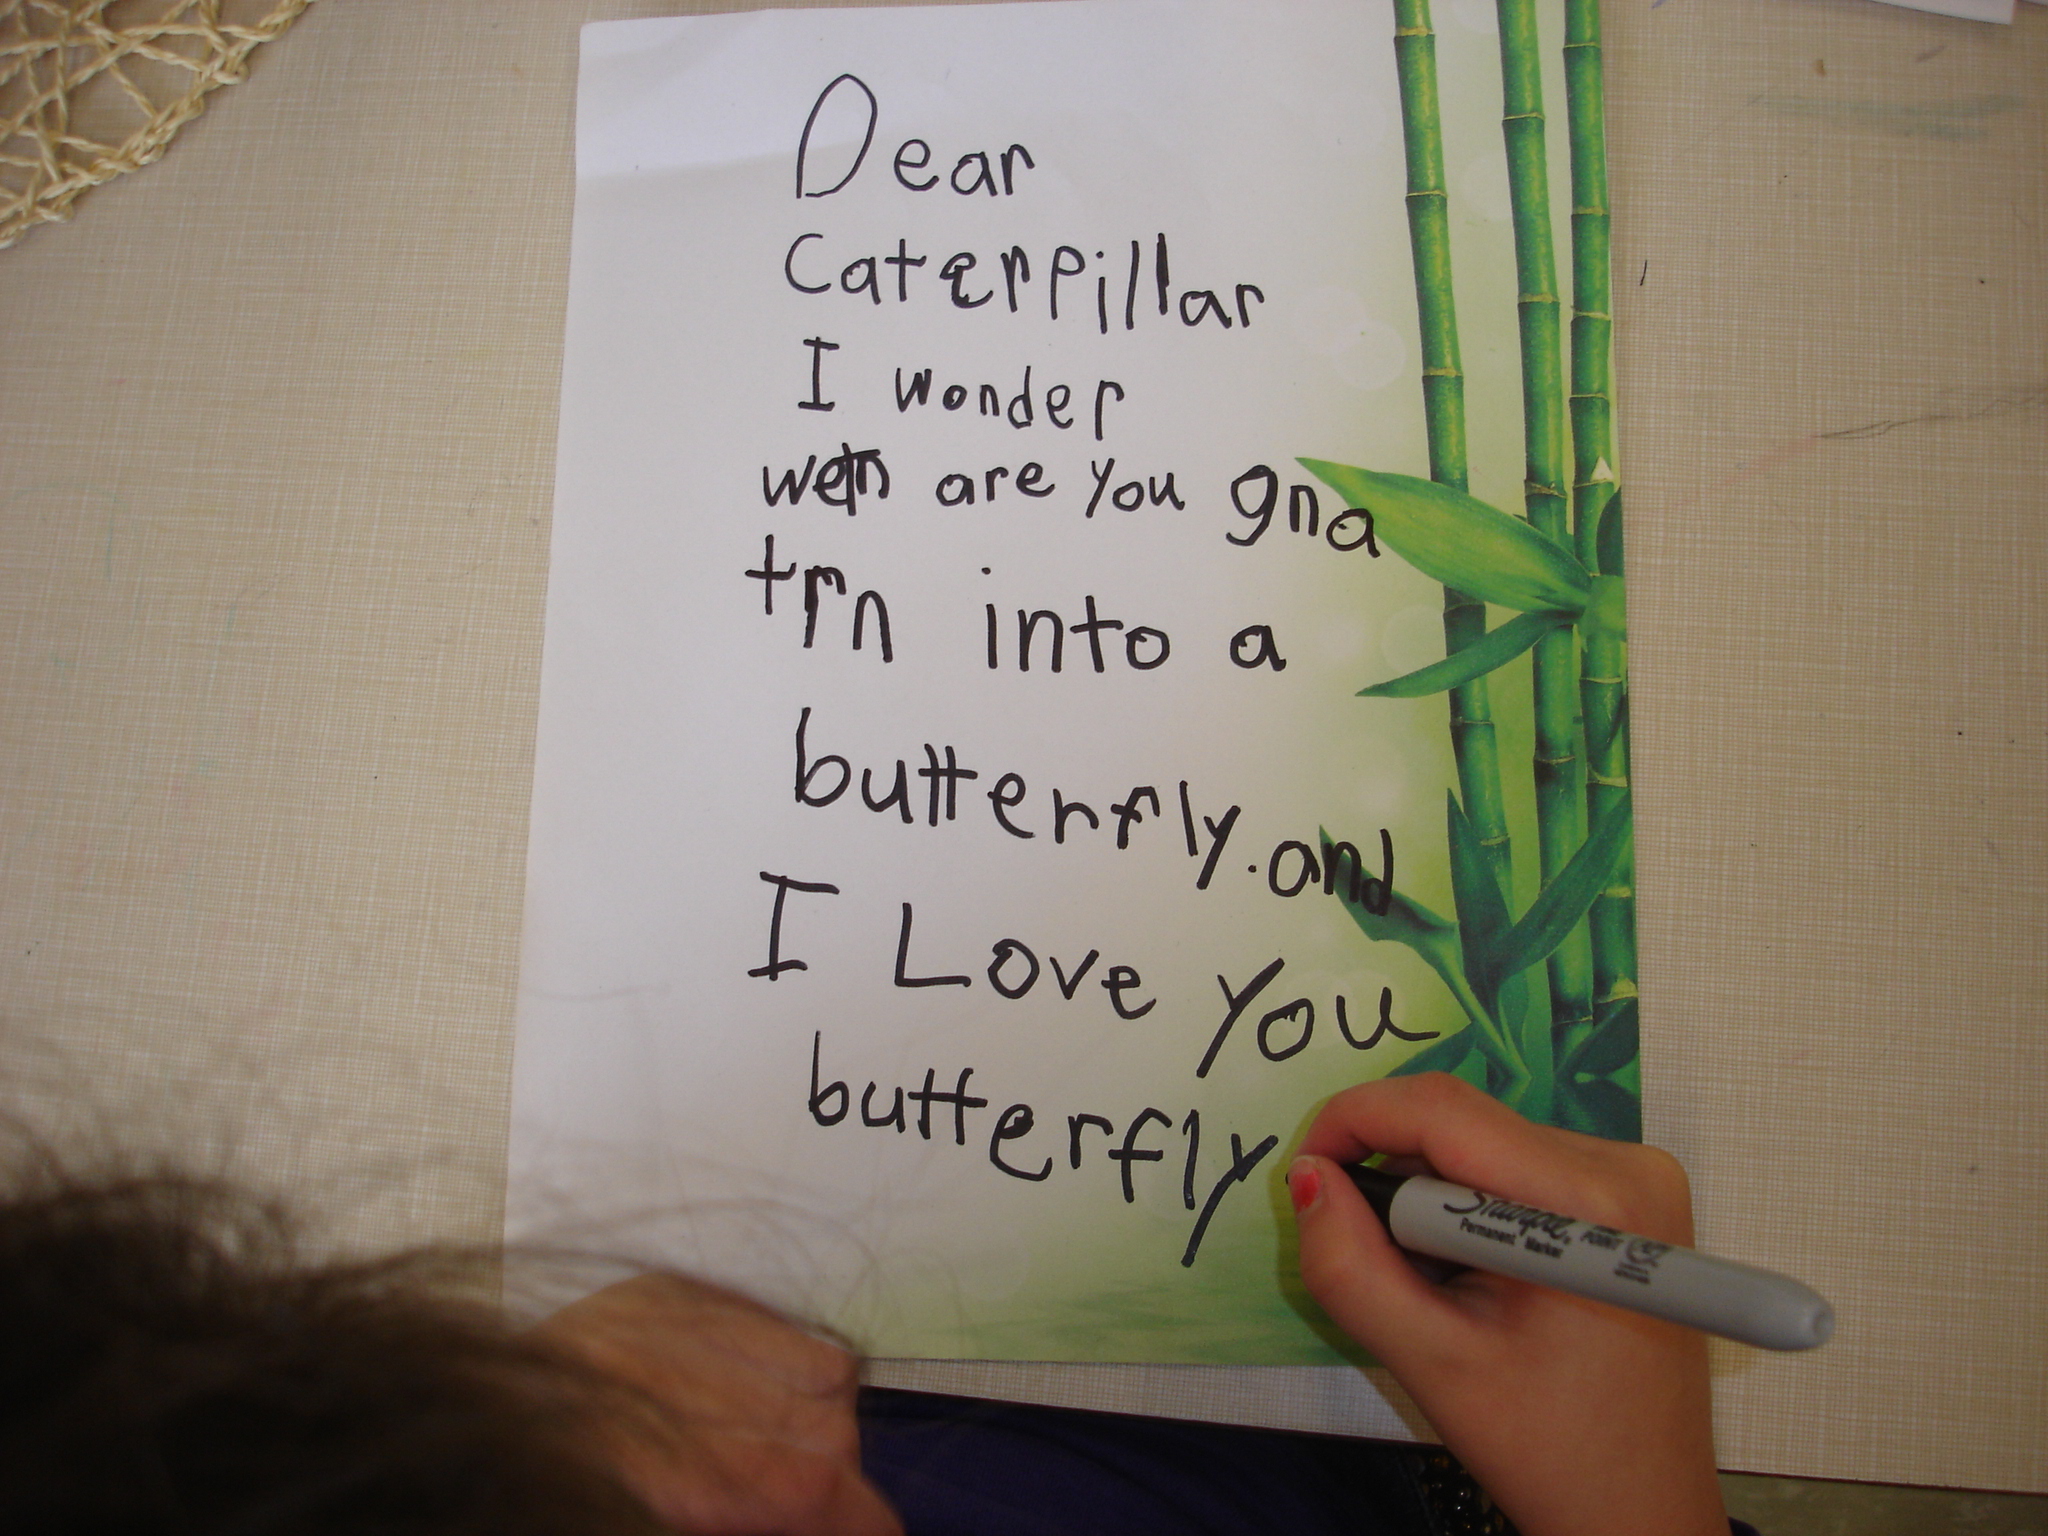
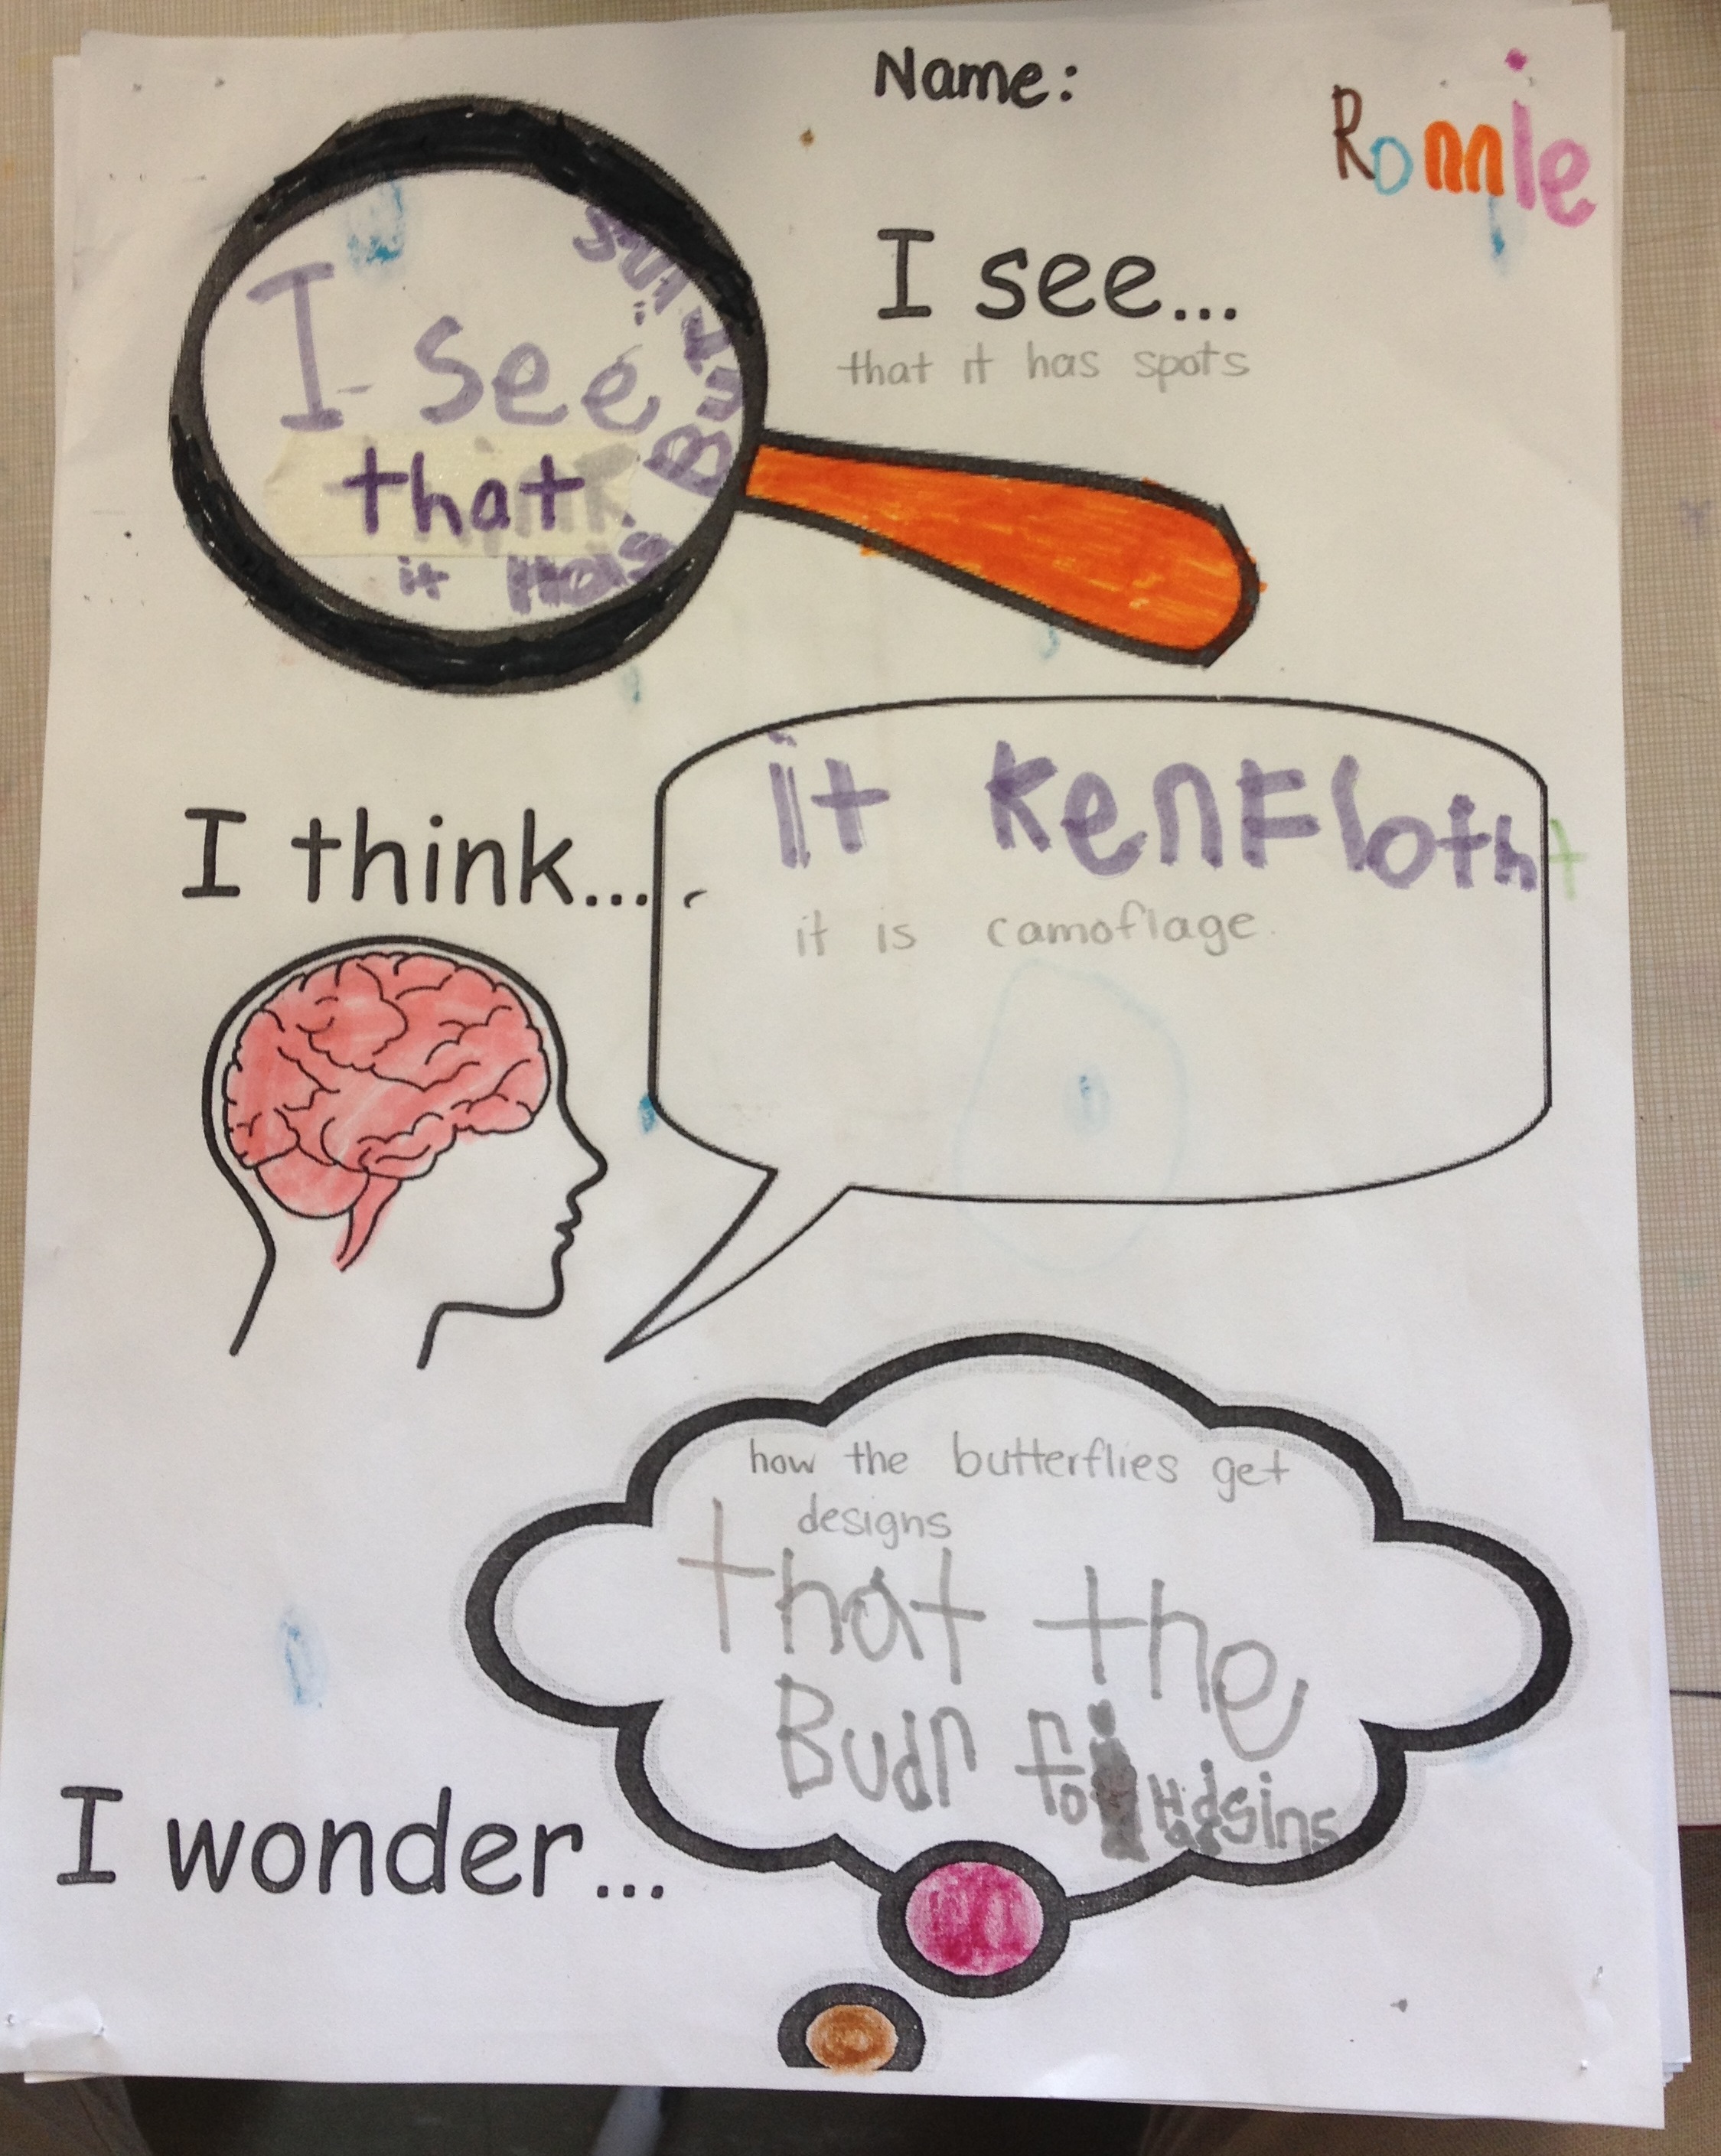
The feedback each child receives depends on what each child is working on currently. At the beginning of the year I focus heavily on picture making as a way of story telling. We work on choosing a good topic (I emphasize modelling events from my own life – from grocery shopping, to going out with my kids, to drinking coffee and reading books, etc.) and I encourage the children to draw themselves in their pictures. I want the children to write about authentic experiences so that they can simultaneously work on their oral language skills when talking about what they have seen/done. The children always have more to say about things they have actually experienced first hand rather than just things they enjoy (e.g., rainbows or monster trucks – though we often get a lot of those kinds of pictures too in the beginning which is ok. There is also a difference between a child writing about something they are inherently passionate about and something they just think is cool or pretty. I have students who’ve written many interesting stories about Minecraft for example.).

During writing time, I am busy looking for breakthroughs or roadblocks. I’m also looking for work to share during reflection time. Usually, it is work that reflects a concept I was teaching in my mini lesson. However, we also love sharing breakthroughs or personal bests, so if a child has suddenly started labeling or writing their own sentences we will share that new learning with the class.

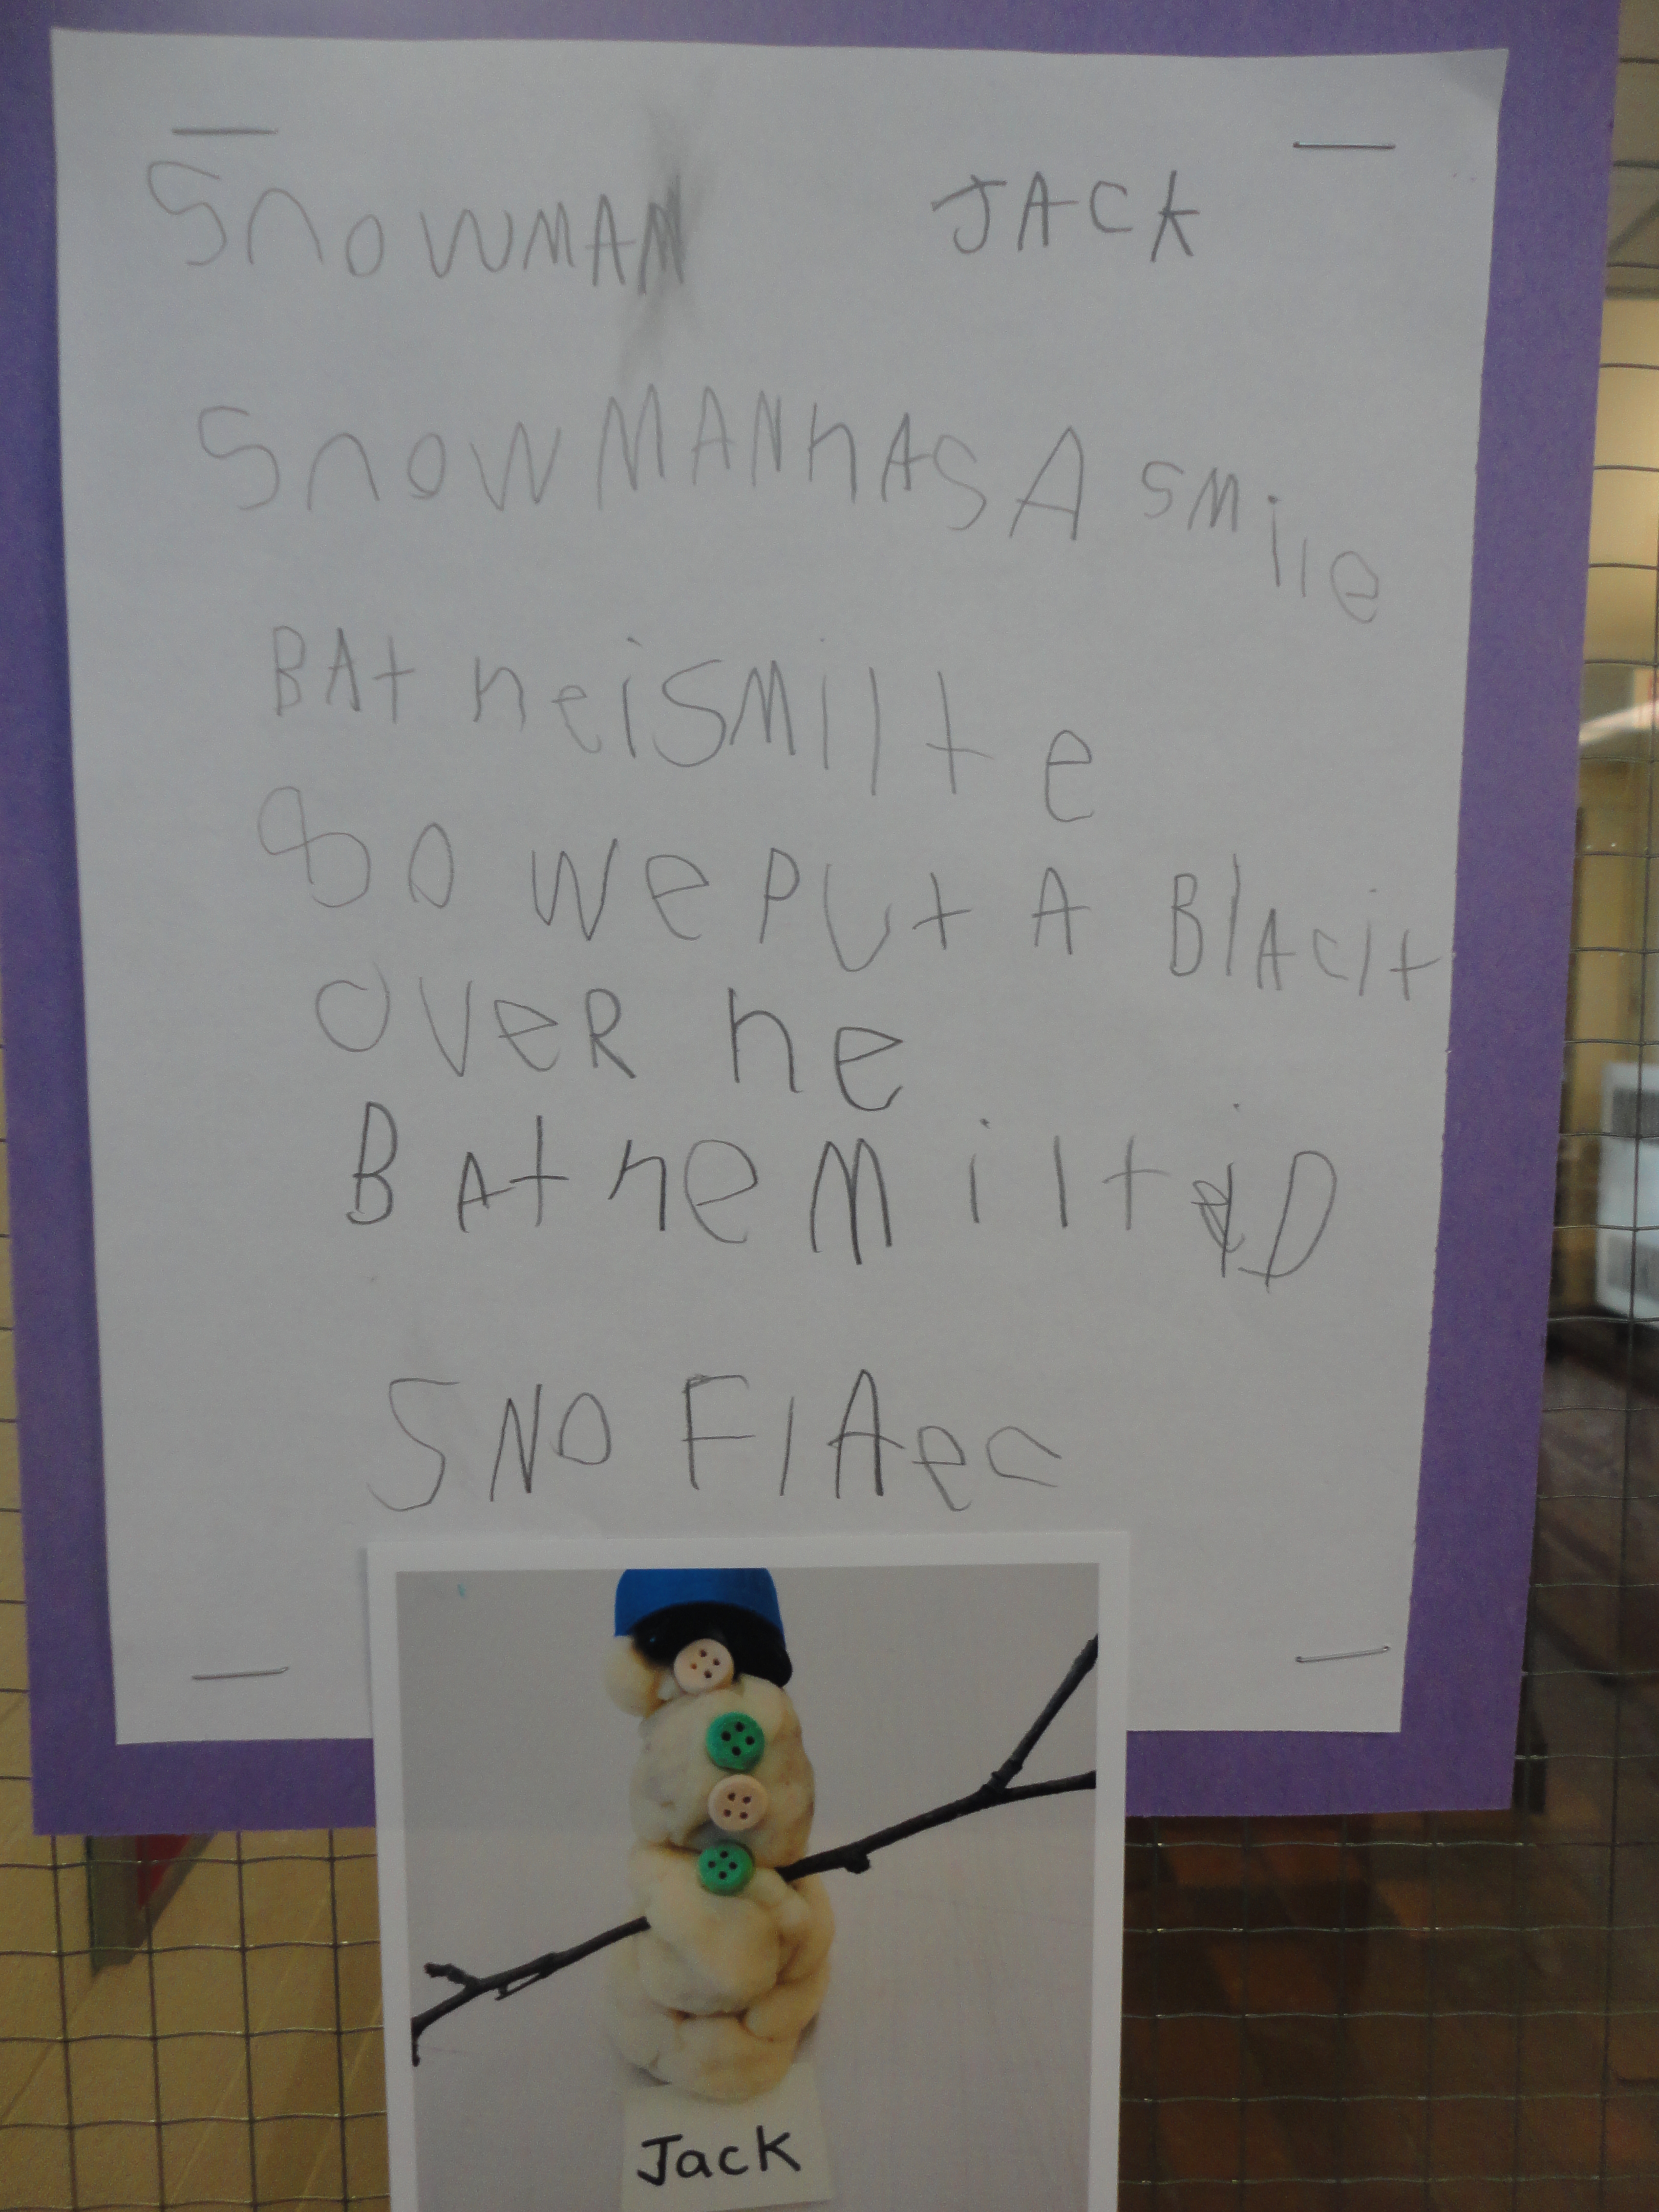
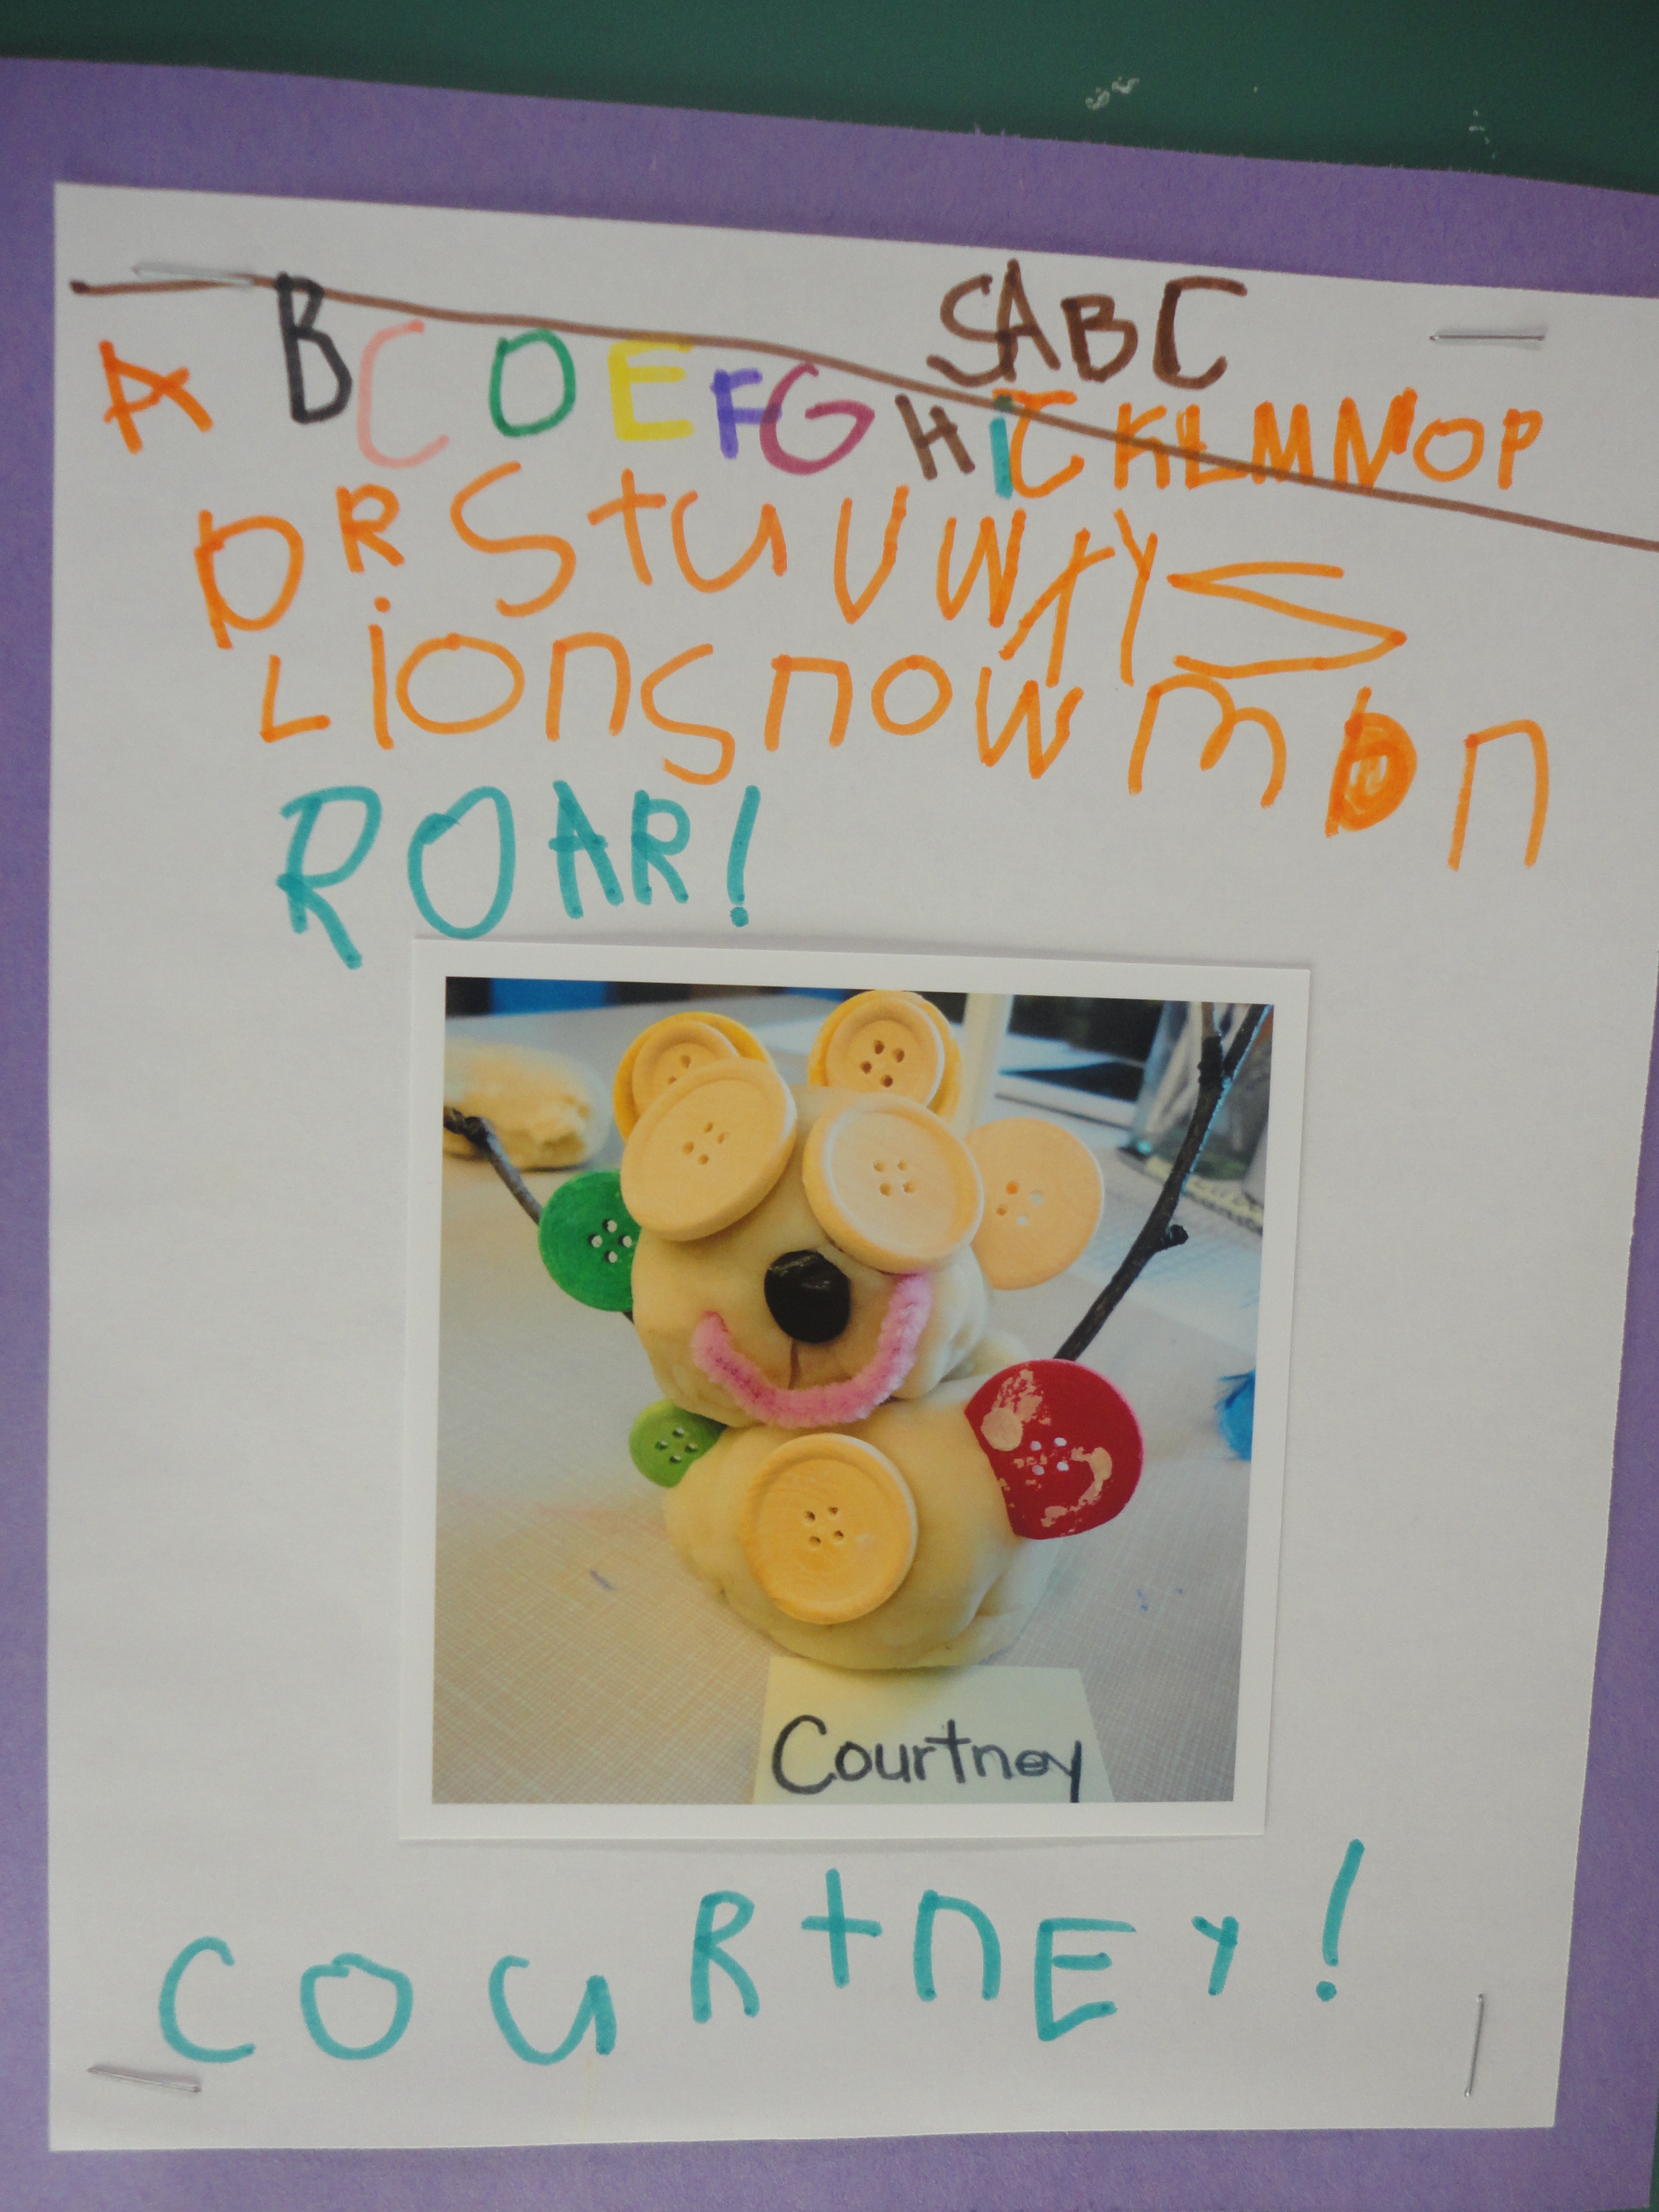
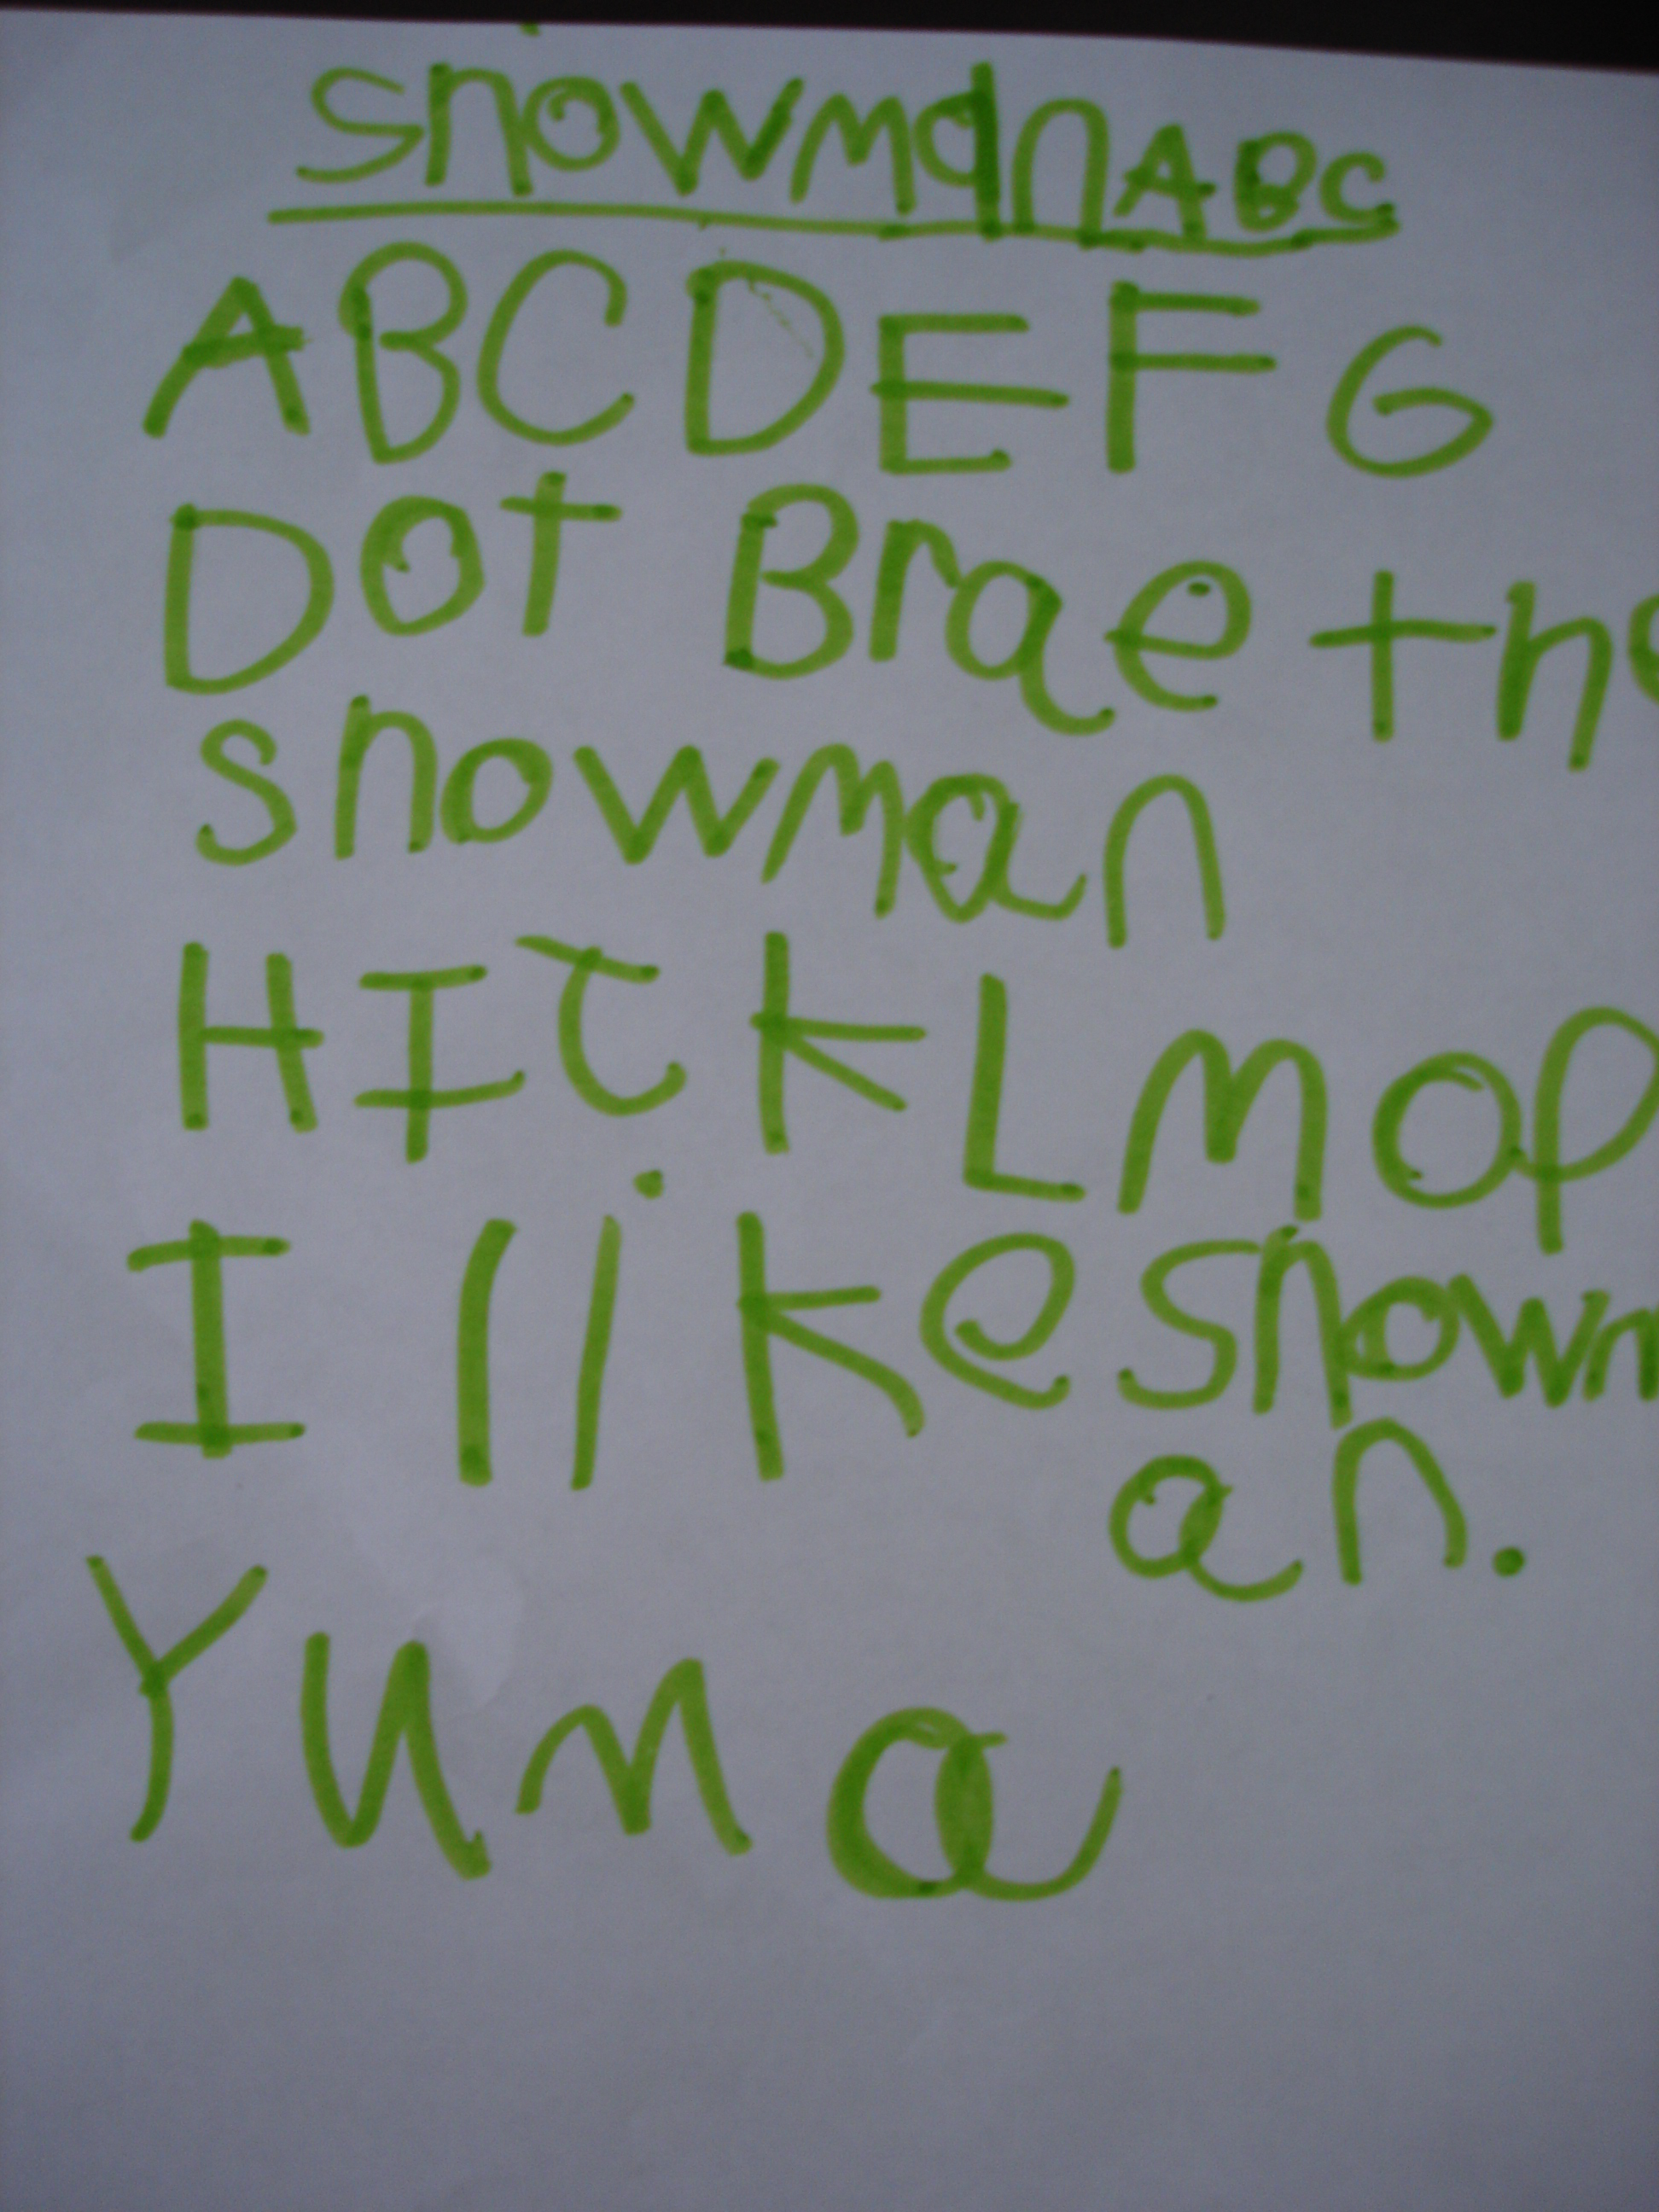
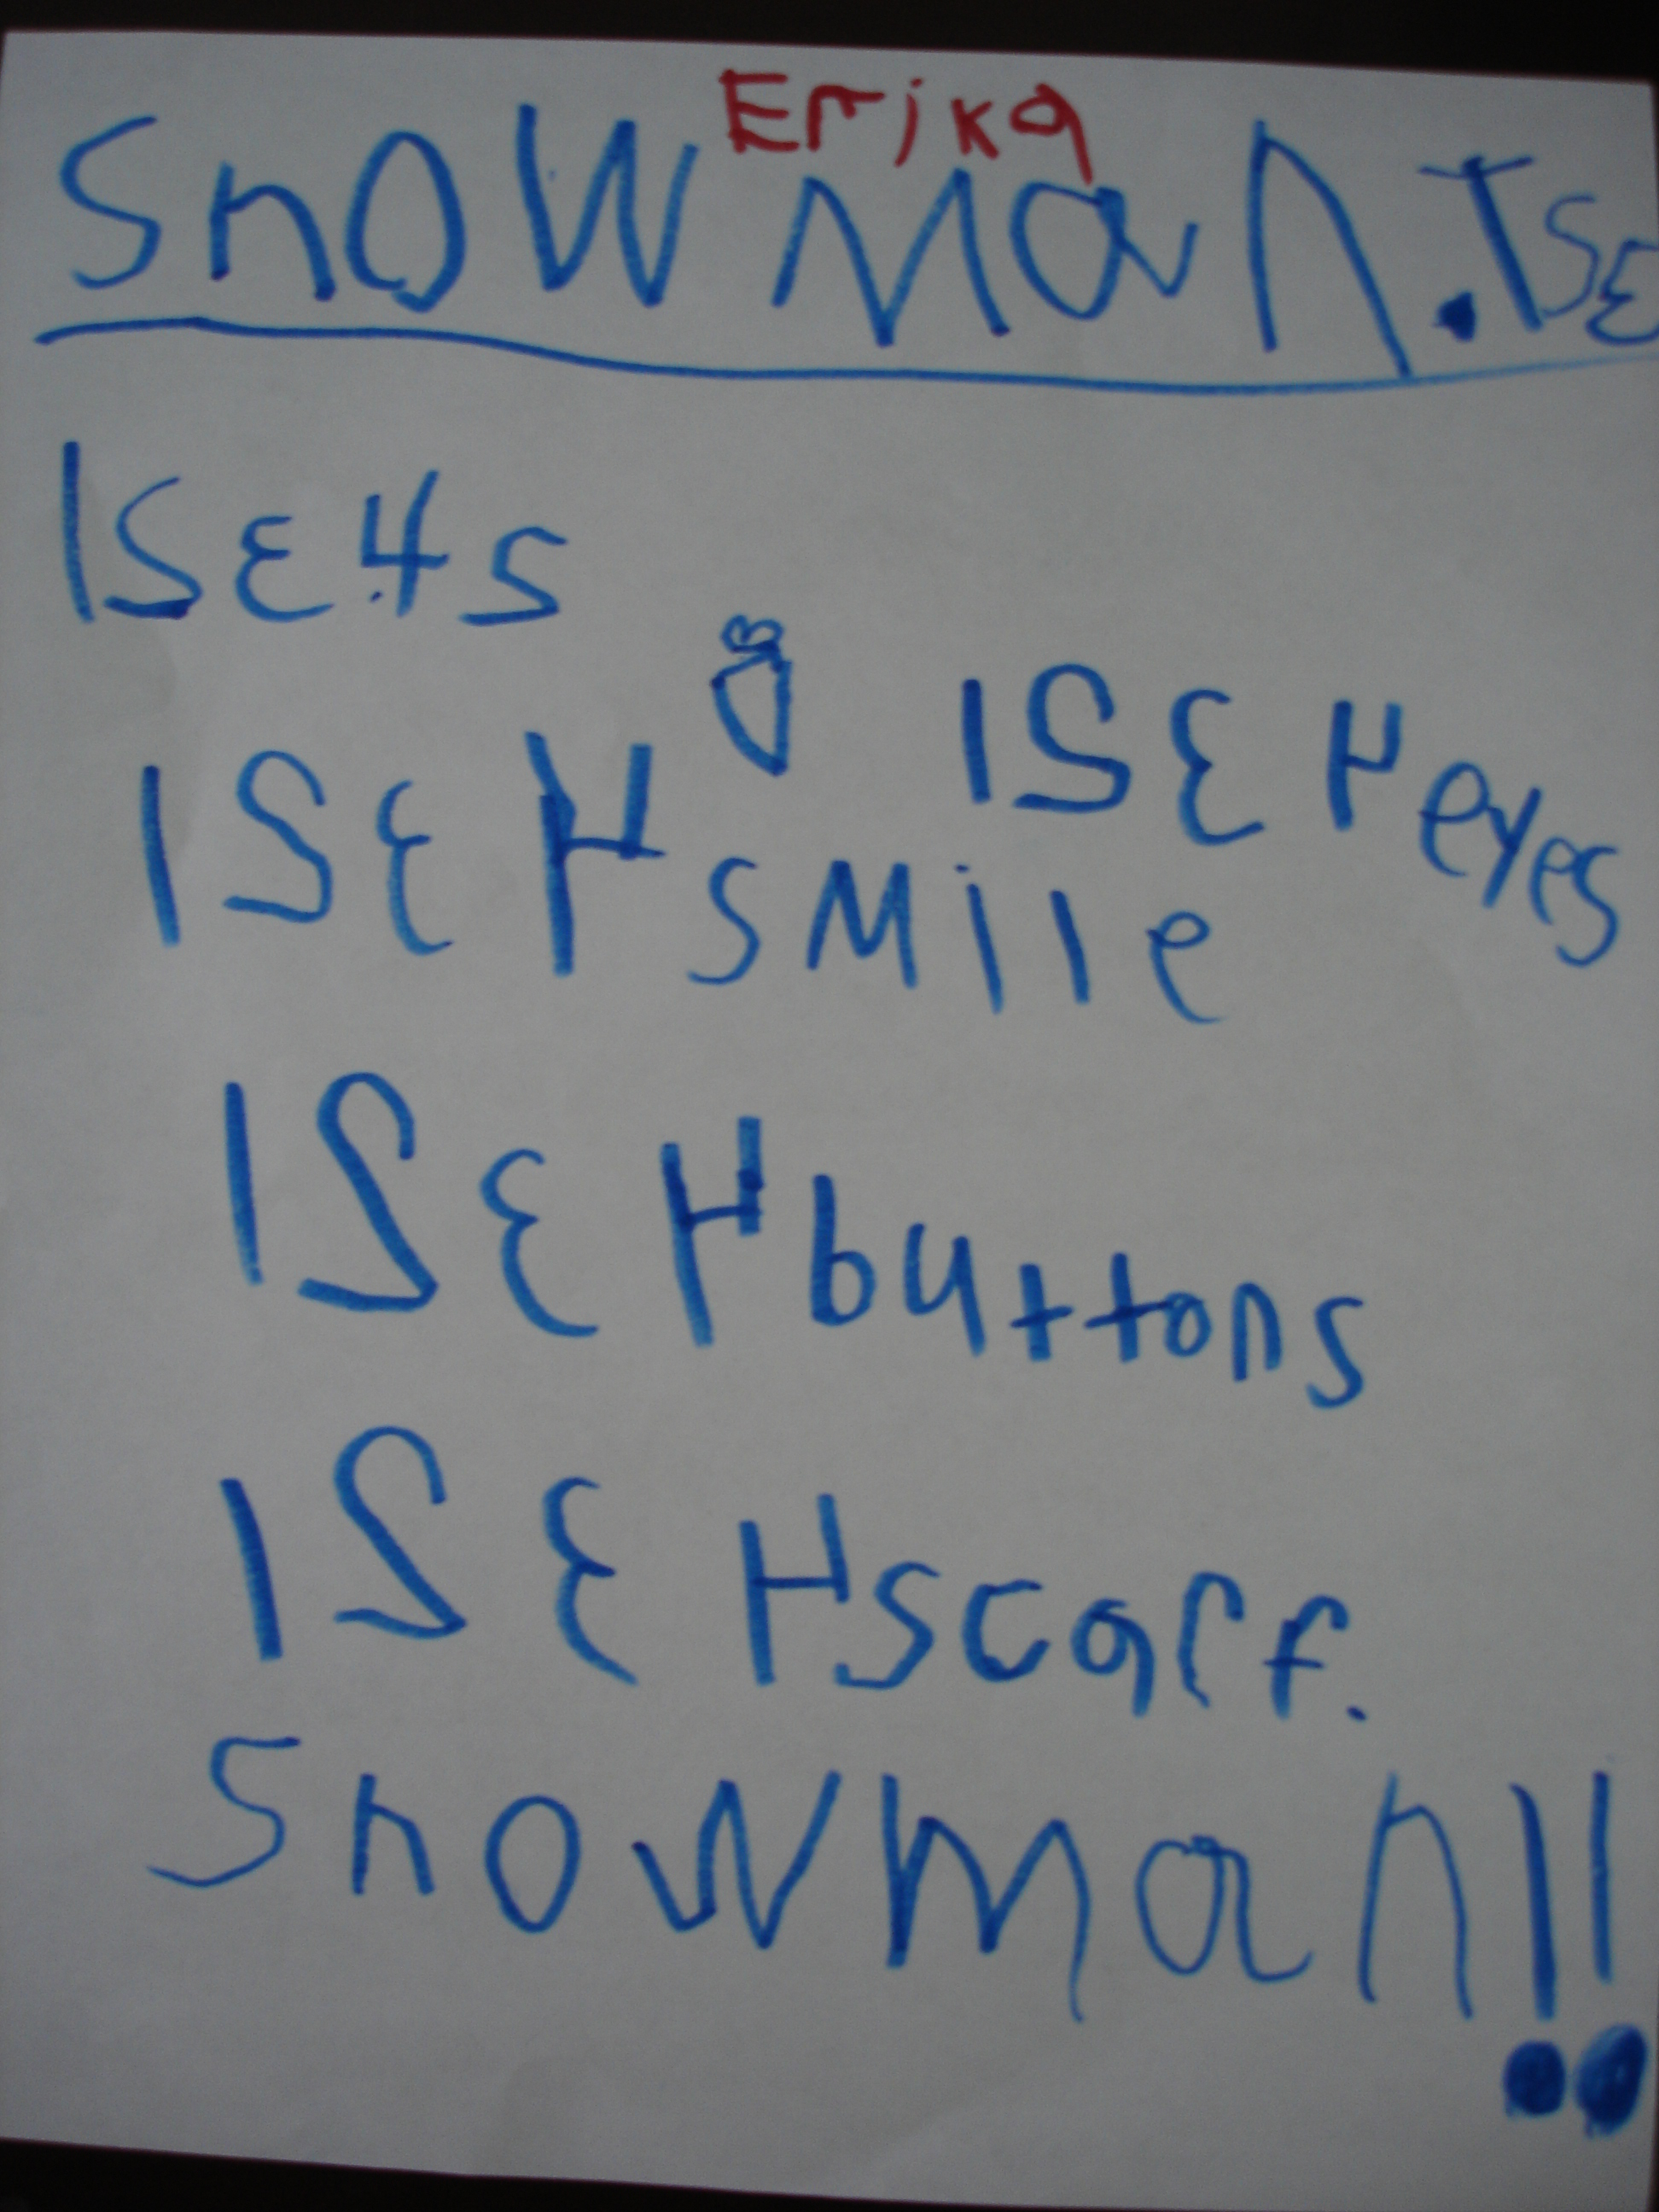
After the winter break, I switch from using writing notebooks to using writing folders. These are two pocket folders that the children use to store their work. Instead of a notebook, the children use single sheets of paper to write on (I use the ones suggested by Lucy Caulkins). The paper reflects the needs of the students. Some children continue working on a blank sheet. Other children use a paper with space for a picture and one or two lines underneath for sentence writing. Still others use paper with space for a picture with lines underneath and lines on the back of the page as well. Again, the work is date stamped. At any time a child can use paper with lines if they need it. I mostly let the children self-regulate this step, but will also suggest it when I feel a student is ready. At the end of each month, the children choose their best work and that work is showcased on our Writer’s Wall. Before choosing their best work we spend time talking about what “Best Work” might look like and we co-construct success criteria together. I love meeting with each child to discuss the progress they’ve made over the month. It’s amazing how reflective the children become over time about their own learning and development as writers. Some children have a hard time choosing what their best work is and will invite their classmates to help them choose (last year one girl even took a survey of her classmates to help her pick!). Once the child has chosen their best work the rest of the work from the month gets stapled together with a cover page with the month on it. The children enjoy re-reading their “books”during writing or discovery time.

img_0184

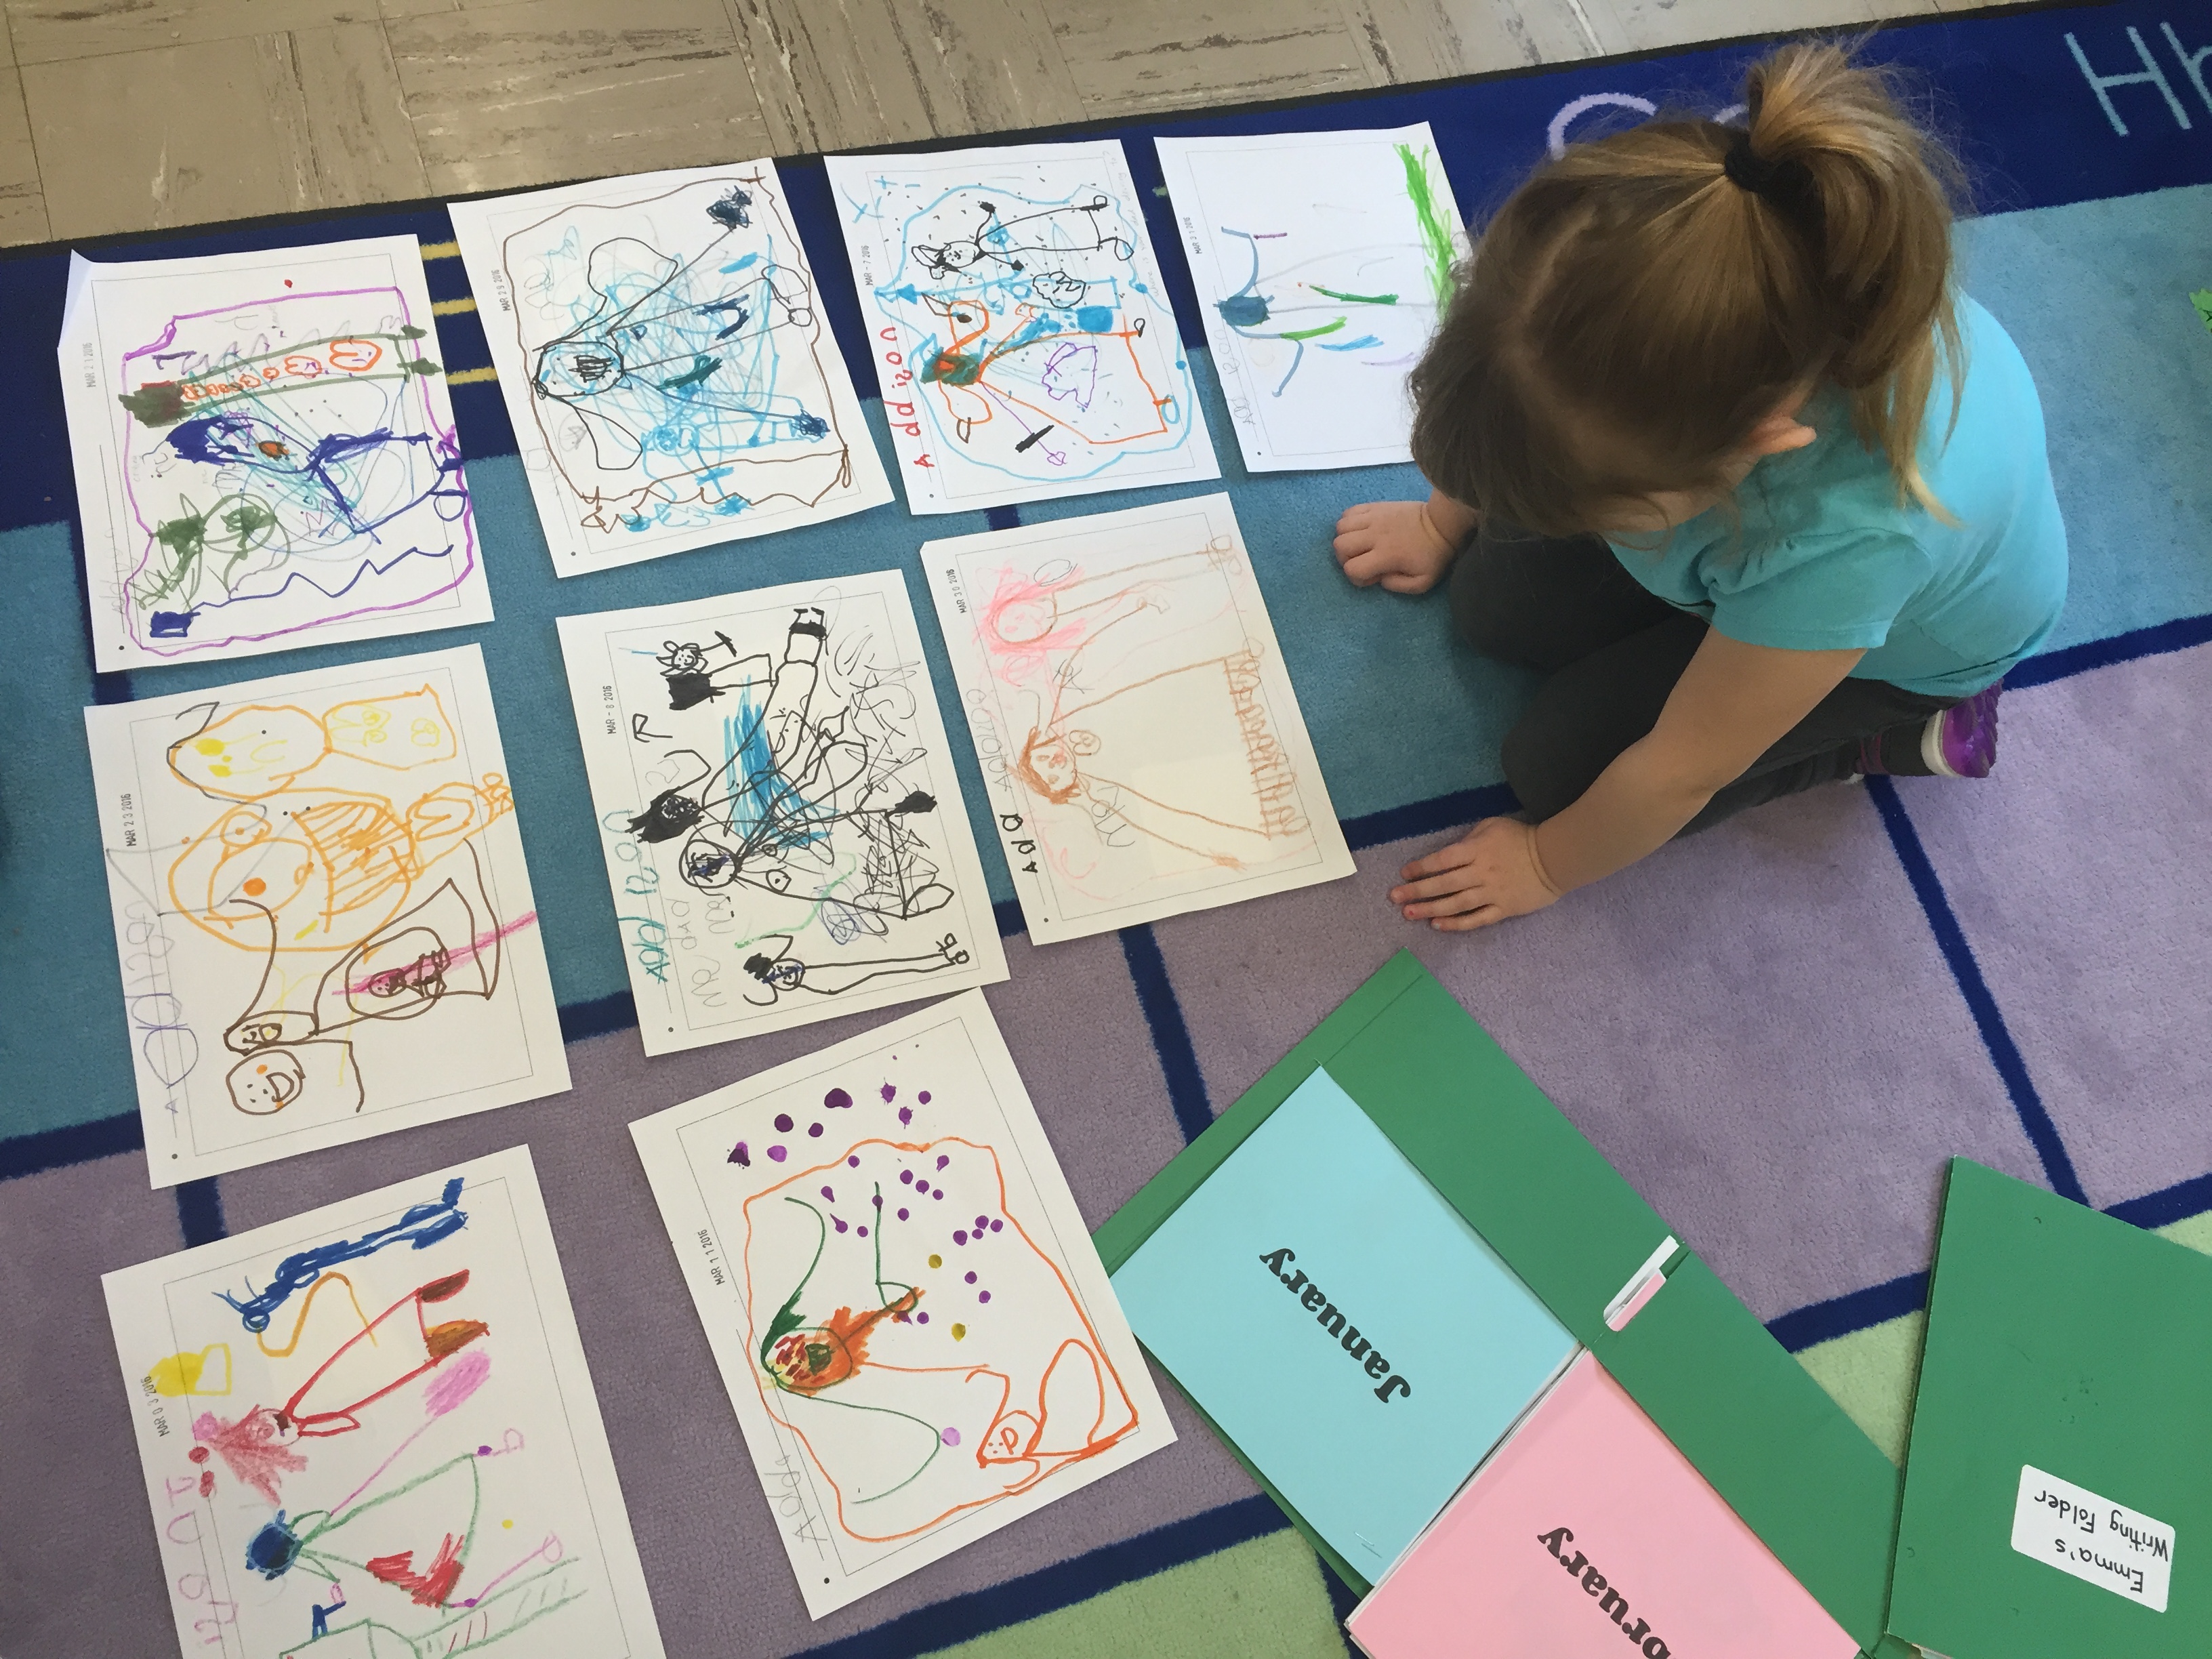
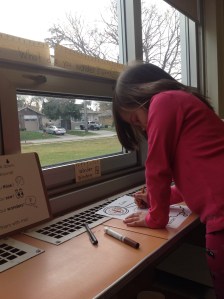
Some children like to lay out all their work and narrow it down through a process of elimination.

img_0186

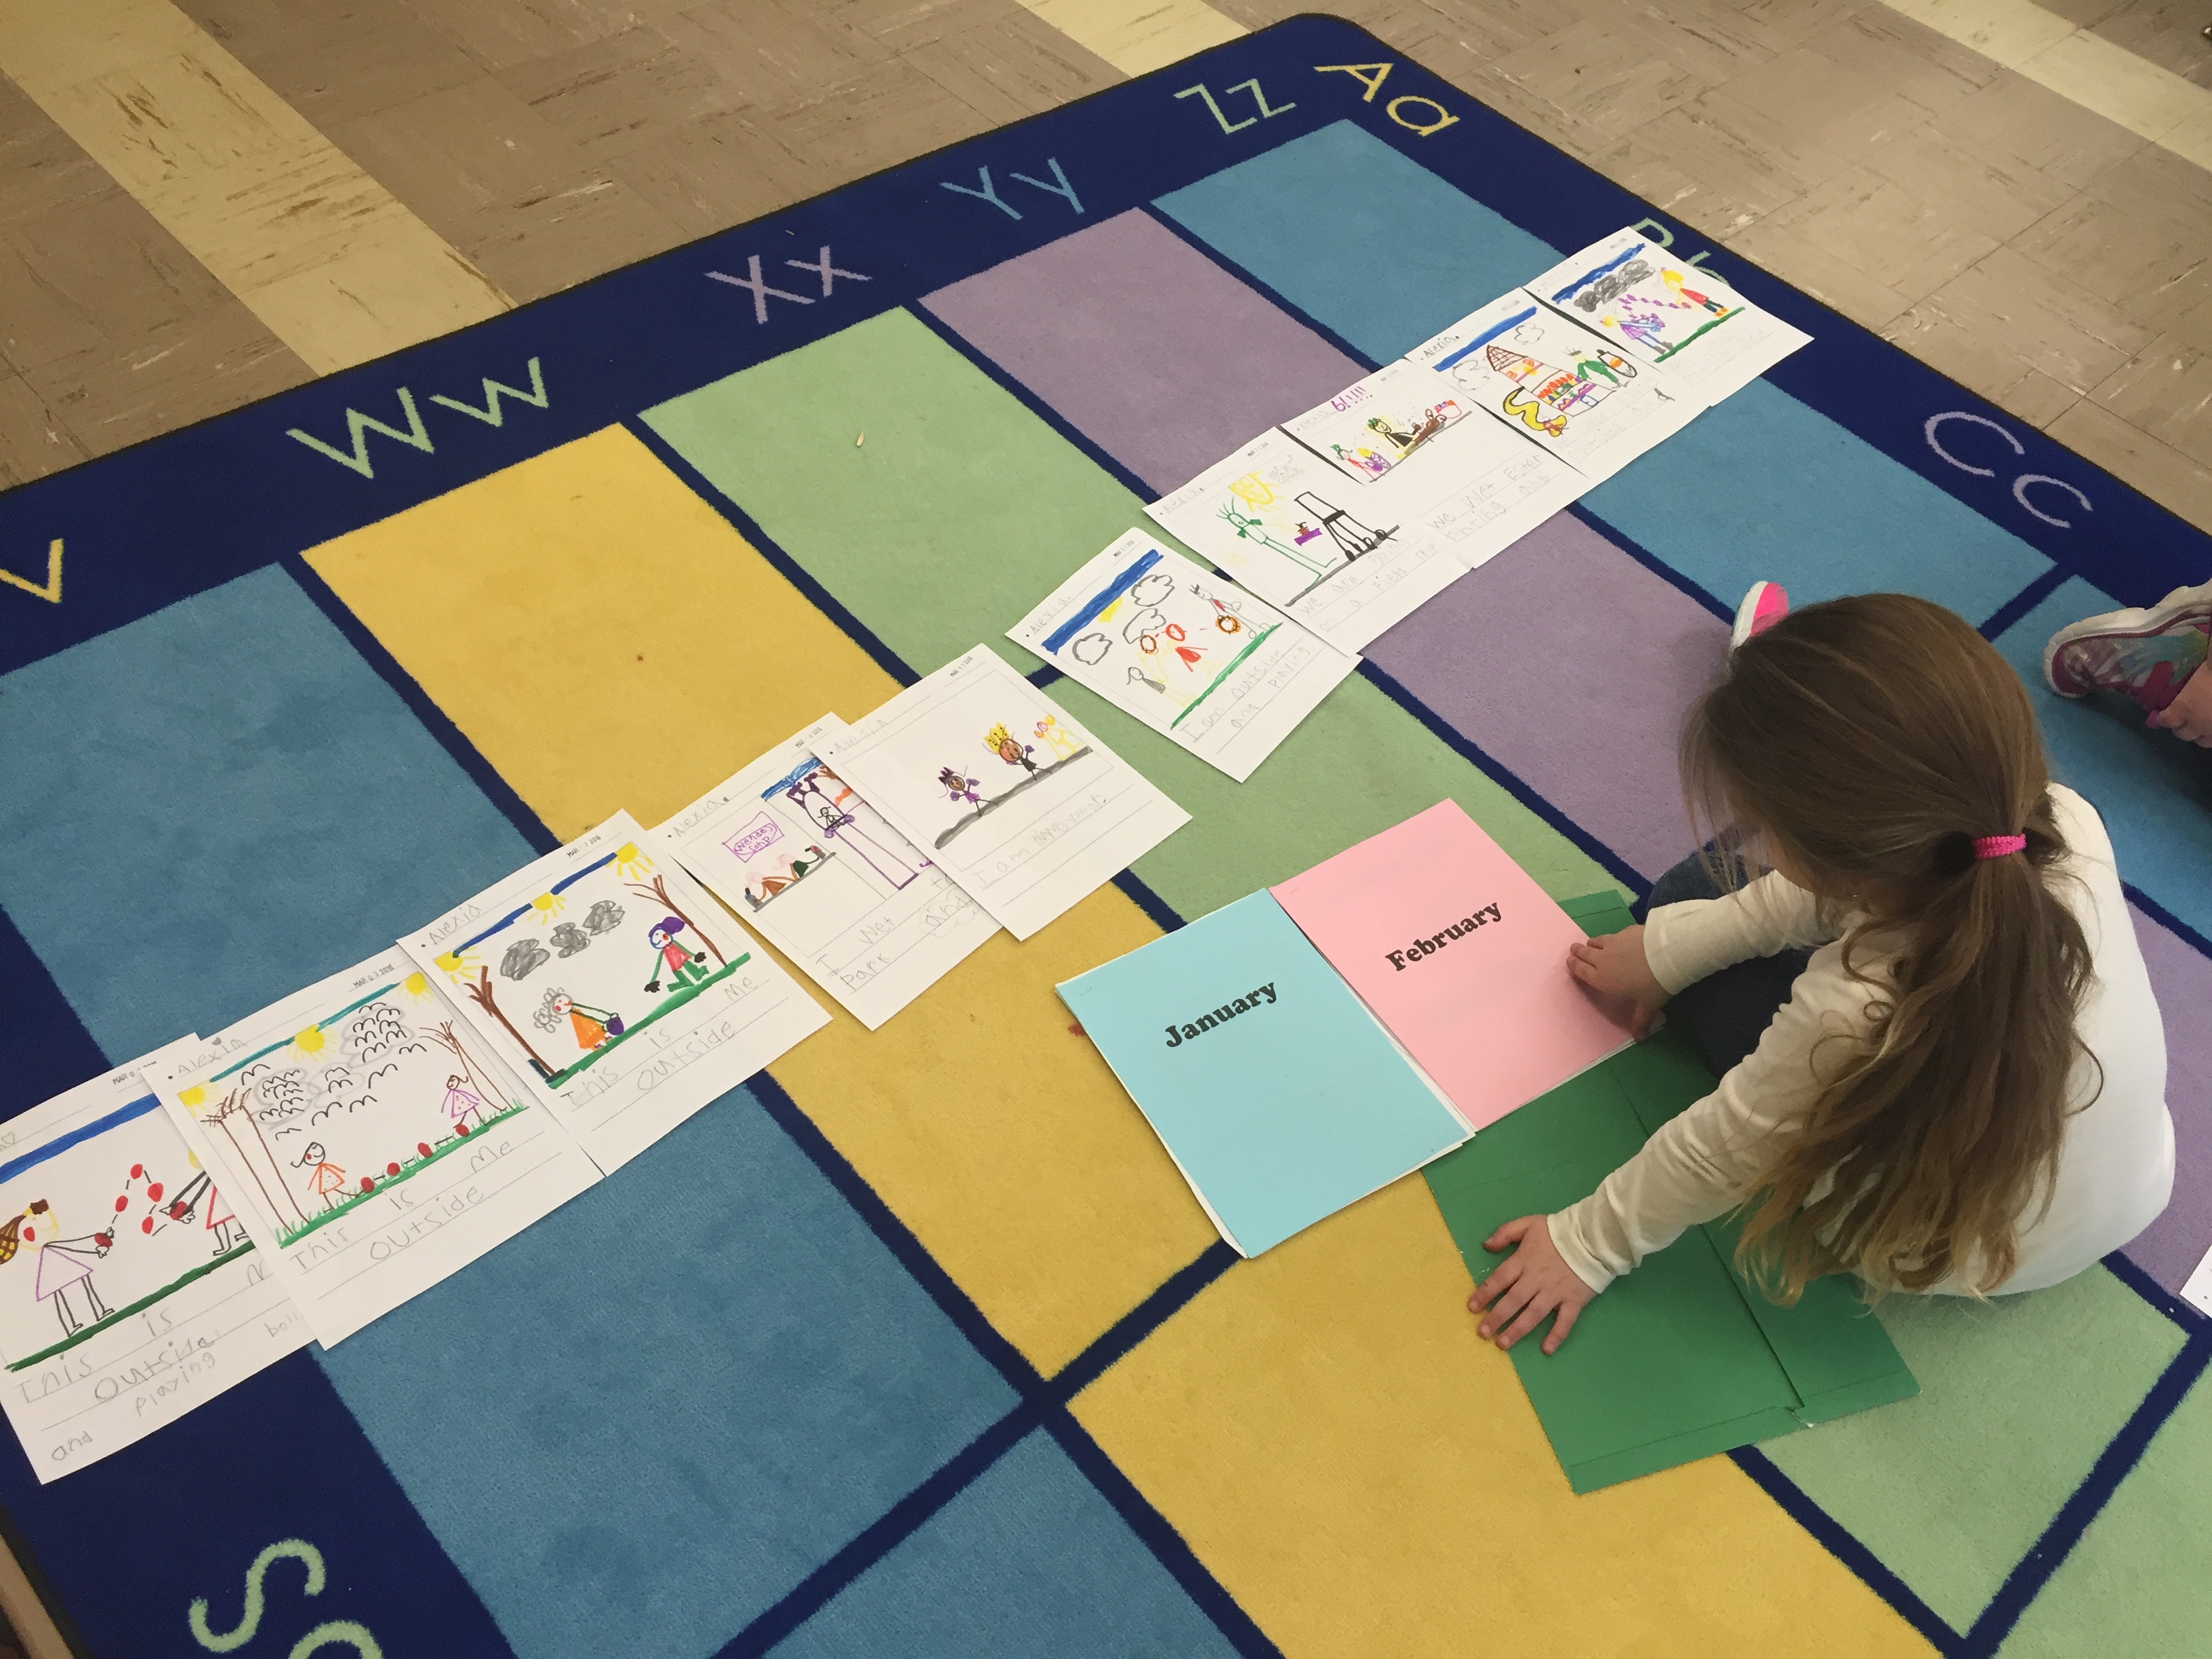
This student said, “It’s so hard to choose my best work because I always do my best!”

One thing I want to make clear is that Writer’s Workshop is for everyone. One of the reasons I dedicate so much time to it during the week is that for me, it is a high yield strategy. It is our reading and writing and oral language development all rolled into one. Whether or not a child can speak English or hold a pencil or draw figures or know their alphabet, they can all participate in Writer’s Workshop. The teaching, the individual attention, the flexible format of our writing materials meet our students where they’re at. If you are at all hesitant to give this a try, my advice would be just to go for it! Believe me, there are times in the first couple of weeks of school where I don’t see a whole lot of progress that I have to remind myself just to keep at it…keep encouraging, keep supporting, keep modelling..and always the payoff comes.

img_4904

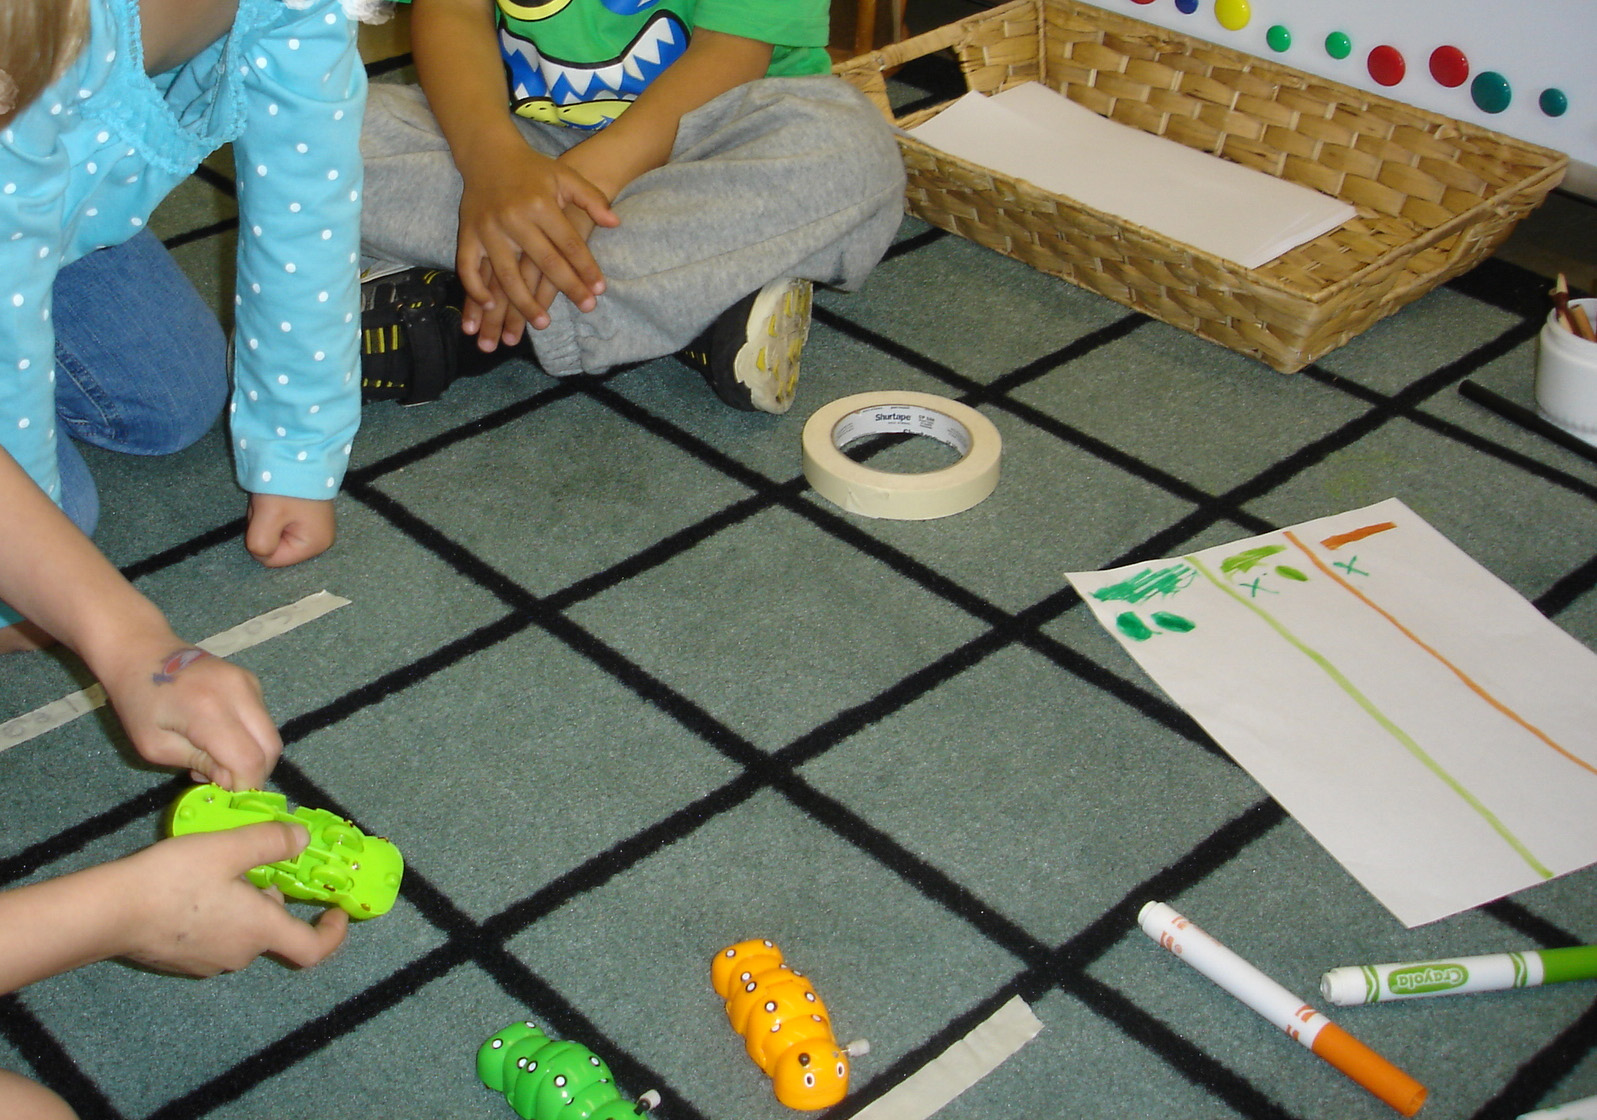
The other thing I want to make clear is that our writing program is not limited to our Writer’s Workshop time. Most (if not all) our provocations encourage the children to draw or write about their learning. We use writing for routine tasks (like our daily message or calendar-journal, our sign-in, etc.), at learning centres, for special projects, at the writing centre, and during workshop time. Writing is encouraged always and everywhere in our classroom!

If you have any questions about our version of Writer’s Workshop please don’t hesitate to leave a comment below.

In the Art Studio: Plasticine Art Inspired by Barbara Reid

IMG_1838

This month we have been inspired by renowned Canadian author and illustrator Barbara Reid. Barbara Reid has worked on some of my class’s favourite read-alouds: Picture a Tree, Perfect Snow, and Subway Mouse. When reading, we often discuss how an artist may have created their illustrations. My students were very interested in how Barbara was able to achieve such realistic and detailed pictures using Plasticine.

Lucky for us, Barbara Reid has created a series of tutorial videos which you can find on YouTube (links below). In her videos, Barbara talks about how she goes about creating her artworks: from the planning stage (researching, sketching a picture), to creating a background, to adding fine details and textures to her work.

Video: Making Plasticine Pictures with Barbara Reid Part 1

Video: Making Plasticine Pictures with Barbara Reid Part 2

Video: Making Plasticine Pictures with Barbara Reid Part 3

For this project, I cut our Plasticine into very small pieces so it would be easy for the children to manipulate (and because a little goes a long way!). I arranged the pieces in small containers by colour. I also included some of Barbara Reid’s books and a non-fiction book about Barbara Reid herself. We also had dry cloths for wiping our hands (as Barbara suggested) and some tools for adding texture. For the planning process, the children had pieces of cardstock and pencils for sketching. We made our Plasticine pictures on small canvas boards I found at the dollar store. The children were extremely excited to do their work with “real artist materials.” For me, it is very important to give the children beautiful and authentic art materials to use and work with. Their art is more than deserving of quality materials and in my experience, they seem to take their art more seriously when they perceive materials to be “special.”  For this project, the strength of the canvas boards was an added advantage, as it made it easier for the children to spread the Plasticine.

IMG_1813

During the planning process, I really didn’t meddle too much in what the children were sketching or wanting to create, thinking the children would figure out on their own what was going to work and what wasn’t. For example, the first group of children who visited the studio realized that creating people with Plasticine was a big challenge, and advised their classmates accordingly during reflection time. Spreading the Plasticine was also a challenge for some (and a great fine motor muscle workout!). Some children took a few sessions to complete their backgrounds, pausing and coming back later to give their fingers a rest. Other children wanted to persevere and complete their backgrounds so they could get to adding their flowers or bugs or animals. If you’re wondering how long it took the children to complete their pictures, it varied between one session (about half an hour) to a few days, depending on each child.

IMG_1809

Y.A.: “I want to make a picture of a cat.” 

IMG_1871

A.J. spreads the Plasticine to make a sky. “I’m mixing the colours. A little bit of dark blue and a little bit of light blue.”

IMG_1835

Y.A.: “I’m making my grass like Barbara Reid. I’m rolling snakes and making them flat like grass. I’m doing a pattern: light green, dark green, light green, dark green…”

IMG_1842

R.A.: “I’m making a little mousey like Barbara Reid. It’s just like The Subway Mouse.”

Here are some of the children’s completed art works. I have them displayed on a low chalkboard ledge in our classroom and the children can often be found admiring them!

IMG_1894

S.C. “I made a rainbow and a little girl is camping in the tent.”

IMG_1932

IMG_1846

IMG_1897

IMG_1853

Honestly, the children were SO proud of their completed art works. They loved showing them off during reflection time and talking about the process they used to make them. During one reflection session, we started talking about how Barbara Reid gets her Plasticine pictures in the pages of her books. One student remembered that Barbara’s husband photographs her art for her so the pictures can be used as illustrations. One student suggested that we take photographs of our work and use the pictures to make a book by writing our own stories. I loved that the children were inspired to create their own stories, so we set up a story-writing invitation.

At the writing table, I gave the children some mini easels to place their art on. I put out plain paper and some black pens. The children could choose to write about their own work or a classmate’s work that inspired them. This proved to be a popular invitation! Some children returned each day to write a new story! We loved listening to each other’s stories during reflection time – some children’s stories were so popular, the class asked them to read it aloud more than once.

IMG_2043

IMG_2045 - Copy


IMG_2095 - Copy

E.H. “Once there was a little ladybug. She wanted to rest on a flower. The red flower was wet but the purple flower was just right. The End.”

IMG_2077 - Copy

“I went out on a stormy day.”

We are still in the midst of our story writing. I was interested to see the emergence of a narrative voice in the children’s work and am curious about exploring this further with the class. Stay tuned!

The Wonder Window

IMG_1355

Do you have a wonder window in your classroom? Perhaps you call it something else – an observation window or a nature window? I first read about the idea of an “Observation Window” in A Place for Wonder: Reading and Writing in the Primary Grades  by Georgia Heard and Jennifer McDonough. It’s one of my favourite resources for ideas about developing an inquiry based program in the primary grades, in part because the ideas are so practical (as you read about them you can instantly picture how they could work in your classroom) but also because the strategies so clearly create opportunities for rich dialogue and deep learning.

wonder

I created a Wonder Window in my classroom because I wanted to give my students a dedicated space for scientific thinking…for looking out into the world, for noticing, for theorizing, for questioning. Our wonder window is located beside our Science and Nature Centre in the classroom, which gives me an opportunity to extend the children’s discoveries at the window into provocations nearby – or take provocations and extend them to the window.

I love writing poems, so to spark some curiosity about our window, I wrote the following poem. I copied it onto chart paper (to work on during our Shared Reading time) and placed this printout at the window (to help the children remember what it is I wanted them to do there):

IMG_1354

I originally started with blank paper at the window, to allow the children some free space to record their observations, drawings, questions, or theories. As I introduced the “See Think Wonder” thinking routine, I placed the recording sheets I had modeled during group time there as well.

IMG_1388

IMG_1390

At first, I only had one student eager to visit the Wonder Window. However, this student made an interesting discovery – nests! Once we shared her thinking with the class, many other students were keen to go to the wonder window to record their own observations and ideas.

IMG_1396

Here are a few samples of the children’s work from the Wonder Window (I added the sticky notes for the purpose of sharing with parents):

IMG_1443

“I see a nest. I think it’s made of leaves. I wonder if a bird is inside.”

IMG_1442

“I see a nest. I think a bird lives there. I wonder if there’s a baby.”

IMG_1441

“I see a tree. I think it is so tall – taller than me! I wonder how it got so BIG.”

IMG_1440

“I see leaves in the tree. I think it’s a nest. I wonder when it will be Winter.”

Some children are totally independent about their work at the wonder window – visiting of their own accord, documenting their own thinking. Others seek me out when they want to visit the Wonder Window. Some simply want to look out the window and discuss what they see with me, some want to take pictures of what they notice, still others want to write or record their thinking on paper. There is something to learn from each of these learning moments and all are just as important and valuable as the other. I often get interesting ideas/questions to talk about with the class from these small group or individual conversations at the Wonder Window. It really has proven to be a source of awesome learning and inspiration!

tally

After spotting nests in the trees outside our window, the children were interested in seeing how many nests we could find in our neighbourhood. Here, one student keeps a tally of how many nests we spotted.

binoculars

Many students were inspired to make binoculars at the Art Studio for observing at the Wonder Window…


Butterfly Inquiry: Inspiring Young Authors with Tap the Magic…Egg?

DSC09071

As mentioned previously on the blog, my students were totally inspired by the book Tap the Magic Tree by Christie Matheson (you can read about it in Books That Inspire Young Authors). When it came time to design some provocations for the writing table for our butterfly project, I was thinking about how I could give the children an opportunity to show their learning about the butterfly life cycle. Since the children were already familiar with the cyclical nature of Tap the Magic Tree, it seemed like a good jumping off point for talking about the cycle of how caterpillars grow and change. As a class, we brainstormed a version of Tap the Magic Tree called “Tap the Magic Egg” (which, of course, the children were completely excited about!). After some modelling with the entire class, we placed some inspiration books, book covers, newsprint, and sample vocabulary at the writing table. As with our other Tap the Magic Tree experiences, this centre was immediately jam packed with children creating their own life cycle stories. I was able to assess the children’s understanding of the concept, but each story was unique to the child who wrote it. We certainly got a lot of enjoyment out of hearing the stories read aloud at reflection time!

DSC03423

DSC09064

DSC09051

DSC09043

DSC09046

DSC09056

DSC09040

You can read more about our butterfly project by clicking here.

The Butterfly Inquiry

DSC09257

Have you ever had live creatures in your classroom? There is something quite magical about having a living, breathing part of nature in the classroom to inspire some deep thinking. Beyond the obvious scientific connections, having live creatures in the classroom also provides opportunities for social development around respect, responsibility, care-giving, and self-regulation. Over the years I’ve had many insects, amphibians, and animals come through my door but butterflies are definitely my favourite. The whole process of watching and waiting for metamorphosis to occur provides endless opportunities for observations, predictions, hypotheses, and of course, lots of excitement!

This inquiry project turned out to be quite all-encompassing and there is a lot I want to share here. This post will be mainly photo based, with some captions for the photos to describe what we were doing. If you have any questions, please don’t hesitate to ask!

Our caterpillars on the day of their arrival. We ordered our live caterpillars from Boreal Science.

Our caterpillars on the day of their arrival. We ordered our live caterpillars (Painted Lady Butterflies) from Boreal Science.

DSC03339

E.A. thought our caterpillars should have names – here, she made name tags for two: “Zigzag” and “Stripey.”

Our literacy connection for the start of this inquiry was The Very Hungry Caterpillar by Eric Carle. Here, a student records a shadow-puppet retelling of the story on the iPad.

Our literacy connection for the start of this inquiry was The Very Hungry Caterpillar by Eric Carle. Here, F.S. records a shadow-puppet retelling of the story on the iPad.

DSC03319

The children take time to record their observations of the caterpillars in their science notebooks.

A closer look at the science notebook.

A closer look at the science notebook.


We represented each phase of the butterfly life cycle through an art piece. Here is our collaborative art piece for the caterpillar, based on Eric Carle's famous story.

We represented each phase of the butterfly life cycle through an art piece. Here is our collaborative art piece for the caterpillar, based on Eric Carle’s famous story.

Racing caterpillars at the math centre. The children negotiated the length of the course and recorded the results of their races.

Racing caterpillars at the math centre. The children negotiated the length of the course and recorded the results of their races.

Our caterpillars inspired so much writing at the writing table!

Our caterpillars inspired so much writing at the writing table!

Writing letters to our butterflies while we wait for them to emerge from their chrysalises.

Writing letters to our butterflies while we wait for them to emerge from their chrysalises.

We found this idea on Pinterest - recording the growth and change of our butterflies. We kept this record on the SMARTBoard.

We found this idea on Pinterest – recording the growth and change of our butterflies. We kept this record on the SMARTBoard.


Art and Fine Motor Instruction: learning how to draw a butterfly. Much of this lesson was dedicated to symmetry.

Art and Fine Motor Instruction: learning how to draw a butterfly. Much of this lesson was dedicated to symmetry.

Our See, Think, Wonder graphic organizers were available throughout the entire inquiry. This one says, "I see the butterfly has spots. I think it is camouflage. I wonder how the butterflies get their designs."

Our See, Think, Wonder graphic organizers were available throughout the entire inquiry. This one says, “I see the butterfly has spots. I think it is camouflage. I wonder how the butterflies get their designs.”


One of our main questions was "how can we care for our caterpillars/butterflies?" This led us to think about how to create a  habitat for the butterflies where they could thrive while we had them indoors. The children recorded their ideas on butterfly habitat planning sheets and looked for their materials in our outdoor classroom.

One of our main questions was “how can we care for our caterpillars/butterflies?” This led us to think about how to create a habitat for the butterflies where they could thrive while we had them indoors. The children recorded their ideas on butterfly habitat planning sheets and gathered their materials in our outdoor classroom.

Our representation of the chrysalis stage: creating a chrysalis out of papier mache. The children added finer details with permanent markers when their work was dry.

Our representation of the chrysalis stage: creating a chrysalis out of papier mache. The children added finer details with permanent markers when their work was dry.

You can see how excited the children are to catch a glimpse of our first butterfly!

You can see how excited the children are to catch a glimpse of our first butterfly!

Representing our butterflies with beautiful watercolour paintings. The children worked very hard to create symmetrical designs on the butterfly wings.

Representing our butterflies with beautiful watercolour paintings. The children worked very hard to create symmetrical designs on the butterfly wings.

Documentation of our learning. We layered the children's work in a display that captured not only the growth and change of the caterpillars but of our own learning and understanding.

Documentation of our learning. We layered the children’s work in a display that captured not only the growth and change of the caterpillars but the growth and change of our own learning and understanding.

More documentation.

More documentation.

Our butterflies were clipped to our chrysalises and hung from a branch suspended from the ceiling.

Our butterflies were clipped to our chrysalises and hung from a branch suspended from the ceiling.

We celebrated the end of our learning journey with a butterfly release party in our outdoor classroom where the children sang songs and talked about their wishes for our butterflies as they flew into nature.

We celebrated the end of our learning journey with a butterfly release party in our outdoor classroom where the children sang songs and talked about their wishes for our butterflies as they flew into nature.


Playdough snowmen…inspiring young poets!

DSC02372

Well, here in Toronto this week we got an early blast of winter with 5 cm of snow. It was perfect snow for packing and sculpting too – which meant lots of opportunities for making snow creatures! So, in honor of our first snow of the season, I thought I’d share a wonderful playdough activity that provides many opportunities for language and literacy skills.

This activity begins with a poem (which we explored as a class during Shared Reading time) and a provocation at the playdough table. Here is the set-up:

DSC06918

The children were encouraged to construct and decorate their own snowman/snow creature. While they worked, the children talked about their experiences in the snow and were encouraged to describe their creations. Each snowman was photographed (in fact, most children were keen to snap the picture themselves!).

Here are some of our snowmen:

DSC02216 snowman activity snowman activity2

DSC02230 DSC02272

The photos of the children’s snowmen were printed and added to the writing table where the children were encouraged to write poems about them.

DSC02386  DSC02380

Here are some samples of what the children created:

DSC02398

Snowman

Snowman has a smile

But he is meltie

So we put a blanket over him

But he melted

Snowflakes

DSC08776

Snowman

Snowman, snowman

How are you?

Are you cold?

Are you meltie?

Snowman

Boo Hoo.

DSC08778

Snowman Mommy

Snowman mommy

I love you.

Snowman mommy,

You love me.

Snowman!

DSC02390

ABC Snowman

A B C D E F G H I J K L M N O P

Q R S T U V W X Y Z

Lion snowman

Roar!

DSC08780

Snowman ABC

A B C D E F G

Don’t break the snowman.

H I J K L M N O P

I like snowman.

DSC08782

Snowman 1 2 3 4

1 2 3 4 carrot

1 2 3 4 eyes

1 2 3 4 smile

1 2 3 4 buttons

1 2 3 4 scarf

Snowman!!

DSC02394

This student had some very creative words of his own to add to his poem! He was hesitant to write the words on his own so I scribed them for him, but encouraged him to write the title and special ending words “Splash! Coocoo!” on his own.

We were so impressed with the children’s creativity and enthusiasm throughout this project! Each day, we dedicated some of our class reflection time to listening to each other’s poems. Here are some things we did to help the students achieve success with this activity:

*The topic developed out of the children’s own interests in making snow creatures outside.

*The poem we read helped the children understand/think about the process of making a snowman and served as a model for the type of writing we wanted the children to attempt (poetry).

*We talked about the features that made the snowman poem interesting and fun for us to read. There was a particular emphasis on the ending of the poem and how it was an exciting finish.

*The children had an opportunity for hands-on exploration with materials. The conversations we had while making the playdough snowmen lay the foundation for our poetry writing.

*We wrote several poems together as a class (modelling) prior to students attempting to write their own poems.

*All students were encouraged to write a poem regardless of their level of skill in writing.

*All children were celebrated for their creativity and success.