Playdough Provocations: Treasure Maps!

IMG_8683

Treasure Maps!  The book in the background is My Map Book by Sara Fanelli.

This provocation combines three of my favourite things: play dough, loose parts, and maps! Children often have a natural interest in map making – and why not? Maps are often associated with fantasy and appear frequently in children’s books. They also appear in many electronic games, are used in many vehicles (I had a student lecture me on the benefits and uses of GPS recently), and can help children make sense of their environment. Map making is also an accessible way to engage beginning writers as they can include any combination of pictures, symbols, and words.

For this provocation we were aiming for “treasure maps” as these were the kind of maps appearing in the children’s play at the small building centre and sand table, but the materials were open ended enough that the children could really create whatever they wanted with them. It is important to me that although we have an idea of what we think the children might do with the materials we set out, there is always room for the children to use the materials creatively.

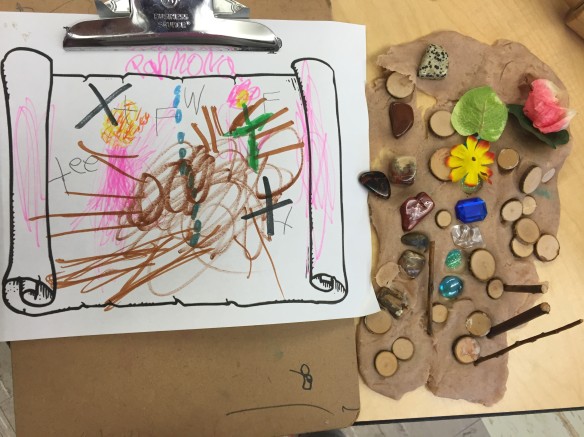
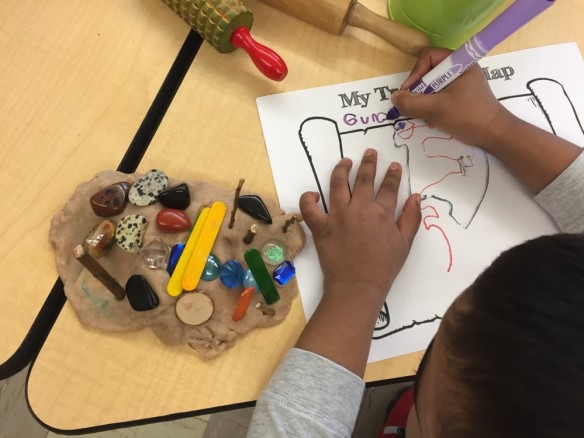
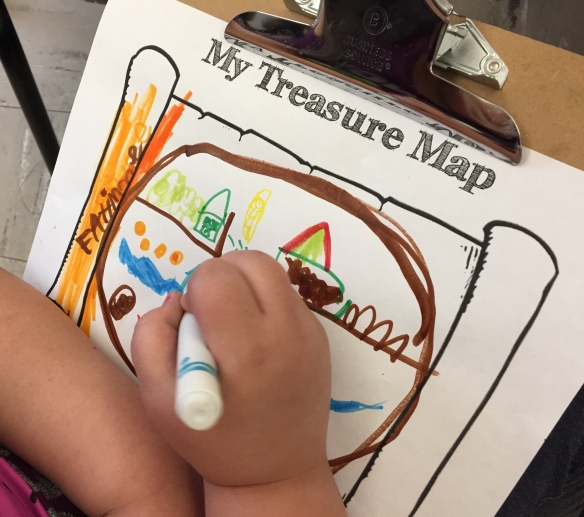
First, the children rolled out their sandy play dough. Then, they used the loose parts to create a map on the dough – blue gems for rivers, stone walkways, flower gardens, forests, stick bridges, etc. The children were encouraged to draw their maps and landmarks on a treasure map recording sheet (you can download a copy here: My Treasure Map). We had gold coins that the children hid under their playdough maps. We talked about marking the location of the treasure on their maps with an “X” and had great fun trying to figure out where the coins were hidden by reading the maps the children had created.


We continue to be impressed with the children’s ability to record their creations on paper. The children put a lot of detail into their maps – looking carefully at the shape and location of their landmarks and choosing coloured markers to match their loose parts exactly. Here are some pictures of the children’s work:

IMG_8699

S.E.: My island has a fire, a tent, a garden, a forest, a river with a bridge going over it, and a house. Can you tell where the treasure is hidden? I marked it with an ‘X’!

IMG_8711

B.B.: I made a treasure island. The guy is guarding the treasure. I put an ‘X’ to show where the treasure is.
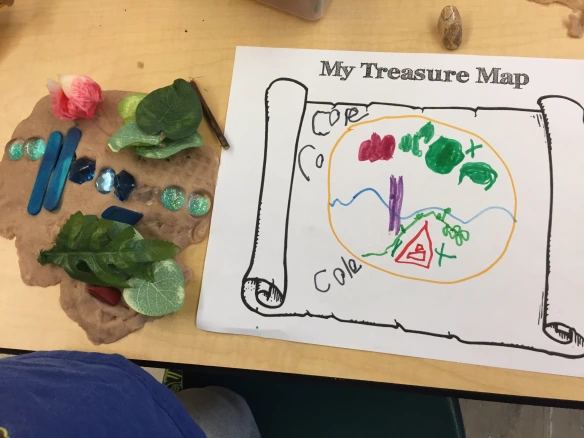
IMG_8697

C.G.: I hid two coins! I made a river with a bridge, a house, a forest, and a garden. There’s a jungle too!

IMG_8678

F. M.: I’m making people on the sticks so they can look for the treasure.
IMG_8695

IMG_8702

IMG_8720

IMG_8685

Have your students shown an interest in map making? What are some of the ways you’ve responded to this interest in your class?

The Snowman Poetry Project

d825a1fb3739

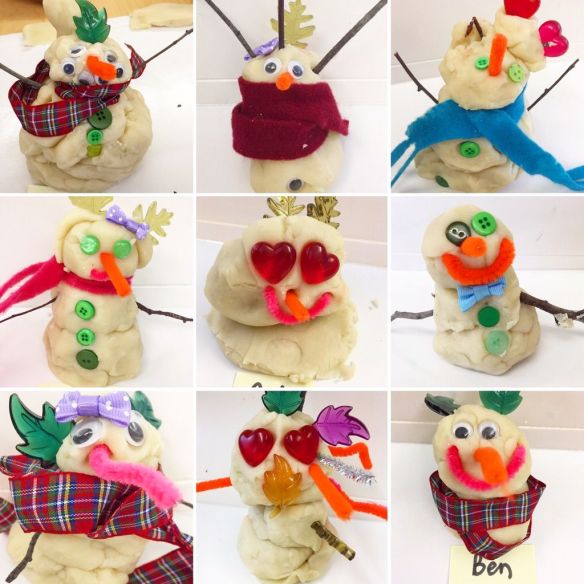
Previously, I blogged about our Snowman Poetry Project using playdough snowman creations as the basis for our creative writing. You can read about it here: https://thecuriouskindergarten.wordpress.com/2014/11/21/playdough-snowmen-inspiring-young-poets/

Well, last year we took this project to a whole new level by using the Chatterpix App to present our written works. The children absolutely LOVED recording their poems using the app and making their playdough snowmen come to life!

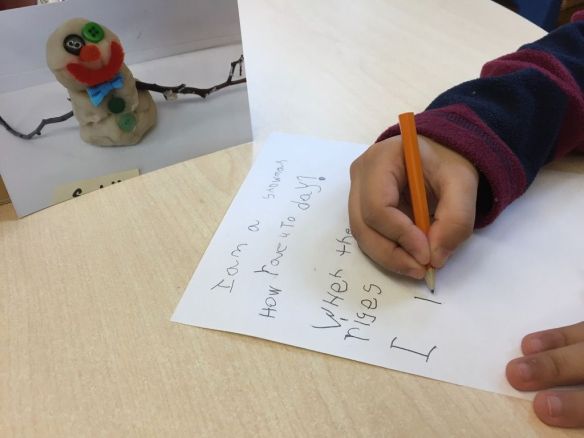
As before, we started by having each student make their own snowman out of playdough and loose parts. Each creation was photographed for the project. I saved them digitally and also printed a hard copy of each picture for the children to use when writing their snowman poems.

8f2952c9e8e1

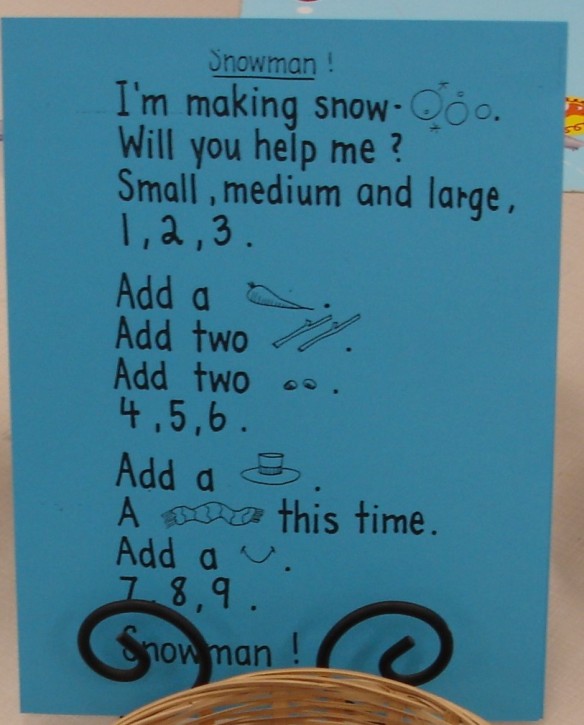
Prior to writing our own poems, we spent some time examining poetry together. Since the children were going to be writing about snowmen, I chose a poem about making a snowman called “Snowballs.” This is a rebus rhyme, which I like because it shows the children how a picture can be used in place of a word (something many children did when they wrote their own poems – e.g., drawing a scarf instead of writing “scarf”). It also uses a counting pattern which many children were inspired by. The poem ends with the word “Snowballs!” which we emphasized is a nice way to finish a poem in an exciting way.

DSC06918

Poem by Vera Trembach from Rebus Chants Volume 1: For All Seasons 

After writing their poems, the children uploaded the pictures of their snowman creations into Chatterpix and then read their poems aloud. You can see from the videos below that the results were pretty fantastic! The children were extremely proud!


One of the things I like about the Chatterpix app is that it motivates even the shyest students to share their work. It is a “low risk” way of sharing, because the children can record their work until they get it the way they want (we usually go to a quiet place to record) and we share the video on the whiteboard so the children don’t have to stand in front of the class if they don’t want to.

Have you been using Chatterpix with your class? What other apps do you find useful and engaging?


Playdough Provocations: Inventor’s Workshop!

img_5627

If you are looking for a way to jazz up the materials at your playdough table, I have a tried and tested provocation that I’m sure your students will love: The Inventor’s Workshop. I stumbled upon this amazing idea while perusing one of my favourite blogs: The Imagination Tree. On her blog, Anna has a list of over 50 ideas for using playdough which I go to whenever I’m in need of some inspiration. You can find her list as well as her recipes for playdough here: http://theimaginationtree.com/2013/01/the-z-of-play-dough-recipes-and.html

Before the children visited this centre, I set them up with some schema about what an inventor is by reading The Most Magnificent Thing by Ashley Spires and Rosie Revere, Engineer by Andrea Beaty (both titles pictured above). I have my own collection of technology cast-offs, but I also wanted to involve the children in the creation of this centre so I sent home a note asking parents for any old electronic materials that we could use. The very next day we got an awesome assortment of old wires (which we trimmed for ease of play), speakers, remotes, cell phones, etc. which we sorted into our loose parts tray. I also added some plastic caps and metal loose parts I had in my loose parts bin.

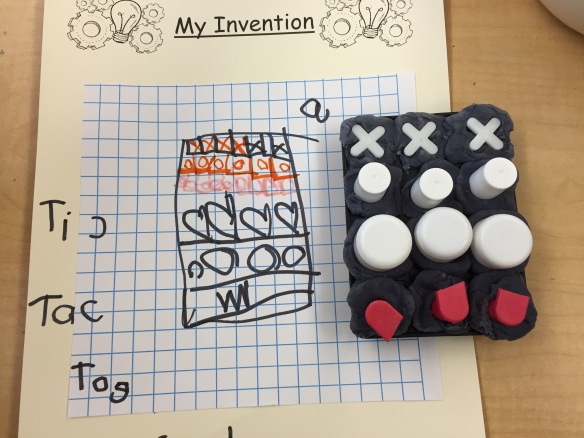
In addition to the playdough and a collection of loose parts, I also wanted the children to record their creations on paper. I created a recording sheet with “My Invention” at the top. I also provided the children with a new kind of paper to sketch on: graph paper. I told them it was a special kind of paper that planners and inventors might use. I even modeled how to draw a creation I made by sketching and labeling the parts of my machine (like the on/off button, etc.). The children couldn’t WAIT to give this one a go!

img_5565

img_5570

“This is the ‘off’ button!”

img_5596

These students were working independently until they realized they could connect their inventions together with a long wire. They were so excited about this discovery!

img_5712

“This is a ‘potato maker’ – it can make all kinds of potatoes: chips, french fries, mashed potatoes…”

img_5595

This student took time to colour and label her drawing to match her creation. “I put a check mark to show that it’s done!”

img_5591

“A Tic Tac Toe machine.”

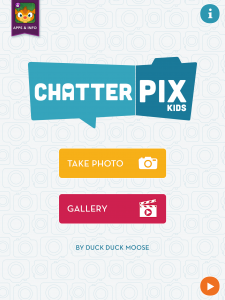
One of the interests that developed from this provocation was an interest in robots. This was in part due to our experimentation with the apps ChatterPix and ChatterKid. Both versions of the app are nearly identical but ChatterKid has a three second countdown before it starts recording so that students know when to start talking.

chatterpix.png

Basically, ChatterPix allows you to bring photos, drawings, and creations to life. You simply “draw on” a mouth and record your message and your image will talk! Here is a sample that one of my students made. This particular student is generally quite shy, so him having the confidence to not only record something but then share it confidently with the class at reflection time was a breakthrough (you can click on the link below to see the video on Twitter)!

Here are a few of the robots the children created:

What I liked most about this provocation  (besides the fact that it is engaging, creative, and fun!) is that it provided so many opportunities for our students to engage in literacy behaviours. The children were actively telling each other about their inventions as they worked, negotiating the use of special materials, and of course recording and writing about their inventions. During reflection time, the class was rapt with attention listening to each other describe what their inventions could do and how they were made. Many students were inspired to visit (or re-visit) this centre after hearing about what their classmates had created there.

Have you ever tried an Inventor’s Workshop in your class? Are you using ChatterPix with your students? I’d love to hear about what you’re doing!
Snowflake Loose Parts

img_6187

Before the winter break we set up this loose parts provocation at the science table. The children thoroughly enjoyed touching and combining the materials to make stunning snowflake designs. I watched with interest to see how some children randomly placed their materials on the snowflakes (by clumping, stacking, and piling materials together) while others were meticulous about creating symmetrical designs. All you need for this provocation is a selection of colourful loose parts (I went with blue, silver, clear and white pieces. The children particularly loved the gems!) and some snowflake designs. I found these wooden and cork snowflakes at my local dollar store, but printed out templates would also work. This activity would also be beautiful on the light table!

Take a look at some of the children’s stunning designs:

img_6242

Happy winter!

Zen Garden

DSC03198

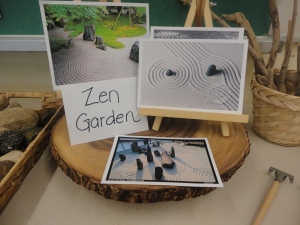
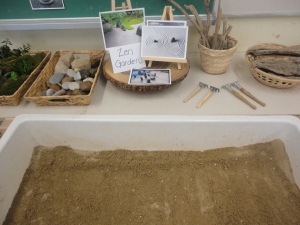
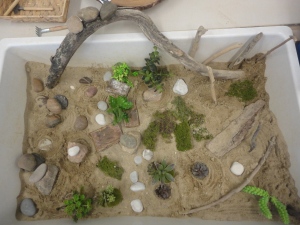
As I have mentioned previously, the children in our class have been curious about gardens lately (check out my post about our Imaginary Garden). One of the things we have been wondering about is different types of gardens: rock gardens, flower gardens, fairy gardens, etc. As a result, we decided to create a Zen Garden provocation at the sand table:

DSC03193

Phototastic-2014-04-26-16-45-26

DSC03195

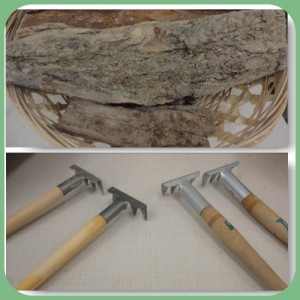
To give the children some background on Zen Gardens, we looked up pictures online and I found a Youtube clip that showed the process of working in and maintaining a zen garden, which the class was quite fascinated by. The children were quite interested in the designs that were created in the gravel (in our case, sand) and noticed how quiet and still the garden was. We also talked about keeping the garden free from clutter and garbage and the idea that before making designs, it was important to start with a clean surface of sand. This meant using a hand-held brush (small broom) to brush and comb the sand. While watching the children at the centre, I was struck by how seriously they took this initial step – brushing and smoothing the sand in a slow, calm manner.

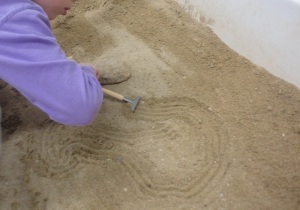
Initially, the children had difficulty making designs in the sand. Some children were frustrated that they were not able to create the patterns or designs they had envisioned. With practice and reflection (during group sharing time) we discovered that in order to make a clear pattern, the creator had to use the rakes very gently/lightly and slowly. This added to the purposeful work that was happening when the children were engaged here.

DSC03296

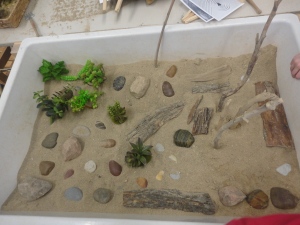
Here are some of the children’s creations, which they were certainly quite proud of!

photo

DSC03223

One of my favourite gardens was created by a JK boy in my class. He had been coming to the garden for a few days but had either stood back and watched his classmates or worked in a very small corner of the sand bin. On this particular day, he worked with one other student and then by himself to create his masterpiece:

DSC03306

A.F.: This is my Zen Garden. I made a bridge – the stones are walking on the bridge. And I put in lots of plants and grass. The sticks are the trees. And the rocks are the daddies carrying the babies around. There are lots of daddies in the garden today. I even made designs with my rake! I had to work really slowly and quietly.

DSC03302

The stones going for a walk on the bridge…

DSC03305

The plants and bushes and grass…

DSC03303

The daddy rocks carrying the baby rocks…

As with any provocation, the success of our Zen Garden came from the schema building, questioning, problem solving, and reflection that we engaged in throughout – both as a whole class and individually or in small groups at the centre itself. Our Zen Garden is a calm space that gives the children a quiet place to create with loose parts. The complexity of the gardens is increasing daily, especially now that the children have gotten the hang of design-making with the rakes, so I’m excited to see what happens next!


Exploring Loose Parts

DSC02130

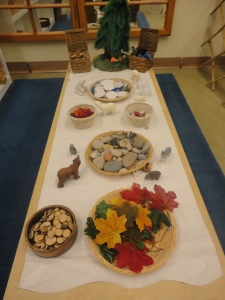
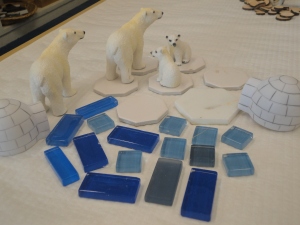
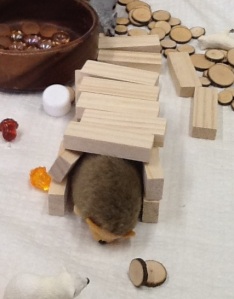
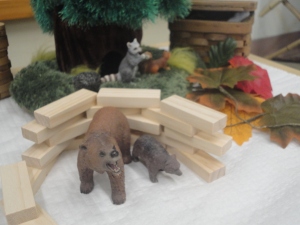
This week at the small building centre, we created an “animals in winter” provocation using a variety of materials and loose parts: wood chips, acorns, mushrooms, small blocks, glass tiles, animals, stones, etc. We also provided the children with some non-fiction books about animals and the class iPad. Having a variety of loose parts available to the children is advantageous in many ways. Loose parts can be used in any way the children wish, thus encouraging creativity and imagination. The children are also not limited with how loose parts can be used, combined, or organized. Because loose parts can be used in many ways, the children are able to demonstrate and explore a variety of themes and ideas. A popular theme that arose from this provocation was that of animal homes. The children were very interested in using the loose parts to create shelters for the animals. When they weren’t sure what a particular animal’s home looked like in real life, we googled it on the iPad and used the images we found to recreate a home that suited the animal. There was a lot of investigation, research, and problem solving going on!

DSC02132

DSC02131

DSC02097

hedg

DSC02135

DSC02102

DSC02098