Playdough Provocations: Treasure Maps!

IMG_8683

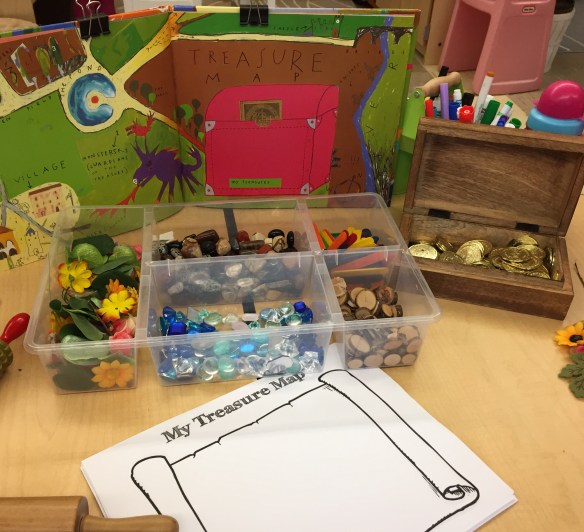
Treasure Maps!  The book in the background is My Map Book by Sara Fanelli.

This provocation combines three of my favourite things: play dough, loose parts, and maps! Children often have a natural interest in map making – and why not? Maps are often associated with fantasy and appear frequently in children’s books. They also appear in many electronic games, are used in many vehicles (I had a student lecture me on the benefits and uses of GPS recently), and can help children make sense of their environment. Map making is also an accessible way to engage beginning writers as they can include any combination of pictures, symbols, and words.

For this provocation we were aiming for “treasure maps” as these were the kind of maps appearing in the children’s play at the small building centre and sand table, but the materials were open ended enough that the children could really create whatever they wanted with them. It is important to me that although we have an idea of what we think the children might do with the materials we set out, there is always room for the children to use the materials creatively.

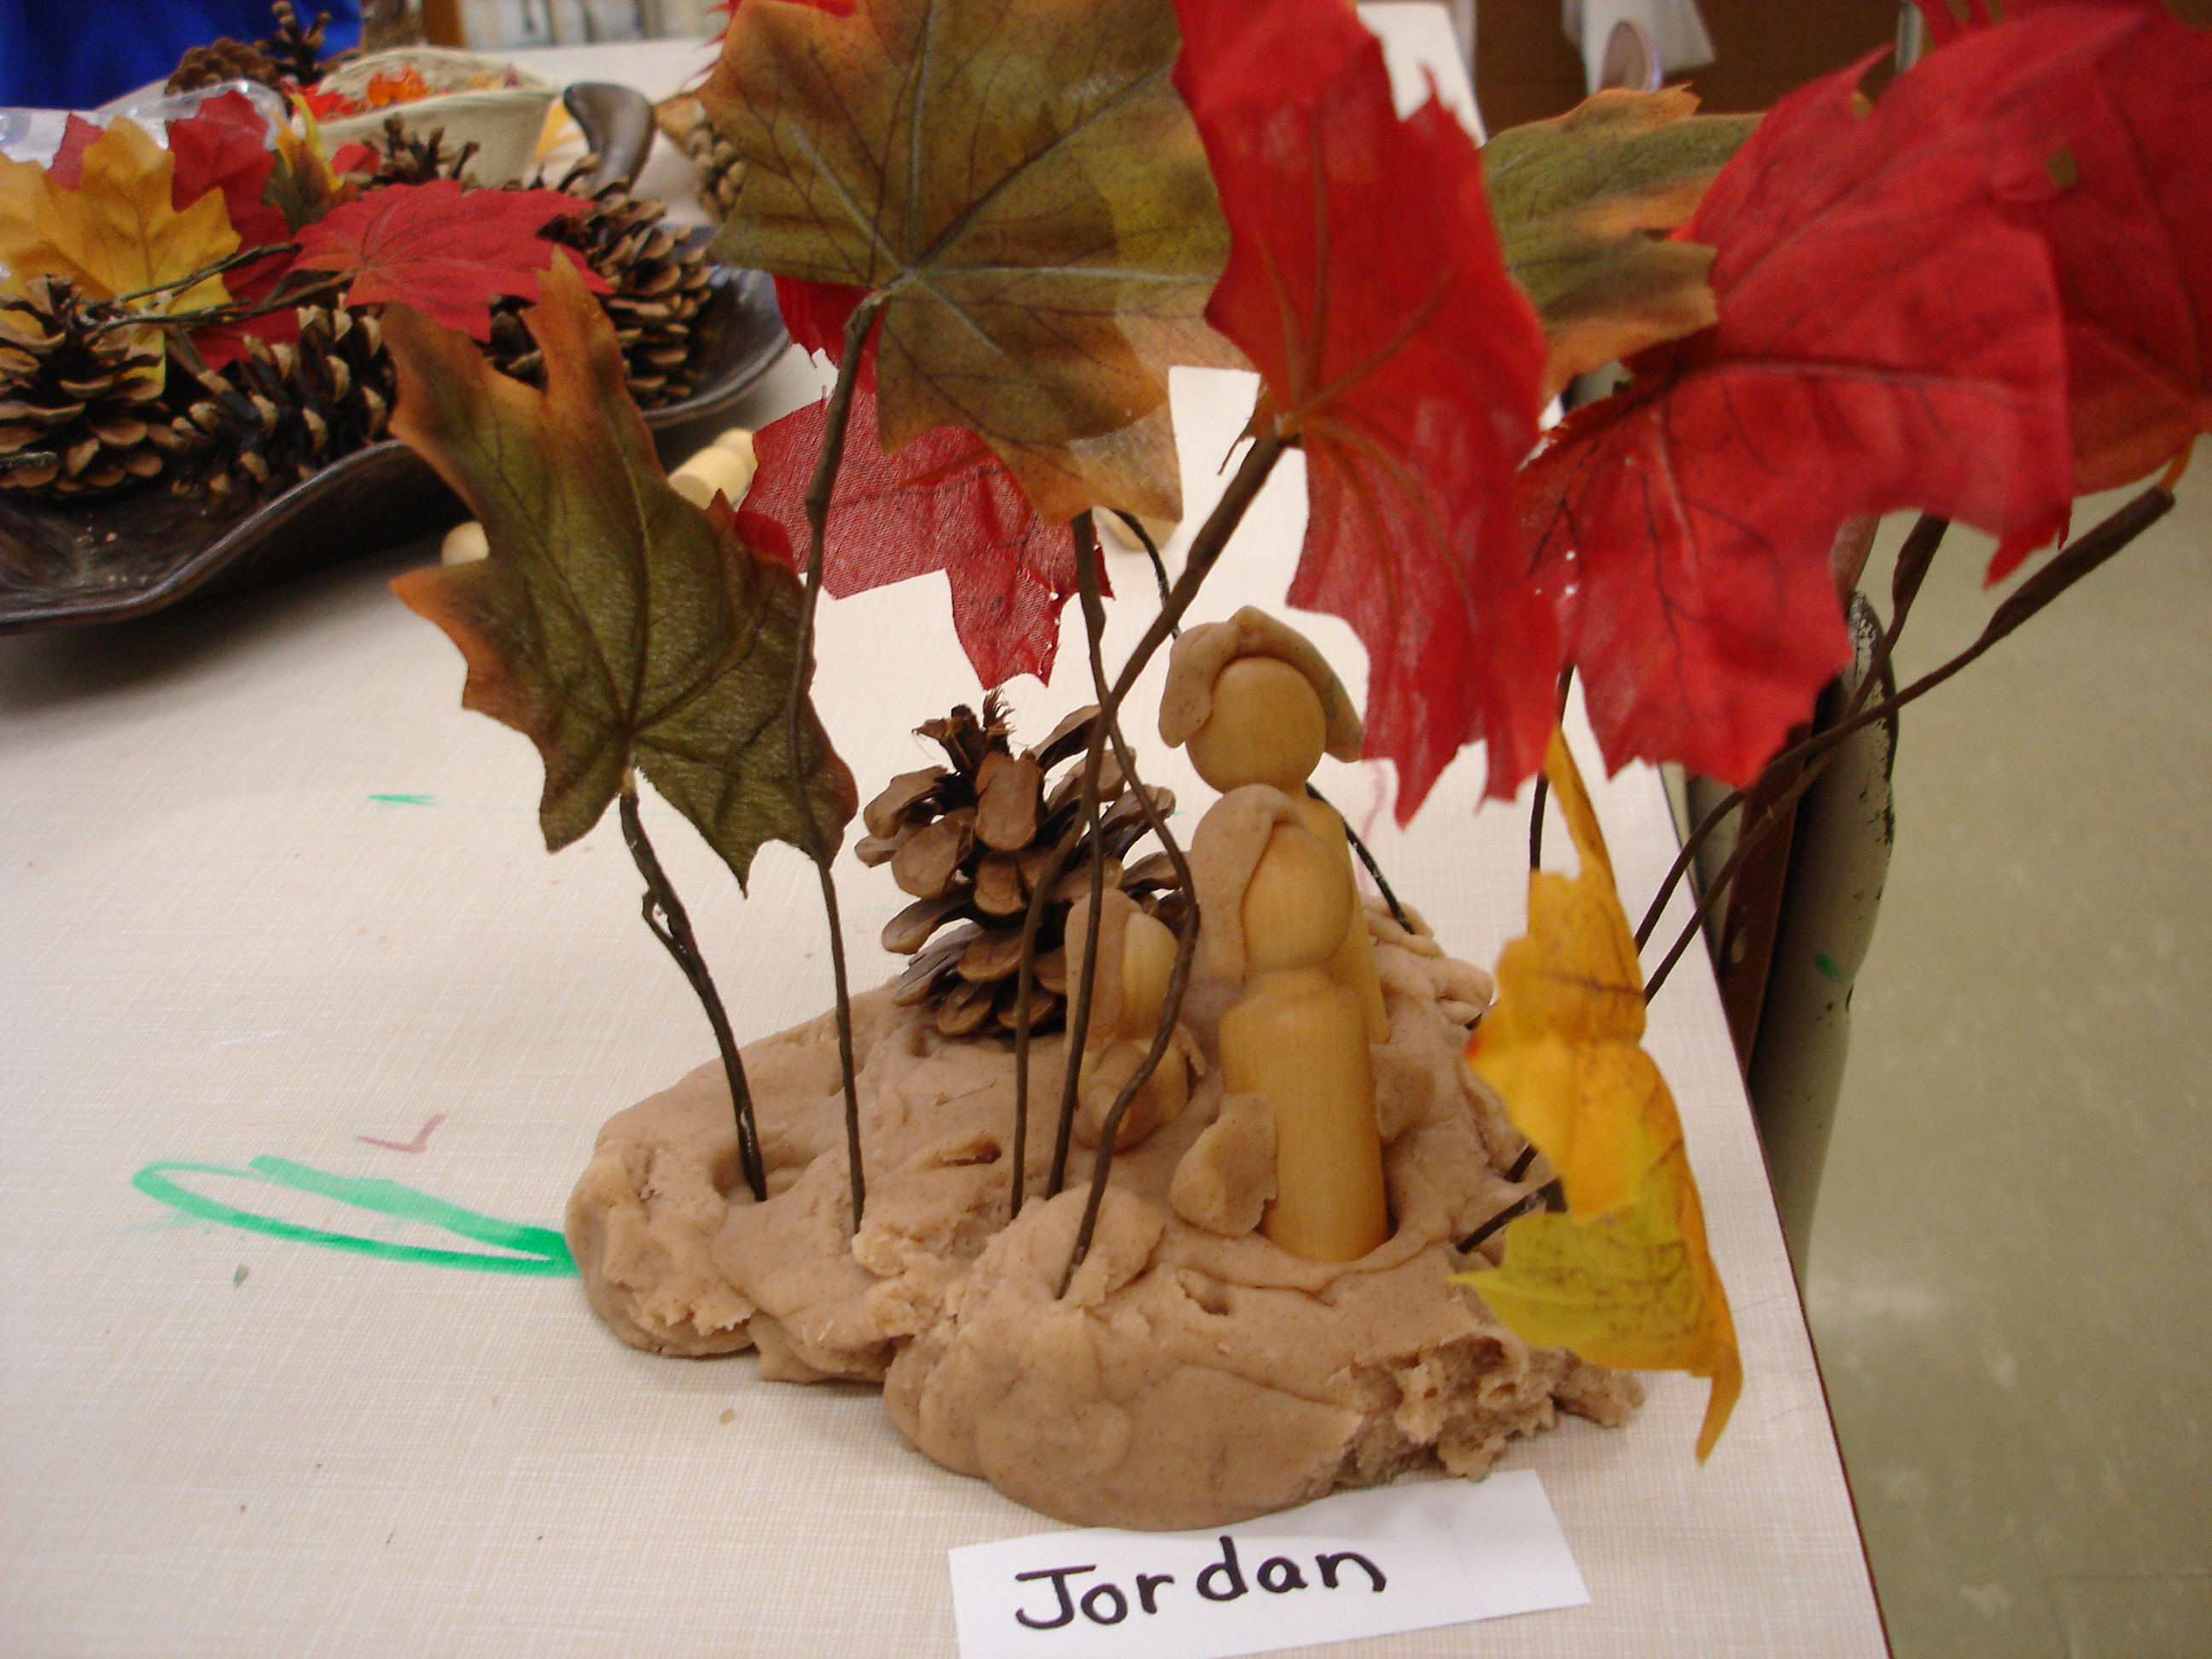
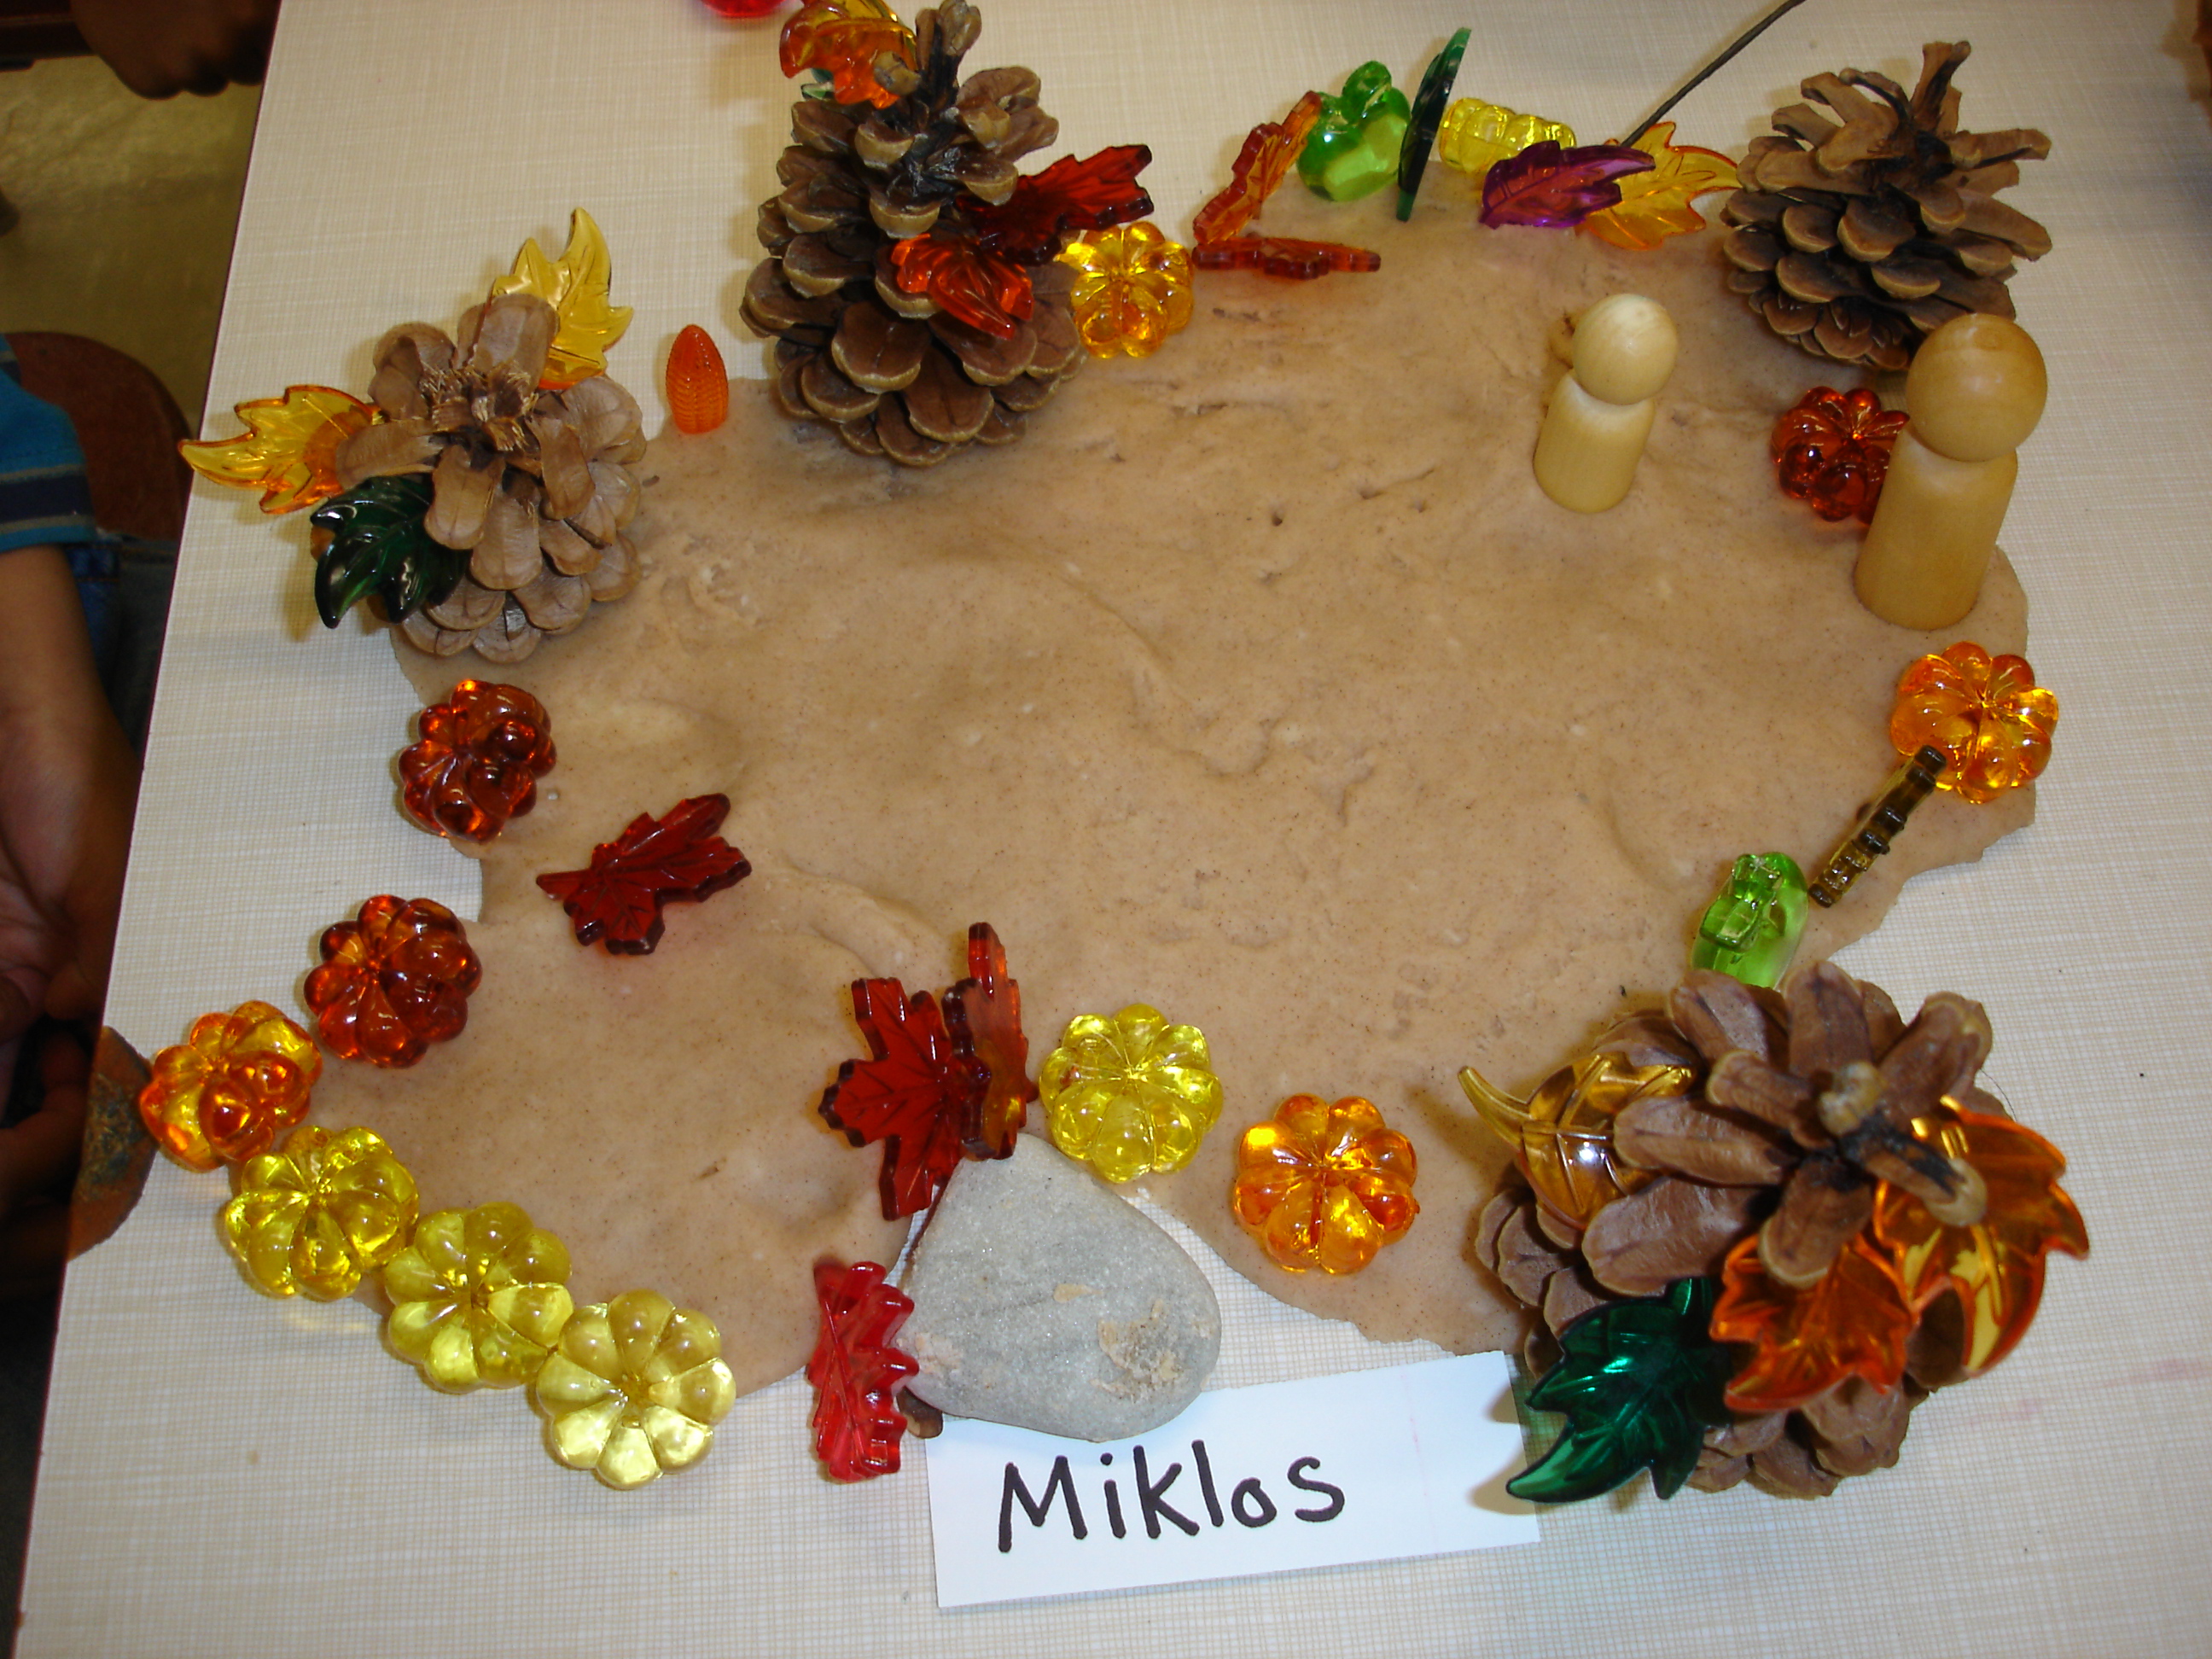
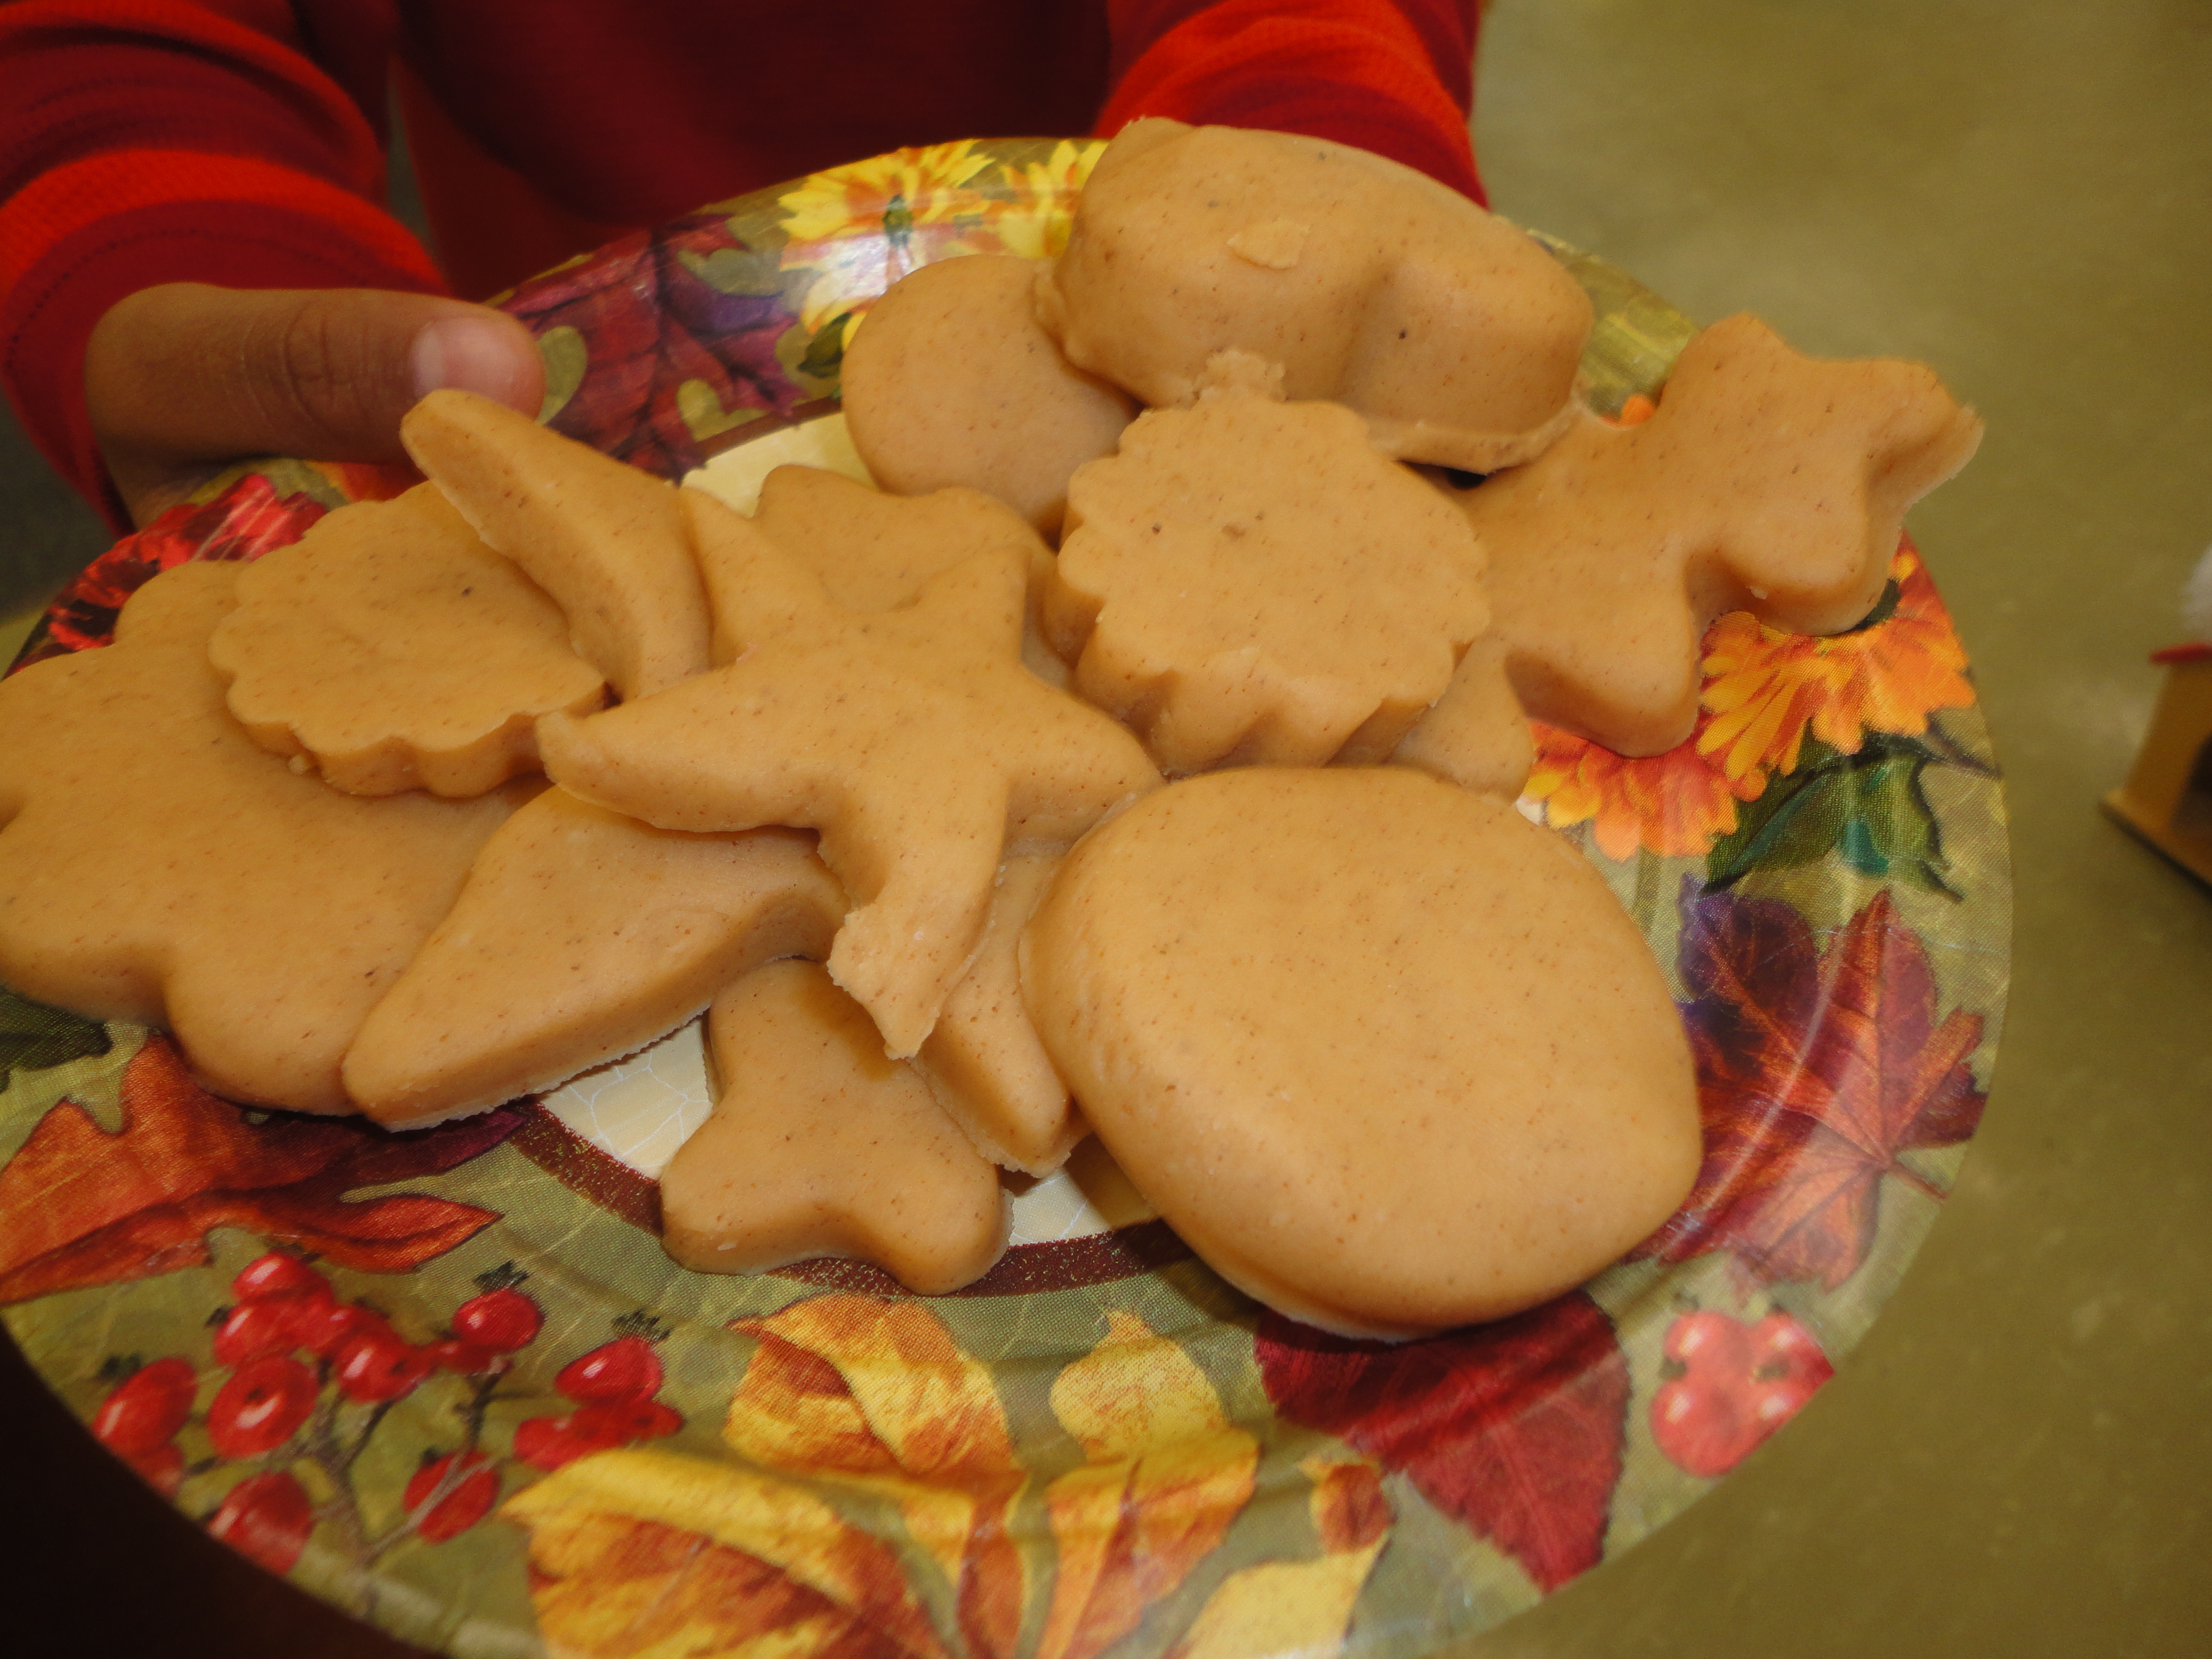
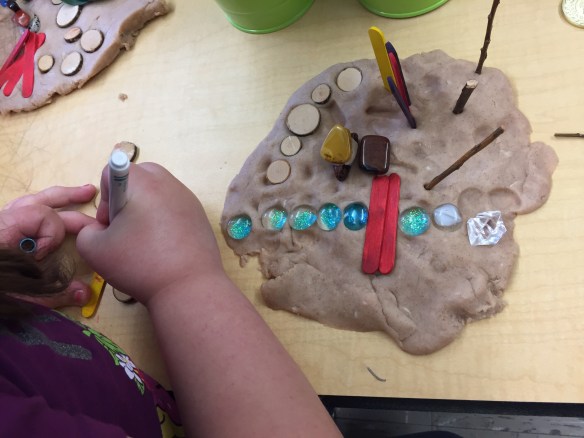
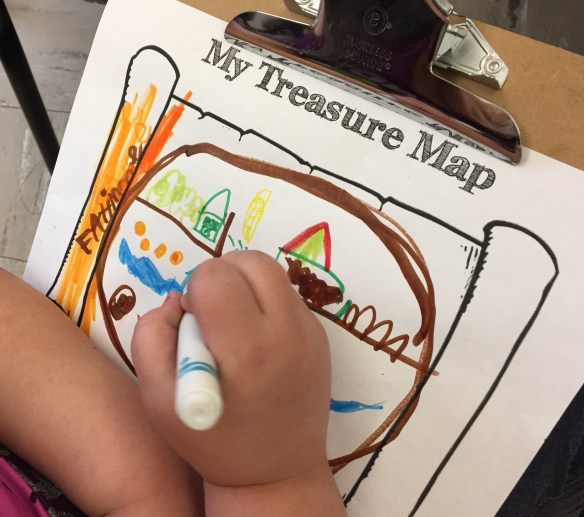
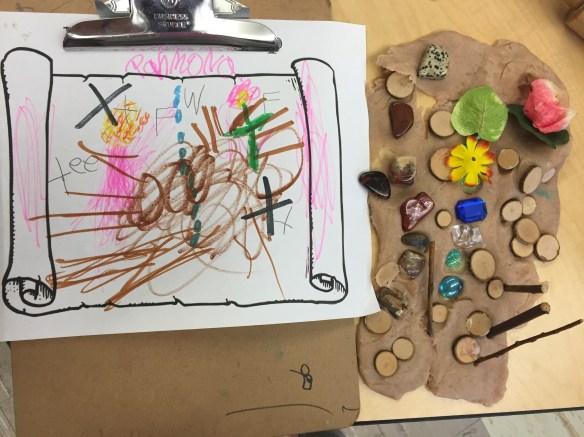
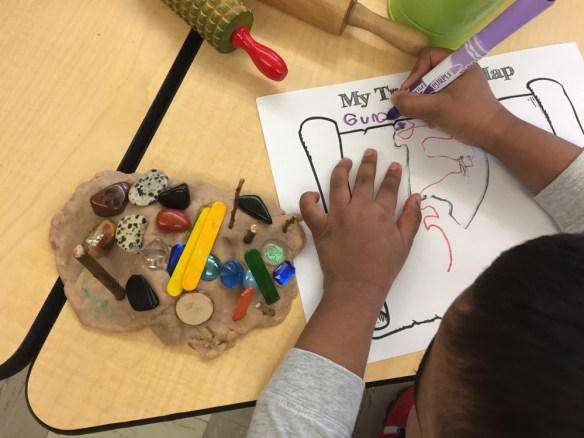
First, the children rolled out their sandy play dough. Then, they used the loose parts to create a map on the dough – blue gems for rivers, stone walkways, flower gardens, forests, stick bridges, etc. The children were encouraged to draw their maps and landmarks on a treasure map recording sheet (you can download a copy here: My Treasure Map). We had gold coins that the children hid under their playdough maps. We talked about marking the location of the treasure on their maps with an “X” and had great fun trying to figure out where the coins were hidden by reading the maps the children had created.


We continue to be impressed with the children’s ability to record their creations on paper. The children put a lot of detail into their maps – looking carefully at the shape and location of their landmarks and choosing coloured markers to match their loose parts exactly. Here are some pictures of the children’s work:

IMG_8699

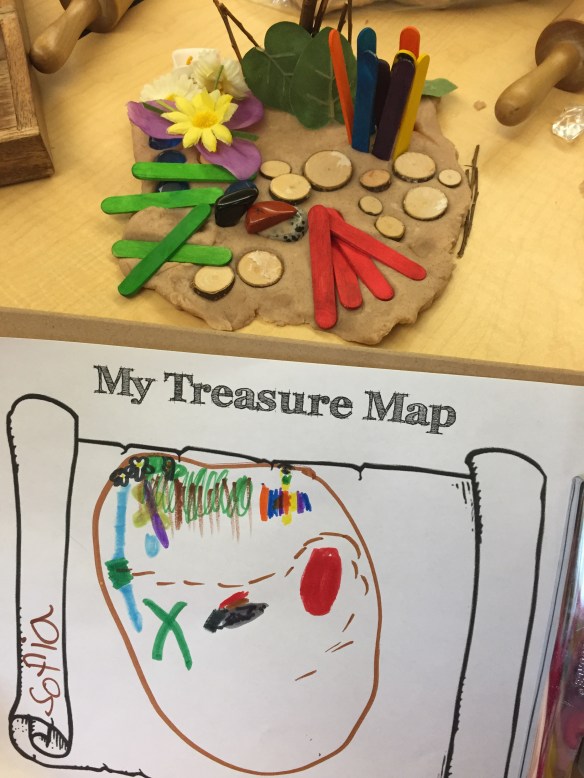
S.E.: My island has a fire, a tent, a garden, a forest, a river with a bridge going over it, and a house. Can you tell where the treasure is hidden? I marked it with an ‘X’!

IMG_8711

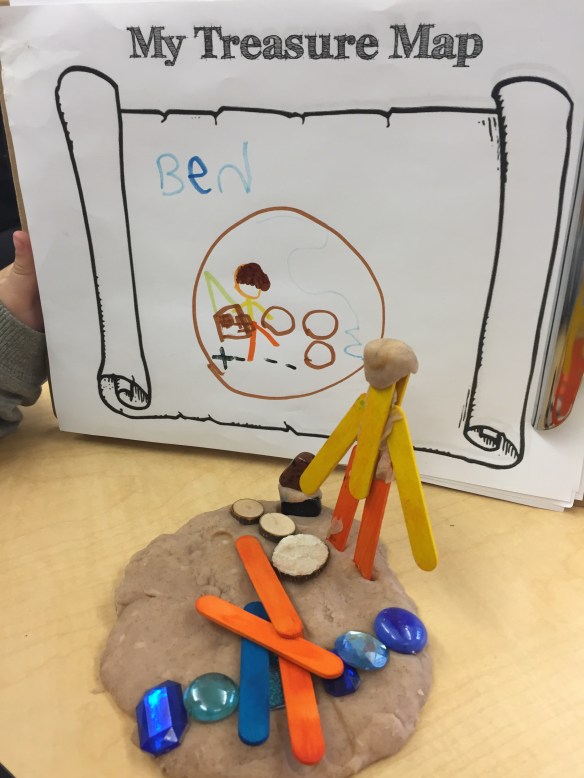
B.B.: I made a treasure island. The guy is guarding the treasure. I put an ‘X’ to show where the treasure is.

IMG_8697

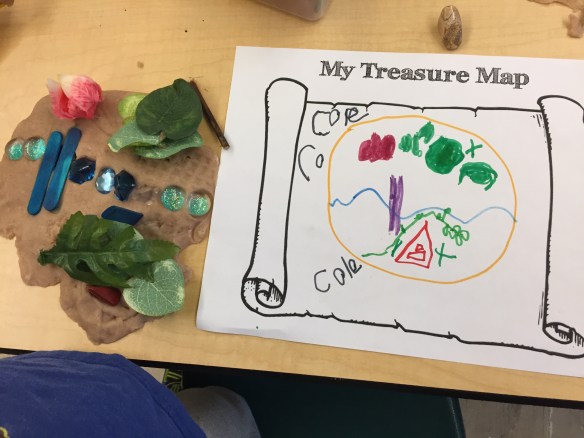
C.G.: I hid two coins! I made a river with a bridge, a house, a forest, and a garden. There’s a jungle too!

IMG_8678

F. M.: I’m making people on the sticks so they can look for the treasure.

IMG_8695

IMG_8702

IMG_8720

IMG_8685

Have your students shown an interest in map making? What are some of the ways you’ve responded to this interest in your class?

Playdough Provocations: Inventor’s Workshop!

img_5627

If you are looking for a way to jazz up the materials at your playdough table, I have a tried and tested provocation that I’m sure your students will love: The Inventor’s Workshop. I stumbled upon this amazing idea while perusing one of my favourite blogs: The Imagination Tree. On her blog, Anna has a list of over 50 ideas for using playdough which I go to whenever I’m in need of some inspiration. You can find her list as well as her recipes for playdough here: http://theimaginationtree.com/2013/01/the-z-of-play-dough-recipes-and.html

Before the children visited this centre, I set them up with some schema about what an inventor is by reading The Most Magnificent Thing by Ashley Spires and Rosie Revere, Engineer by Andrea Beaty (both titles pictured above). I have my own collection of technology cast-offs, but I also wanted to involve the children in the creation of this centre so I sent home a note asking parents for any old electronic materials that we could use. The very next day we got an awesome assortment of old wires (which we trimmed for ease of play), speakers, remotes, cell phones, etc. which we sorted into our loose parts tray. I also added some plastic caps and metal loose parts I had in my loose parts bin.

In addition to the playdough and a collection of loose parts, I also wanted the children to record their creations on paper. I created a recording sheet with “My Invention” at the top. I also provided the children with a new kind of paper to sketch on: graph paper. I told them it was a special kind of paper that planners and inventors might use. I even modeled how to draw a creation I made by sketching and labeling the parts of my machine (like the on/off button, etc.). The children couldn’t WAIT to give this one a go!

img_5565

img_5570

“This is the ‘off’ button!”

img_5596

These students were working independently until they realized they could connect their inventions together with a long wire. They were so excited about this discovery!

img_5712

“This is a ‘potato maker’ – it can make all kinds of potatoes: chips, french fries, mashed potatoes…”

img_5595

This student took time to colour and label her drawing to match her creation. “I put a check mark to show that it’s done!”

img_5591

“A Tic Tac Toe machine.”

One of the interests that developed from this provocation was an interest in robots. This was in part due to our experimentation with the apps ChatterPix and ChatterKid. Both versions of the app are nearly identical but ChatterKid has a three second countdown before it starts recording so that students know when to start talking.

chatterpix.png

Basically, ChatterPix allows you to bring photos, drawings, and creations to life. You simply “draw on” a mouth and record your message and your image will talk! Here is a sample that one of my students made. This particular student is generally quite shy, so him having the confidence to not only record something but then share it confidently with the class at reflection time was a breakthrough (you can click on the link below to see the video on Twitter)!

Here are a few of the robots the children created:

What I liked most about this provocation  (besides the fact that it is engaging, creative, and fun!) is that it provided so many opportunities for our students to engage in literacy behaviours. The children were actively telling each other about their inventions as they worked, negotiating the use of special materials, and of course recording and writing about their inventions. During reflection time, the class was rapt with attention listening to each other describe what their inventions could do and how they were made. Many students were inspired to visit (or re-visit) this centre after hearing about what their classmates had created there.

Have you ever tried an Inventor’s Workshop in your class? Are you using ChatterPix with your students? I’d love to hear about what you’re doing!

Autumn Playdough Provocations II

playdough leaf

This playdough provocation was inspired by the tree study we have been doing this term. In our weekly art lesson the children were able to practice drawing a portrait of a tree in the schoolyard and began to notice the parts of the tree as they sketched. I wanted to extend the children’s thinking about trees by getting them to focus on smaller details – like how the leaves attach to the branches.

For this provocation I put three different colours of playdough, some tree branches, leaf cookie cutters, leaves, and toothpicks on the table. I wanted the children to see a real example of how leaves attach to a branch and also have an opportunity to notice the details in the leaves themselves. The toothpicks were there as a tool for the children to add details to the leaves they cut with the cookie cutters.

Image

I think the results were quite beautiful! Here are a few examples of the students’ work:

Image

DSC01314 DSC01316

For more Autumn playdough provocations and the recipe I use for my playdough, please visit the link below:

https://thecuriouskindergarten.wordpress.com/2013/10/12/autumn-playdough-provocations/

Autumn Playdough Provocations

Image

After finding some rather inspiring pins on Pinterest regarding creative ways to use playdough (see below for links) I decided to “spice up” (pun intended) my go-to playdough recipe. In my first attempt, I added a lovely cinnamon scent to the dough and gathered some fall-themed supplies such as leaves from the dollar store, wooden people, sticks, stones, and fall gems (clear pumpkins, leaves, and acorns). I put out the materials and let the children create whatever they wanted. This centre was constantly busy! The children ended up creating “fall scenes” and told wonderful stories about going on walks in the forest with their families, going camping, and even connecting to some songs/stories we have been reading such as “Going on a Bear Hunt.” Even students who are normally quite quiet during sharing time were eager to talk about what they had made. I was able to assess the children’s ability to talk about their own experiences, make connections, and demonstrate their understanding of fall changes. We shared the children’s work with the class by photographing it and posting it on the SMART Board or showing it on the iPad.

Image

Image

In my second attempt, I decided to jump on the “Pumpkin Spice” bandwagon that has been popping up everywhere lately by adding pumpkin pie spice to my playdough recipe. For this dough I also added some red and yellow food colouring to give the dough a light orange tint. My ECE partner and I noticed that the children had shown an interest in cooking at our classroom drama centre so for this provocation we included baking supplies such as muffin and cake tins, rolling pins, measuring cups, and cookie cutters. I also put out some harvest-themed paper plates. Just like the week before, this centre was constantly busy! The children were really drawn to the delicious scent of the dough and set to work making cookies, pies, and ice cream. I was able to observe many children planning “pumpkin parties” and negotiating roles, such as who would make which dessert for the event. When the treats were completed, their bakers walked around the room to “share” them with their classmates. It is interesting to reflect on how food can bring us together – I haven’t yet seen another activity in which the children are so keen to immediately involve others in what they have created.

Image

Have you found any other inspiring ways to use playdough in your classroom or home? If you decide to try either of these activities, I’d love to hear how they turn out!

Here is the base recipe that I use when making playdough. I use a cooked version because I like the texture of the dough and I find that it keeps extremely well. In each spiced version I added about a Tbsp of spice, but you can add as much or as little as you like. For a centre of 6 children, I usually triple the recipe below:

1 cup of flour
1/4 cup of salt
2 Tbsp cream of tartar
Food colouring
1 Tbsp cooking oil
1 cup of water

Heat the oil in a pot on the stove on medium low. Mix the flour, salt, and cream of tartar in a bowl. Add water and food colouring. Add the mixture to the pot with the warm oil and stir with a wooden spoon until it forms a ball in the middle of the pot. When the ball is no longer sticky looking, remove to a cutting board and let cool for a few minutes. Knead the dough on the board several times until the dough is smooth. Store in a plastic bag or air tight container.

Fall Forest Playdough Activity from Two Daloo: http://www.two-daloo.com/2013/09/09/invitation-to-play-fall-forest/

Spiced Playdough from Craftulate: http://craftulate.blogspot.com.au/2013/09/homemade-herb-and-spice-play-dough.html