Waiting for children…
I’ve spent a lot of time thinking about the first day of school lately. Even as an experienced Kindergarten teacher, the first day/few weeks of school are always a bit daunting. In August, I often still have my wonderful “June kids” in the front of my mind. It can be hard to remember where we started in September and just how far we came in our year together. If you are new to Kindergarten, I hope this post will give you some practical strategies for how to approach your first days with your new students. I should also be honest and say that I am also writing this for myself – to help me get my mind back into “beginning of the year” mode.
First…organization. Prepare a clipboard. The style of it doesn’t matter as long as you have a place to record anything important you’ll need to remember as you meet and greet your students and their parents before the bell. I like to have a class list where I’ll make note of who is staying for lunch and who is going home. Any important information that the parents need to share – like who might be picking their child up after school (daycare, bus, etc.) can also be recorded here. I actually use this all year long to record info that is relayed as children are dropped off. Both my partner or I may receive a child and the clipboard also helps us communicate with each other important details about our students. I always think I’ll remember when a parent says something like, “I’m picking Sarah up today at 1:30 for a dentist appointment…” but the reality of our busy day often means I will forget. Write it down.
Entry time. We always start our day with extended play in our outdoor play yard (I highly recommend this if you can arrange it in your schedule) but when it’s time to go in, I’ll blow a whistle and have the class line up. After we line the kids up, I usually give a little pep talk about what the children need to do when they move inside: Find your cubby, hang up your backpack, change your shoes, take out your lunch bag, go to the carpet (in the first week we will co-create an anchor chart with the class with these “to dos” on it and post it in the cubby area). Returning children are usually excited to see where their cubby is located. My verbal instructions serve more as a reminder for them about what they are expected to do. New children will obviously need help with the entire process. Many Year 1 children have never worn a backpack before and will stand helplessly unsure of how to get it off once we get inside. Many children will never have had to take off or put on their shoes by themselves before. Some children may have difficulty separating from their parents. All of this is the work of September…being patient, teaching the children what they need to do when they arrive, and helping them learn how to do it themselves. Be prepared for entry time to take a bit of time. It will become more streamlined as the days and weeks go on. It’s pretty amazing how quickly the children learn what they need to do each day!
Gather on the Carpet. Some teachers prefer to do a “soft opening” where the children go straight to centres. Others may have reading time or meeting time. I opt for reading time (later in the year, we will move to math bins, but at the beginning of the year we keep it simple). I place name cards in a circle on the carpet and ask the children to find their name and look at a book. Year 2 children are familiar with this routine, so I let them choose a book from the bookshelf (you can put a book at their spot if you wish). Year 1 children will have a book already placed with their name card. Again, new students may not recognize their name yet, so a staff member should be on hand to help them locate their spot. Students read until most if not all the children are seated and then we begin our day by putting our name cards and books away. I usually do so by holding up a letter of the alphabet and asking the children whose name starts with that letter to put their name card in the basket and their book on the shelf. My partner will help children identify their starting letter and put their book away. If you have any shy/nervous children you can always ask a classmate to help them out by putting the materials away for them.
Morning Circle. Our welcome circle in the morning is very brief. On the first day we will warm up with one or two easy songs or finger plays. I have included a few here you can download: Sticky Bubblegum, Roly Poly, Shut the Door, and Great Big Sneeze. You can also read a brief story (perhaps a song book, pattern book, etc. I usually pick something light and fun – this year I’ll be reading You’re Finally Here! by Melanie Watt).
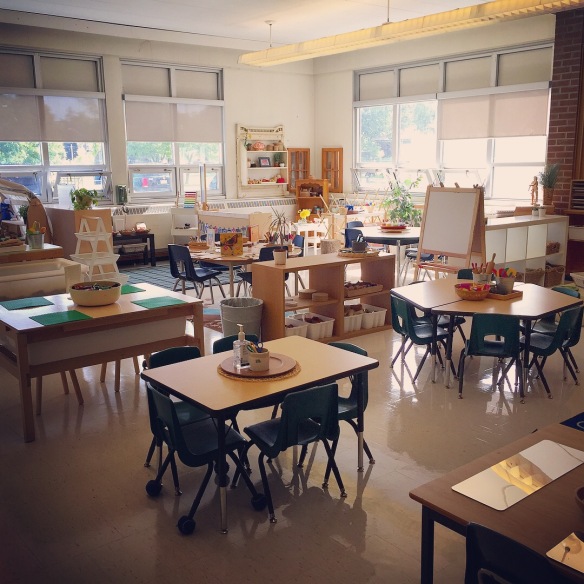
Centre Time. It may be tempting to do a “tour of the room” but in my experience with a large class, it’s pretty much impossible. You can’t crowd 30 kids around a centre and expect that anyone will be able to see what you’re talking about. Most kids will be too excited and overwhelmed to pay attention and might just start wandering around or go right to playing. Skip the tour and let the kids explore on their own when it’s centre time. In our class, we set up centres with materials that will be familiar to the children and activities that don’t need teacher assistance or explanation. When a child arrives at a centre, I want them to look at the materials and know what it is they can do there. I steer clear of activities that require teacher assistance like a special craft or project because we need staff free to supervise and observe the children. We might have children who are crying or upset and need comforting, children who need help with toileting, etc. We need all hands on deck!
Here are some of the centres we have set up for the first week:
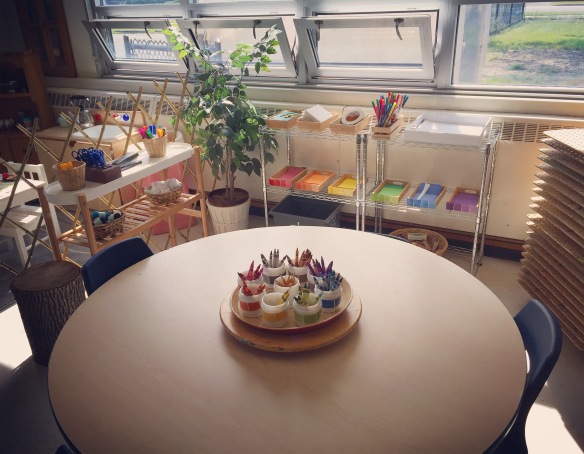
Simple cut and paste materials are available for the children to create with at the Art Studio.
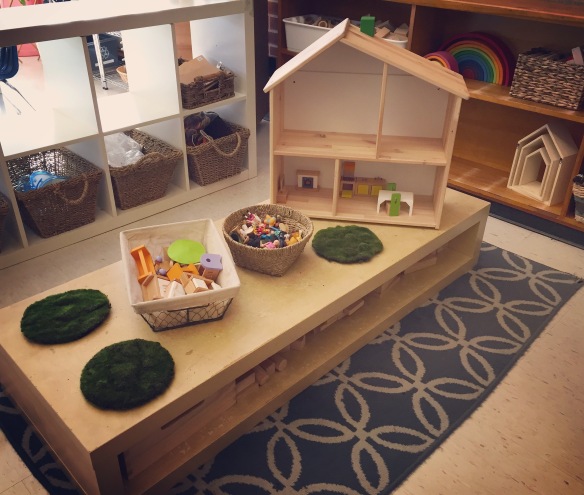
We set up the dollhouse at the small building centre. We like to provide ample opportunities for the children to engage in dramatic social play. When the children see this set up, they know exactly what to play here.

This is our water table, but with the lid on it creates the perfect space for Lego creations. This is another material most children will be familiar with.
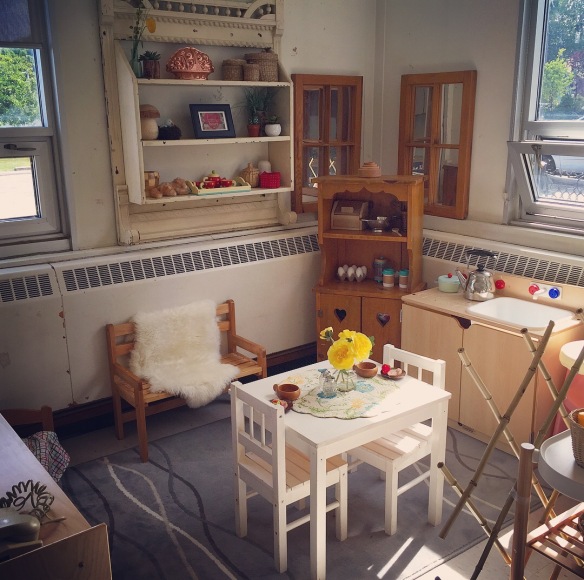
The Drama Centre is set up like a house to provide comfort and familiarity. We don’t have too many materials set out on the shelves at the moment so it will be easier to clean up at the end of the play block.
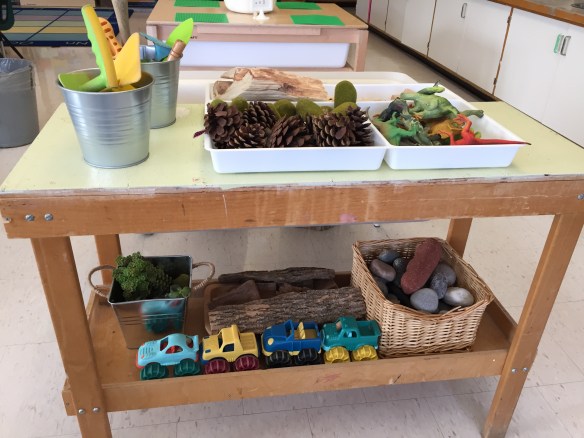
Sand table materials.
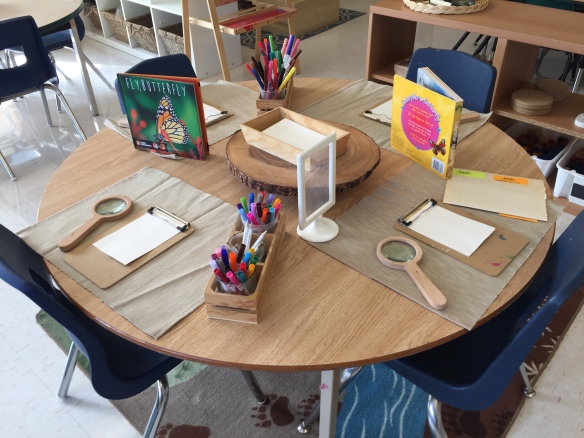
We have a number of returning students this year. We will be starting with monarch caterpillars. I usually try and set up something from nature for the children to explore with magnifiers and clipboards; in other years we’ve put out rocks, shells, or flowers. Magnetic items are always a popular material that doesn’t require too much explanation.
Before the children choose their centres, tell them how you will get their attention when it’s time to stop and clean up. Many teachers use a saying like “1, 2, 3, Eyes on Me” or “Hands on top, that means stop.” Maybe you have a rain stick or plan on turning out the lights. Whatever your method of getting the children’s attention, make sure you explain it to the class and practice once or twice before the children go off to play.
To choose centres, start with the kids that absolutely know where they’d like to go. Most Year 2 students will have an idea of what they want to do during their choice time. You can go centre by centre (“Hands up if you would like to visit the play dough table today. We can choose 5 children”) or just have children raise their hands and tell you where they’d like to go. After you’ve gone through this process, you will likely have children still sitting on the carpet who have no idea what they want to do. At this point you can offer some suggestions or take a walk around the room with them to help them find an activity that interests them. Remember to remind the children to visit the washroom during this play block. Many children get engaged in their activities and forget to answer nature’s call. Also, don’t be surprised if the children quickly move from one activity to another. They will be excited and want to explore many different things! During this time, my partner and I are on hand to make sure the children are making good choices, using materials appropriately, and cleaning up their activities before they move on to something new.
Tidy up time. Use the signal you practiced earlier to get the class’s attention. In our class, after I signal the children to tidy up, I usually put music on the CD/iPod player. Eventually the children will learn that when the music is on, they need to tidy up and head to the carpet. You can use the same song as a “tidy up song” (one year we used “Mama Mia” by Abba) or mix it up. When several children have gathered at the carpet, one staff member will join them and lead the class in some action songs with the CD. The children will likely need the opportunity to jump some jiggles out. I also find that the songs and games we play at this time are so engaging that the children want to tidy up and join the fun. It’s a bit like playing the role of the Pied Piper.
Snack/Nutrition Break. Normally in our class we have an “open snack” which means the children can choose to eat their snack any time they are hungry during their extended play block. In fact, we’ve even had students who needed to eat their snack when they first arrived at school in the morning. We are flexible on that. However, there are a few routines that are required when eating snack so we opt for a group snack time for the first week of school so that we can teach the children what they need to do: how to wash their hands, get their snacks, eat, tidy up their spot, put their snacks away. When the children know how to get this done on their own, we move to the “open snack” system at a designated snack table.
After snack our students will go for a prep – to gym or library depending on the day, so after they eat we will show them where they need to line up. We use this time to talk a bit about “line behaviour” and how we need to move quietly through the school.
Reflection. When the children return from their special program we meet briefly on the carpet for reflection time. On the first day, I will only choose one child to share their learning from our play block. I will use this time to talk more specifically about a particular centre and show the class what kind of learning can happen there (for example, I may choose a child who created something at the art studio and highlight the materials that were chosen, how the student put their creation together, etc. The student will model talking about their work and I will model how we ask them good questions about what they’ve accomplished). You can read more about reflection time here. After we reflect we might do a brief message (the special helper of the day helps me do this). My first message of the year is:
________ is the Special Helper.
________ is in [SK/JK card].
________ is [dice number card] years old.
________ is feeling [emoji card]
This message highlights the word “is” and also focuses on the name of the child, which is an excellent way for the class to learn each other’s names and also begin to associate letters of the alphabet with the names of their classmates.
Children going home for lunch (check your clipboard!) will go with a staff member to the cubby area to get ready for home. The rest of the class will get ready for outdoor play before lunch (at our school the children play first and then eat).
After lunch meeting/play block/snack. In our class, whichever staff did not do carpet time in the morning will lead carpet time in the afternoon. We like to make sure we share leadership duties so the children get used to working with all staff on a regular basis. We usually begin the afternoon with attendance, a brief story, and some mindful minute exercises. Our afternoon closely mirrors the schedule from the morning. The children will have another opportunity to choose a centre/centres during the play block, practice tidying up, and revisit the procedures for a group snack. As a staff, we will decide if any centres need to be closed or changed for the afternoon depending on how things went during the morning session. We have a few “back up” activities prepared to put out in the afternoon (lacing beads, colouring) – if not on the first day, maybe later in the week. I find that novelty is important in all-day Kindergarten. It’s nice to have some new materials/activities to offer as the week goes on to keep the children engaged.
Home transition. Getting ready for home means changing our shoes again and packing up our backpacks. Again, this will take longer on the first day/first few weeks as the children learn what stays at school (you would be surprised at how many children do not want to leave their indoor shoes behind. We tell them their shoes “sleep at school now” and we’ll see them tomorrow!).
We try and end the day with an extended play time in the outdoor play yard. The day is long and we find the children need the time outside to run around or sit under a tree. Parents will begin to arrive to pick up their children and before we know it, the first day is done! I hope my students go home on their first day feeling like school is a safe, fun, enjoyable place to be.
Remember, it is the slow, patient work of September that will set up your learning for the rest of the year. Try not to get discouraged if things appear to be moving slowly. Establishing routines and classroom expectations are the main priorities at the beginning of the year. It’s important to take the time to really get to know your students and for them to get to know you. Relationships are everything!
For more information on our classroom layout you can read: The Third Teacher: Classroom Layout 2017.
For more information about setting up your weekly schedule and day plans you can read: Planning for A Full Day of Inquiry Based Learning.
Wishing you all a wonderful start to the school year!


")