Boxitects STEM Challenge!

Boxitects, by Kim Smith, is a book about Meg, a brilliant and creative child who can make masterpieces out of cardboard! Meg is so talented her mom decides to send her to Maker School. There, Meg meets Simone, another Boxitect, and the two creators don’t exactly get along. The story highlights the importance of collaboration and teamwork, as well as thinking “outside the box” (*ahem*) when considering what materials can be used to create works of art. This is a perfect book for teaching and learning online as it reminds children that they can use simple materials they already have at home to build and create with!

Click here to visit Kim Smith’s website to learn more about the book: https://kimillustration.com/index.php/portfolio/boxitects/

I discovered Boxitects because it was selected this year in The Forest of Reading shortlist for The Blue Spruce Award (for Canadian picture books for children in Kindergarten to Grade 2). The Forest of Reading program is run by the Ontario Library Association and aims to spread the word about new and wonderful Canadian books and foster a love of reading. Readers of the books are encouraged to vote on their favourites, and winners are chosen based on votes cast. I always find The Blue Spruce award-nominated books to be wonderful resources for teaching. If you are interested, you can visit the Forest of Reading website to learn more about this year’s shortlisted works as well as lists from years past: https://kids.tpl.ca/ready-for-reading/books/booklist/blue-spruce

After reading the book, we watched the video above to find out why cardboard is such an excellent material to build and create with! In the video, the author of Boxitects, Kim Smith, demonstrates why corrugation makes cardboard so STRONG! She also talks about how much she looks forward to seeing what the children will make with their cardboard and asks for us to send her photos of our creations – something my students were particularly excited about!

After reading the story and learning about carboard corrugation, we gave the children a challenge to create something (anything!) with the cardboard they had at home. Since we are learning remotely, it was important to me to provide my students with plenty of material options for this project. We talked about using carboard boxes used to ship parcels, shoe boxes, cereal boxes, egg cartons, and even paper tubes! Prior to the lesson, I asked our families to gather their materials so the children would have them ready for exploring. I also asked the children to bring their science notebooks (sent home in their remote learning kits) so they could work on drawing a plan or brainstorming ideas about what they could make prior to building.

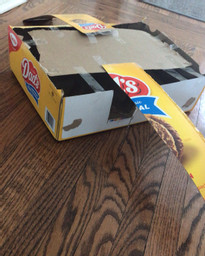
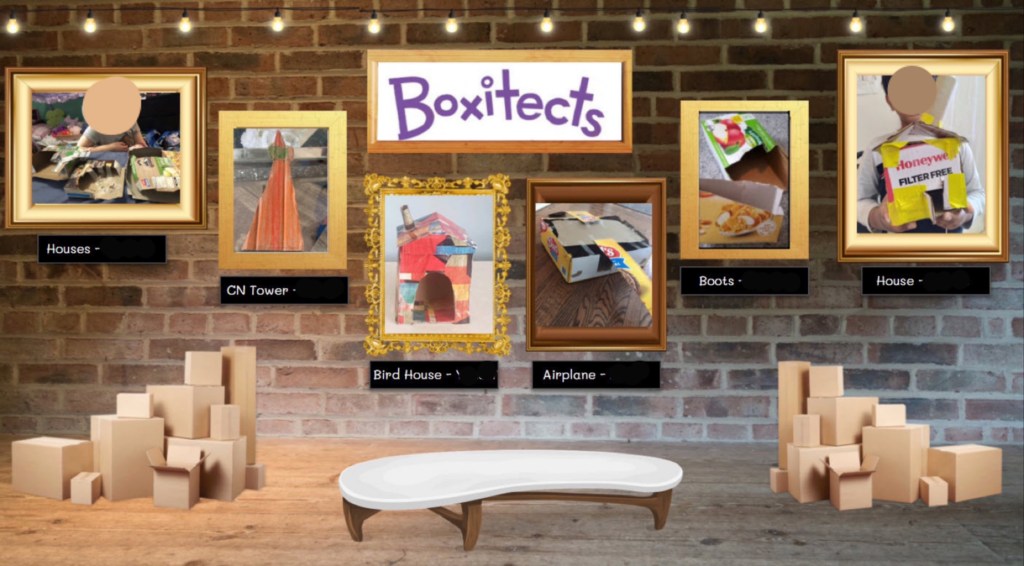
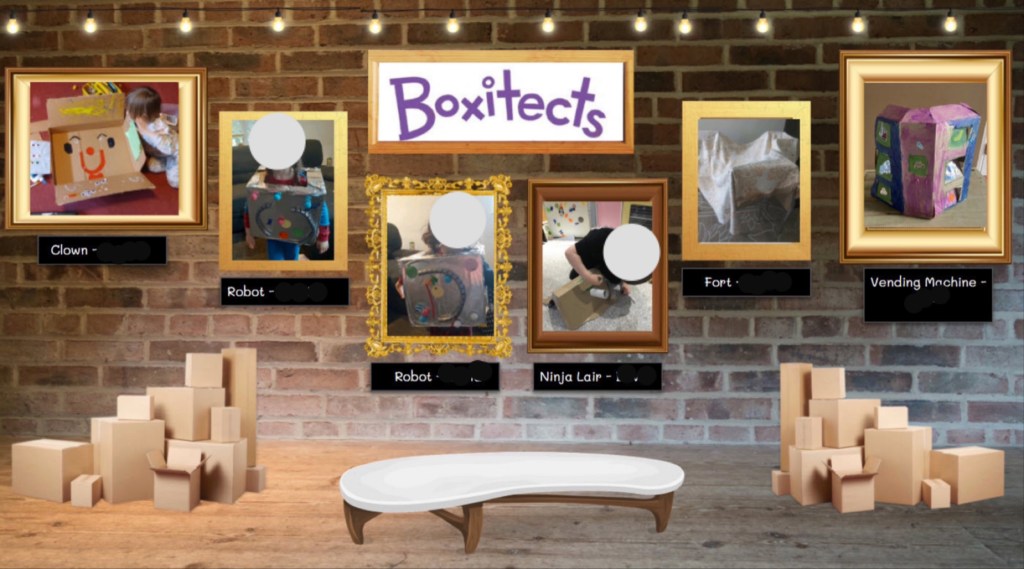
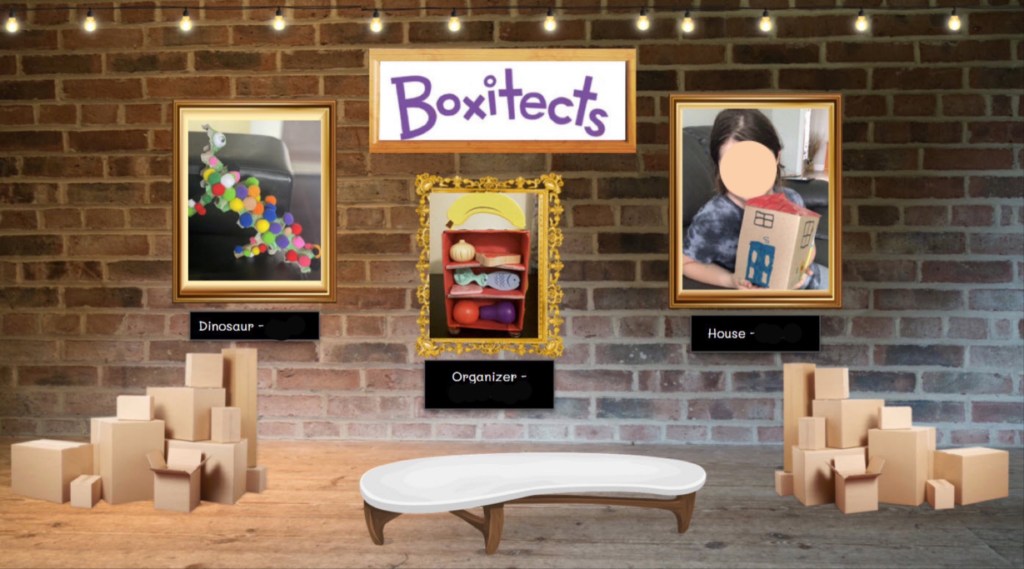
And then they were off! Our Boxitect challenge was listed on this week’s choice board, which meant the children had all week to work on it. Each day, as children finished their creations, we spent time during Reflection sharing and talking about them. There was such a variety of ideas presented: from houses, to boots, to robot costumes, to airplanes! I began compiling photos of the children’s creations in our special “Boxitect Gallery” slides. My Twitter timeline has been filled with amazing ideas for teaching remotely this year, and the “Art Gallery” idea (originally posted by Kenrick DeoDat – @KenrickDeodat) has to be one of my favourites! My students are incredibly motivated to send me photos of their art works and creations when they see that they’re going to be displayed in a beautiful “art gallery” or “museum.” The art gallery is a way of highlighting the work the children are doing and communicating that what they learn and create is special and has value. At the end of the week, I posted our Boxitect Gallery on our online classroom for everyone to see.

Online learning in Kindergarten can be a challenge. I’m always looking for ways to give the children opportunities to play and create as they would if they were in person at school. This Boxitect challenge reminded me of the kind of excitement we would experience in our regular classroom – the children excitedly talking about what they could make, drawing plans in their notebooks, and getting creative with materials.

If you would like a copy of the Google Slides I prepared for presenting this to my class (including a copy of the gallery ready for editing), click on this link and “Make a Copy” for yourself: https://docs.google.com/presentation/d/19sAoUsLa6HPZ8wAAhuJfWd7Frvk_HU6mGG2Y3jhqN5E/copy?usp=sharing

Enclosures Inquiry: A House for Snuffles

DSC00631

Our second major inquiry of the year in M.S.I. was an inquiry about enclosures (you can read about our first inquiry on towers by clicking here.)

To introduce the idea of enclosures, I read my class the story Snuffles House by Daphne Faunce-Brown, about a hedgehog who sets out to build himself a new house after his house burns down. In the story, Snuffles experiments with different shapes and designs for his house, each with their own flaws (e.g., the round house rolls down a hill, the triangle house has too small of an upstairs) until he decides on a rectangle shaped house. As you can tell from the description, this story provides a lot of opportunities to talk about shapes. Snuffles House is out of print (so if you find a copy, grab it!), but you can find a video of it being read on YouTube. You can also tell the story orally by making your own props (I made a set of different shaped houses using brown construction paper). Alternatively, a story like The Three Little Pigs also lends itself well to this topic.

After reading the story, we talked about the problems Snuffles encountered and what features were important in the construction of his house. I then gave the children the task of building a house for Snuffles with blocks. To help the children, I provided them with a basket of small stuffed hedgehog toys to use for checking the adequacy of their structures. The children loved having a tangible “Snuffles” to work with!

DSC00634

The instructions for our initial building time were sparse. I basically read the story and sent the children to “build a house for Snuffles.” The purpose of this initial building time was for me to gauge what ideas/skills/experiences the children had around houses and enclosures. As the children worked, many of them demonstrated some ideas about walls and doors. Still others worked on some kind of roof-like covering, though this proved to be a challenge for most children because of the size of their blocks. During reflection time, we pointed out these successes and challenges. Naturally, a brainstorming session began on how to solve our roofing problems. It was decided that a roof was an essential part of our enclosures in that it would protect Snuffles from weather and predators. But how could we make a roof when our blocks were so small? I challenged the children to look around and see if they could spot anything that might make a good roof material. Immediately, the children started shouting out ideas: “books!” “carpets!” “paper!” Suddenly, we had so many ideas for roof materials! We decided to make a basket of roof materials for the next M.S.I. lesson.

During our initial building, one student modifies her structure to add a roof. We talked about her decision during reflection time.

During our initial building, one student modifies her structure to add a roof. We talked about her decision during reflection time.

A photo showing a student who struggled with adding a roof to her structure.

A photo showing a student who struggled with adding a roof to her structure.

Throughout this inquiry, we explored so many important ideas around enclosures, almost always by examining more closely the children’s own structures. For example, many students built enclosures that the little stuffed hedgehog just barely fit inside. This got us thinking about space. We looked around our classroom and realized how high the ceiling was and how far apart the walls were. Why was space so important? What did having space in our enclosure allow us to do? How did space add to our comfort? These are some of the ideas we explored.

Snuffles seems like he needs a little more space!

Snuffles seems like he needs a little more space!

The idea of space really came to life when we added a Snuffles House provocation to the light table. With the window blocks and the light shining from underneath, the children were really able to get a sense of how much space Snuffles had inside his house – it was quite the breakthrough! The light table also gave the children an opportunity to collaborate and the enclosures that were created were amazingly elaborate!

A collaborative structure at the light table.

A collaborative structure at the light table.

Another idea that popped up during this inquiry was the idea of drawing up blueprints or making plans for building. In the computer lab, the children were given a chance to work with a partner to design a house for Snuffles using KidPix. After printing out their plans, many children continued to work on adding details to their drawings at our classroom writing centre.

Students continue adding to the plans they designed in the computer lab.

Students continue adding to the plans they designed in the computer lab.

DSC02856

Enclosures also began popping up at the classroom big blocks centre:

DSC09078 DSC03381

After several weeks of experimenting with different designs for our enclosures and talking about the important features for enclosures, the children were given one last opportunity to design a dream house for Snuffles (by this time, we had co-created success criteria for enclosures on the SMART Board which were reviewed and added to each week).

Our collaborative success criteria for Snuffles' house.

Our collaborative success criteria for Snuffles’ house.

Whereas in our Tower Inquiry the students sketched their towers after they were built, this time the children were encouraged to draw their plans first, label them, and then build. While building, the children were able to refer to their plans and make sure they had all their important elements covered.

This student focuses on using a variety of shapes in his design.

This student focuses on using a variety of shapes in his design.

This student adds labels to his design plan.

This student adds labels to his design plan.

"Inside Snuffles house are so many toys. I used the square blocks with the colours because you can see through them. They are windows."

“Inside Snuffles house are so many toys. I used the square blocks with the colours because you can see through them. They are windows.”

"First I made a square and I thought I could use blocks for the roof but it was too small for Snuffles so I made it so he can fit. It has 2 chimneys and a 2nd floor where he sleeps."

“First I made a square and I thought I could use blocks for the roof but it was too small for Snuffles so I made it so he can fit. It has 2 chimneys and a 2nd floor where he sleeps.”

"I put the bed upstairs and a kitchen downstairs. There’s rain outside but it won’t get in the house. I made 5 floors on mine!"

“I put the bed upstairs and a kitchen downstairs. There’s rain outside but it won’t get in the house. I made 5 floors on mine!”

DSC09104